
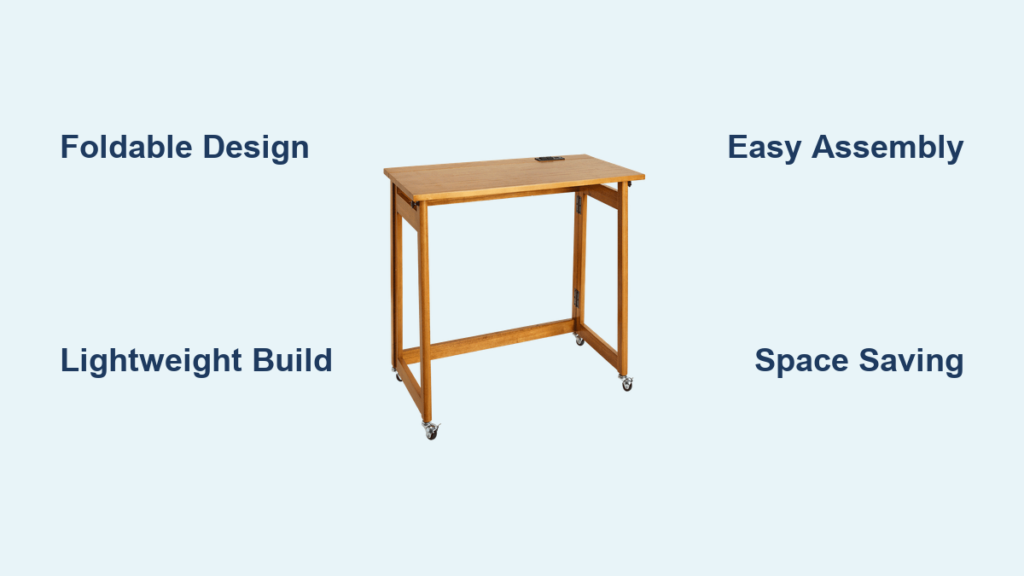
If you’re tired of cluttered living rooms, cramped dorms, or unstable laptop trays, learning how to make a portable desk is the ultimate DIY fix. Whether you’re a remote worker, student, van lifer, or just short on space, a custom-built foldable desk offers ergonomic comfort, instant mobility, and personal style all while fitting neatly under a bed or against a wall. With just a few tools and one sheet of plywood, you can build a sturdy lightweight workstation tailored to your exact needs.
This guide compiles proven designs from beginner-friendly box desks to tool-free knockdown models so you can choose the best build for your skill level, space, and lifestyle. You’ll learn how to cut precise parts, assemble stable frames, install folding hardware, and finish with pro-level touches.
Choose Your Portable Desk Type
Before picking up a saw, decide which design fits your use case. Each style balances portability, stability, and ease of setup.
Foldable Box Desk
Ideal for beginners and tight budgets, this design folds flat like a suitcase. It’s made from ¾” plywood with hinged legs and a built-in handle. At under $35 and 20 lbs, it’s perfect for dorms, couch work, or temporary setups.
Scissor-Leg Desk
Uses a folding leg mechanism with T-hinges and latches. Opens in seconds, stores under a bed, and supports daily laptop use. Best for intermediate builders using pocket-hole joinery.
Wall-Mounted Murphy Desk
Folds down from the wall like a drop-leaf table. Anchored to studs with a locking triangle brace. Great for RVs, kitchens, or closets where floor space is precious.
Knockdown Desk with Tea Nuts
Fully disassemblable using threaded inserts and bolts. No tools needed for reassembly. Perfect for travelers or frequent movers.
Folding Laptop Desk
Compact 22″ × 12″ model with mitered legs and apron enclosure. Lightweight at 8 to 10 lbs, great for bed or couch use. Raises screen to reduce neck strain.
Gather Materials and Tools
Your material choices depend on which design you select. Here’s what you need for each build.
Essential Materials by Design
Box Desk requires:
– ¾” plywood: 30″ × 18″ desktop, 18″ × 10″ sides, 30″ × 10″ back panels
– 14″ × 10″ legs with rounded tops
– 2 butt hinges, 5/16″ bolts, dowels, brad nails
Scissor-Leg Desk requires:
– 2×4 pine for legs: 19″ tops, 27 5/8″ angled, 25½” back legs
– Three 1×6 boards (43″) for desktop
– 4 T-hinges, pocket screws, 4 latches
Wall Desk requires:
– 2×4 horizontal brace mounted to studs
– Heavy-duty hinges, L-bracket, wood peg lock
– Desktop sized to your space
Knockdown Desk requires:
– One 4′ × 8′ sheet of ¾” plywood
– Threaded inserts (tea nuts), ¼” bolts, rare earth magnets
– Decorative acorn nuts
Must-Have Tools
- Jigsaw for curved cuts and rounded edges
- Miter saw for precise crosscuts
- Drill and driver for screws and bolts
- 6-inch clamps for glue-up sessions
- Sander for smoothing surfaces
- Tape measure and square for accurate layout
- Spade or Forstner bit for clean holes
Pro Tip: Use painter’s tape to mark drill depths and prevent over-drilling. Label every cut piece with a pencil during layout.
Build a Folding Box Desk (Beginner)
This ultra-simple design folds flat and weighs under 20 lbs. It’s a great first project.
Cut the Panels
From ¾” plywood, cut these pieces:
– Top: 30″ × 18″
– Bottom: 30″ × 18″
– Sides: 18″ × 10″ (2 pieces)
– Back: 30″ × 10″ (2 pieces)
– Legs: 14″ × 10″ (2 pieces), round the top edge with a jigsaw
Use a straight board as a guide for clean cuts.
Assemble the Box
Apply wood glue to the edges of side and back panels. Clamp to top and bottom panels. Reinforce with brad nails every 6 inches. Wipe excess glue and let dry for at least 2 hours.
Attach the Legs
For front legs, drill a 5/16-inch hole 1.5 inches from the top. Insert a bolt with washer and acorn nut through the top panel. For back legs, glue a 1-inch diameter dowel horizontally between the leg and bottom panel to prevent wobble.
Add Folding Hardware
Install butt hinges between the top and bottom panels. The desk folds closed like a suitcase. Drill a 1½-inch hole in the bottom panel for a carrying handle, then sand the edges smooth to avoid splinters.
Build a Scissor-Leg Desk (Intermediate)
This sturdy design is self-supporting and folds flat. It uses Kreg joinery and T-hinges for strength.
Cut Leg Components
From 2×4 pine, cut these pieces:
– Leg tops: 19 inches long, round the front corner
– Angled legs: 27 5/8 inches long, cut at 22.5 degrees
– Back legs: 25½ inches long
– Desk back: 37 inches long (2 pieces)
Assemble Legs with Pocket Holes
Use a Kreg Jig set for 1½-inch material. Drill 2 pocket holes in the top of back and angled legs. Join with wood glue and 2½-inch screws. Repeat for the second leg assembly.
Build the Desktop
Join three 1×6 boards (43 inches) edge to edge. Drill 5 pocket holes along one long edge of each board, except the last one. Clamp flat, apply glue, and screw together. Sand smooth.
Attach T-Hinges
First hinge: longer arm on leg top, shorter on desk back. Second hinge: longer arm on desk back, shorter on leg, 5 inches from bottom. Secure with 1-inch wood screws.
Install Latches
Place the desk upside down and position the leg assembly. Center the legs with 1½-inch overhang on each side, flush at back. Install 4 catches: 2 on top of back legs about 6 inches from sides, and 1 on inside of each side leg about 5 inches from front. Attach hooks to desk underside.
Deployment: Unclip, unfold legs, place desktop, then re-latch.
Install a Wall-Mounted Folding Desk

Perfect for RVs, kitchens, or tiny homes. It stays out of the way until needed.
Locate Wall Studs
Use a stud finder or tap method to locate studs. Mark mounting height at 32 to 34 inches from floor (elbow level when seated).
Mount Horizontal Brace
Cut a 2×4 brace to span between studs. Attach with 3-inch screws driven into each stud. Ensure it’s level.
Add Lip Board
Attach a second board on top of the brace, same length. Reinforce underneath with an L-bracket. This creates a shelf for the desktop hinge.
Hinge the Desktop
Attach heavy-duty T-hinges to the underside of the lip board and the back edge of the desktop. Open and close to test clearance.
Build Triangle Support Brace
Create a right triangle from three wood pieces. One leg attaches to the wall T-support, the other to the desktop underside brace. Hinge one end to the wall and the other to the brace.
Install Wood Peg Lock
Drill a hole in the top of the triangle brace. Insert a 1-inch diameter wood peg halfway with glue. Drill a matching hole in the desktop’s underside brace. When open, the peg slides in to lock the position.
Safety Note: Round all corners with a jigsaw and a coffee can template for safety.
Assemble a Knockdown Desk (Tool-Free)
Fully disassemblable using tea nuts and bolts. Ideal for travel and frequent moves.
CNC or Hand-Cut Parts
From one 4-foot × 8-foot sheet of ¾-inch plywood, cut:
– Tabletop: 36″ × 24″
– Legs: 4 with mortises for tenons
– Stretcher: 2 pieces with lap joints
Use SketchUp to optimize cuts and minimize waste.
Install Threaded Inserts
Drill holes in leg ends (M6 size). Tap in threaded inserts with a rubber mallet. Let epoxy set if required.
Add Magnets for Alignment
Press rare earth magnets into pre-drilled holes at leg and tabletop corners. This helps snap parts into place during reassembly.
Use Decorative Bolts
Connect the stretcher to legs with ¼-inch bolts. Cap with brass or black acorn nuts.
Pro Tip: Include a small hex key in a labeled pouch for reassembly on the go.
Finish for Durability and Style
Sand All Surfaces
Start with 120-grit sandpaper and finish with 220-grit. Round all edges with a round-over bit or sanding block.
Stain or Paint
For stain, use Minwax Espresso for a warm tone. Wipe off excess. For paint, apply 2 to 3 coats of chalk or latex paint. For contrast, stain the top and paint the legs.
Seal the Wood
Apply matte polyurethane (3 coats). Lightly sand between coats with 320-grit. Let cure 24 hours before use.
Pro Tip: Wet the wood lightly before staining to reduce blotchiness.
Fix Common Problems
Wobbly Legs
Ensure all joints are glued and clamped. Add a horizontal dowel or stretcher. Pre-drill screw holes to prevent splitting.
Hinges Misaligned
Dry-fit before final screwing. Sand hinge mortises slightly if binding. Use shims behind hinge leaves.
Desk Won’t Fold Flat
Check leg clearance. Bevel leg edges or reduce thickness. Ensure no screws protrude through joints.
Hard to Carry
Add a routed handhold in the tabletop. Use ½-inch plywood to reduce weight. Attach a nylon strap with screw-on handles.
Maximize Portability and Ergonomics
Ideal Desk Height
32 to 34 inches from floor for seated work. Measure from your elbow when sitting upright. For couch use, 24 to 28 inches may be more comfortable.
Weight Reduction Tips
Use ½-inch plywood instead of ¾-inch. Route lightening cutouts in legs or apron. Choose pine over hardwoods.
Ergonomic Benefits
Raises laptop to eye level, reducing neck strain. Encourages better posture versus bed use. Frees floor space for movement.
Customize Your Design
Aesthetic Upgrades
- Live edge desktop with epoxy resin
- Painted accents on legs or underside
- Brass inlays or engraved nameplate
- Cable management slots with grommets
Functional Add-Ons
- Magnetic tool tray under desktop
- Fold-out keyboard shelf
- USB hub cutout with power bank storage
- Felt-lined bottom to protect walls
Final Tips for Success
Before You Build
Dry-fit all parts before gluing. Label every piece with a number or side (L/R). Optimize cuts with SketchUp or graph paper.
During Assembly
Use painter’s tape to mark drill depths. Clamp joints tightly and wait 2+ hours for glue cure. Sand before and after staining.
After Build
Apply felt pads to legs or back to prevent scratches. Store folded in a cotton cover to reduce dust. Re-tighten bolts every few months.
Frequently Asked Questions About Making a Portable Desk
How much does it cost to build a portable desk?
Basic box desks cost under $35 in materials. Intermediate scissor-leg desks run $60 to $80. Wall-mounted and knockdown designs range from $35 to $100 depending on materials and hardware.
What is the easiest portable desk to build?
The folding box desk is the easiest design for beginners. It requires only basic cuts, wood glue, brad nails, and simple hinges. Total build time is 4 to 6 hours.
How do I make my portable desk more stable?
Add support dowels between legs and frame. Use wood glue on all joints. Pre-drill screw holes to prevent splitting. For wall-mounted desks, anchor into wall studs with long screws.
Can I use ½-inch plywood instead of ¾-inch?
Yes, ½-inch plywood reduces weight significantly but offers less rigidity. It’s suitable for laptop desks and lightweight builds. For heavier use, stick with ¾-inch plywood.
How do I make my portable desk fold completely flat?
Check leg clearance before final assembly. Bevel leg edges where they contact the frame. Ensure hinges are installed flush and no screws protrude. Test folding multiple times during build.
Key Takeaways for Building Your Portable Desk
Building a portable desk gives you complete control over size, style, and strength with no compromises found in store-bought versions. Choose a design matching your skill level: box desk for beginners, scissor-leg for intermediate builders, wall-mounted for permanent installations, or knockdown for travel needs. Focus on precise cuts, strong joinery, and quality hardware. With proper sealing and occasional maintenance, your DIY workstation will last years while outperforming mass-produced alternatives. Now reclaim your space one cut at a time.


