
Building a mini desk opens up creative possibilities for small spaces, imaginative play, or detailed model crafting. Whether you need a 1:12-scale desk for a dollhouse or a functional child-sized activity station, learning how to make a mini desk is a rewarding project that costs under $15. This guide walks you through choosing materials, assembling your desk safely, adding realistic details, and customizing the final piece for your specific needs.
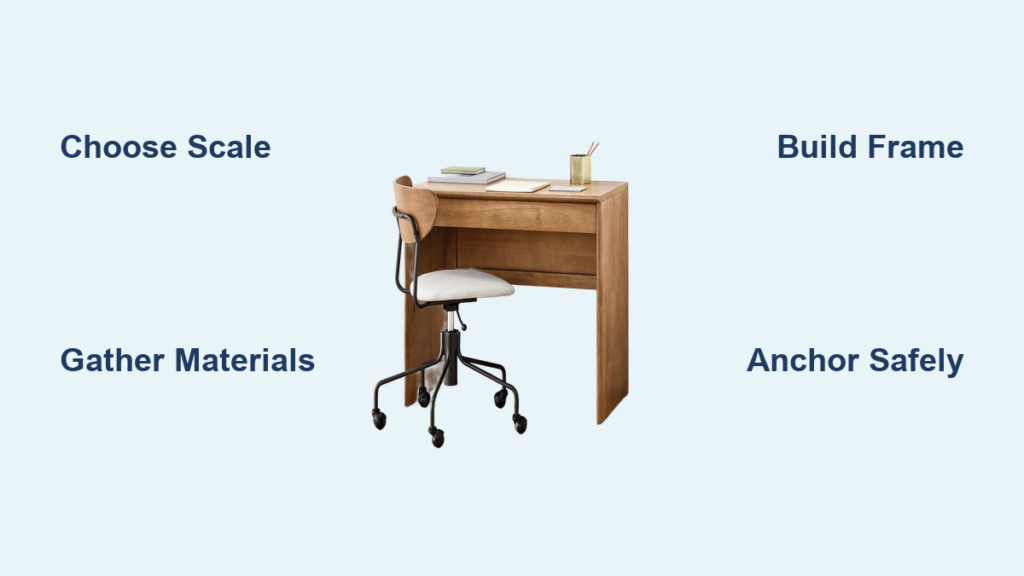
Choose Your Mini Desk Type and Scale
Before starting your project, decide what type of mini desk best fits your goals. The two main categories serve very different purposes.
Miniature Craft Desk (1:12 Scale): This option works perfectly for dollhouses, dioramas, or model scenes. You will use popsicle sticks, cardstock, and wood glue to build a detailed piece with weathered finishes. This type suits crafters, model makers, and collectors who enjoy intricate detail work. Expect to spend one to two hours on construction. Skill level ranges from beginner to intermediate.
Child-Sized Play Desk (Human Scale): This functional desk works well for toddlers in nurseries, playrooms, or tiny homes. The design uses a pre-cut laminated board and shelf brackets, eliminating the need for cutting or sanding. This option is safe, wipeable, and space-saving. You can complete the entire build in about 30 minutes, making it ideal for beginners.
Gather Materials for Your Mini Desk Project
Having the right supplies ready before you begin makes the build go smoothly. Material choices depend entirely on your desk type.
For Miniature Desks: You will need smooth unbroken popsicle sticks for legs, frames, and drawer components. Cardstock or a calendar sheet serves as the desktop surface. Wood glue provides strong non-toxic bonds. Acrylic paints in brown and white allow for realistic aging effects. Sandpaper and a blade help with distressing and fine detailing. Scrap paper works well for pencil boxes and book props.
For Child-Sized Desks: A laminated board measuring 10 inches by 23 inches creates a spill-resistant desktop. Two white shelf brackets provide support. Screws and wall anchors ensure secure mounting. A screwdriver completes the basic tool list.
Pro Tip: Test your desk placement using a diaper box as a mock-up before purchasing materials. This helps you check clearance for chairs and overall movement space.
Build a Miniature Craft Desk Step by Step
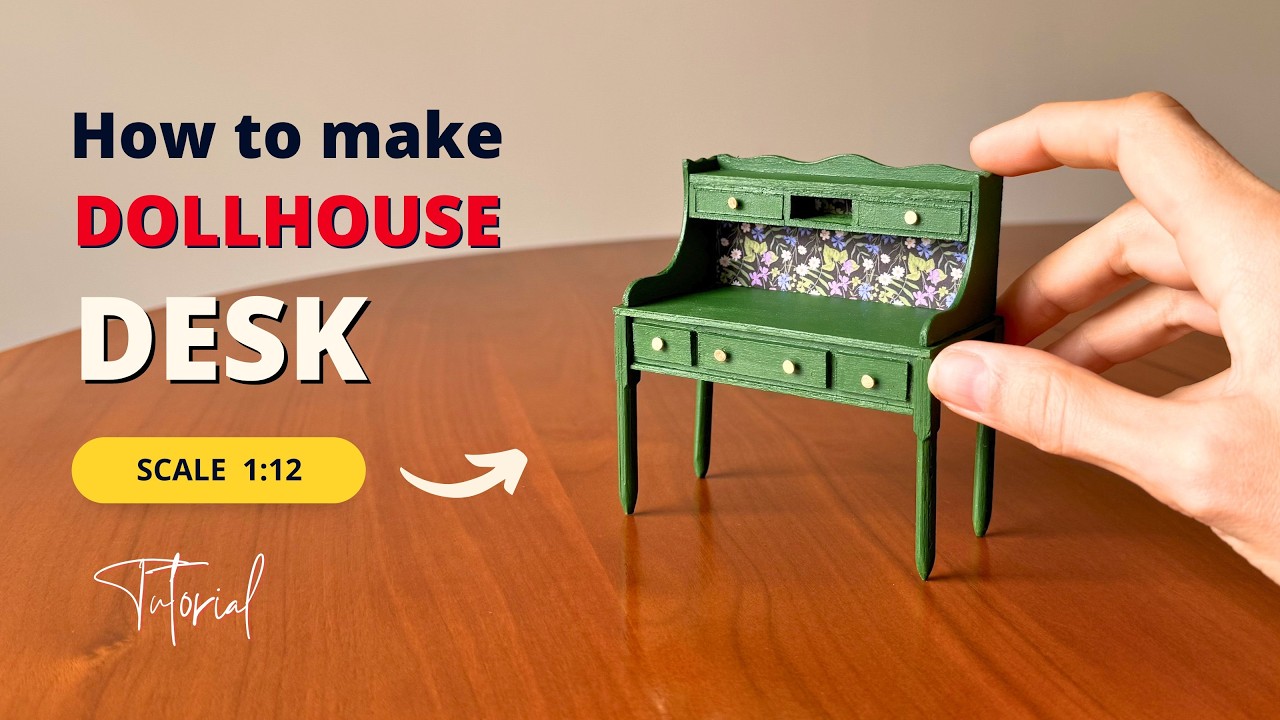
Creating a realistic miniature desk involves careful assembly of multiple components. Follow these steps for best results.
Create the Desktop: Cut your cardstock or calendar sheet to your desired size, typically around 6 inches by 4 inches for 1:12 scale. Use a ruler to keep edges straight. Lightly sand the corners for a worn, realistic appearance.
Assemble the Drawer: Trim popsicle sticks to uniform lengths. Glue four sticks together forming a rectangle for the drawer frame. Attach a flat stick or cardstock piece to the bottom as the drawer base. Allow the piece to dry completely before handling.
Attach Legs and Supports: Cut four popsicle sticks to equal lengths for the legs. Glue two legs to each side of the desktop underside. Add a horizontal support piece between the front and back legs. Reinforce all joints with extra glue.
Stability Test: Gently wiggle the desk after assembly. If it feels wobbly, add diagonal braces or apply more glue to weak joints.
Construct a Child-Sized Play Desk in 30 Minutes
This fast method produces a safe, functional desk without advanced tools or cutting.
Mount Brackets to Desktop: Place your laminated board upside down on a flat surface. Position the two shelf brackets three to four inches from each end. Secure them with screws, drilling pilot holes if needed. Verify that brackets are level before proceeding.
Install on the Wall: Use a stud finder to locate wall studs. Hold the board against your chosen wall with brackets facing down. Mark screw hole positions with a pencil. Drill anchors if you cannot hit studs directly. Screw the brackets firmly into the wall.
Safety First: Always anchor furniture to prevent tipping. This is especially critical with active toddlers who may climb or lean on the desk.
Paint and Weather Your Mini Desk for Realism

Adding color and aging effects transforms simple craft pieces into believable miniatures.
Apply Base Coat: Paint all wooden components with light brown acrylic paint. Use thin layers to avoid visible brush marks. Let each layer dry completely before applying the next.
Add Aging Effects: Mix dark brown paint with water to create a wash solution. Brush this into corners and grooves to simulate shadows and age. Apply white wash along edges for wear highlights. Lightly sand surfaces to expose what appears to be natural wood grain underneath.
Create Scratches and Dents: Use a utility knife tip to make shallow lines in the wood. Focus on high-contact areas like the drawer front and desktop edges. Keep your strokes uneven for authentic appearance.
Pro Tip: Use a dry brush technique by wiping most paint off your brush, then lightly dragging over surfaces for a faded vintage look.
Create Miniature Accessories for Your Desk
Complete your miniature desk with handcrafted details that add charm and realism.
Build Mini Pencils: Cut thin wire to approximately 12 millimeters in length. Sharpen one end using a blade. Insert 0.5 millimeter mechanical pencil lead into the wire. Paint the lead black or yellow. Gently bend the tip for realistic appearance.
Craft a Mini Eraser: Cut a small eraser to about 5 millimeters in size. Flatten milk-powder foil and trim it to wrap around the eraser. Secure with a tiny dot of glue for a metallic finish.
Fold a Pencil Box: Cut scrap paper into a 2-inch by 3-inch rectangle. Fold up the sides to form walls. Glue a second folded piece to create a lid. Attach with a paper hinge made from a small tab of folded paper.
Customize Your Desk Design and Layout
Making your mini desk fit your space and style requires thoughtful placement and aesthetic choices.
Match Room Aesthetic: Use white brackets to blend seamlessly with walls. Pair your desk with industrial-style chairs like mint green metal options. Hang custom nursery art above the desk for a cohesive look.
Optimize Small Spaces: Position the desk in a corner or beside a bookshelf. Place it under a window for natural light during activities. This approach works well in condos, nurseries, and learning nooks.
User Insight: One builder found their $15 desk solved space issues in a tiny condo without requiring bulky furniture.
Ensure Safety and Stability
Protecting children and pets requires smart setup choices and ongoing attention.
Anchor the Desk: Always screw the desk into wall studs for maximum stability. Use furniture anchors if studs do not align with your bracket positions. Test stability by gently pushing side-to-side before allowing child use.
Use Child-Safe Materials: Choose non-toxic wood glue and water-based paints. Sand sharp edges on all cut wood or laminated board surfaces. Keep blades and small parts away from young children during and after construction.
Critical Warning: Unsecured furniture can tip dangerously, especially if a child climbs or leans on it. Never skip the anchoring step.
Maintain and Upgrade Your Mini Desk
Keeping your mini desk looking great ensures years of use and enjoyment.
Clean the Surface: Wipe the desk with a damp cloth after snacks or art activities. Avoid harsh chemicals on laminated boards. For miniature models, use a soft brush to remove dust from details.
Check for Wear: Inspect bracket screws monthly for looseness. Re-glue any lifting joints in craft models. Touch up paint on high-friction areas that show wear over time.
Longevity Tip: Laminated desks can last for years with proper care, making them ideal for growing toddlers.
Cost Breakdown and Sourcing Tips
Building affordably requires smart shopping decisions. Here is a typical cost breakdown for a child-sized play desk.
| Item | Cost | Source |
|---|---|---|
| Laminated board (10″x23″) | $4.48 | Home Depot |
| 2 Shelf brackets | $5–$10 | Home Depot |
| Screws and anchors | Under $2 | Hardware store |
| Total | $10–$15 |
Savings Tip: In-store prices are often significantly cheaper than online. One builder saved $6 by purchasing the board locally rather than ordering online.
Frequently Asked Questions About Making a Mini Desk
What materials work best for a beginner mini desk project?
For beginners, a child-sized play desk using a pre-cut laminated board and shelf brackets offers the easiest path to success. This approach requires no cutting or sanding. For craft-scale projects, popsicle sticks and cardstock provide forgiving materials that are easy to work with.
How long does it take to build a mini desk?
A child-sized desk takes approximately 30 minutes to construct. A detailed miniature craft desk requires one to two hours due to the additional painting and weathering steps involved.
Can I make a mini desk without power tools?
Yes. Both desk types described in this guide require only basic hand tools. A screwdriver suffices for bracket mounting. Scissors and a blade handle all cutting needs for miniature projects.
What is the most affordable way to build a mini desk?
The child-sized laminated board approach costs approximately $10 to $15 total. Using in-store pricing rather than online ordering saves additional money. The miniature craft desk costs even less since it uses inexpensive supplies like popsicle sticks and glue.
How do I make my miniature desk look realistic?
Apply light brown paint as a base coat. Use dark brown wash in corners and grooves for shadows. Add white wash along edges for wear. Lightly sand surfaces and use a blade to create fine scratches. This combination creates believable aging effects.
Is a mini desk safe for toddlers?
A properly anchored child-sized desk is safe for toddlers. Always mount the desk to wall studs or use appropriate anchors. Choose non-toxic materials and sand sharp edges. Supervise use when children are using pencils or art supplies.
Key Takeaways for Building Your Mini Desk
Building a mini desk, whether for craft modeling or child play, is a simple project that delivers major rewards. The child-sized version costs under $15, requires only basic tools, and installs in 30 minutes. The miniature craft version offers creative detail work that appeals to model makers and collectors. Both options solve space problems while adding charm to your home.
Your next steps are straightforward. First, decide which desk type fits your needs. Second, test your space using a cardboard mock-up. Third, gather your materials and begin building. Whether you are crafting a tiny world or creating a play station for your toddler, a mini desk provides functional charm that sparks creativity and saves valuable space.


