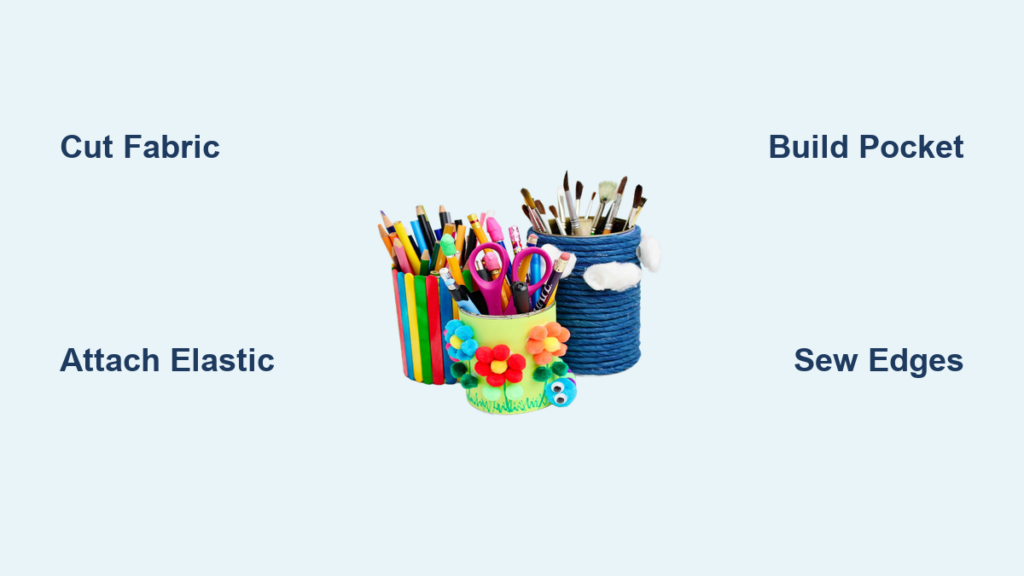
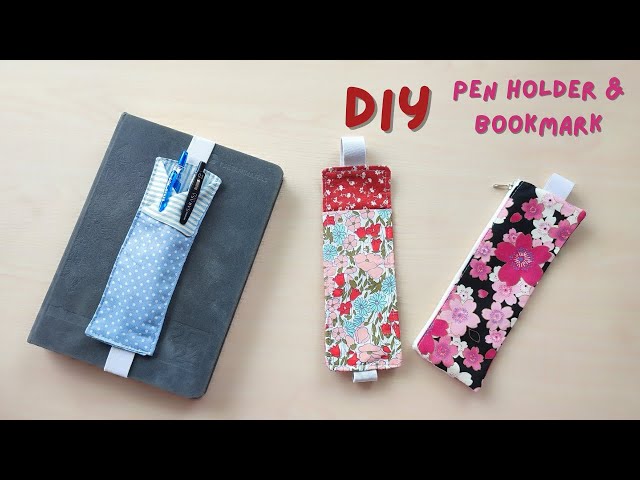
Digging through your backpack for a pen during a lecture wastes precious minutes. A fabric pen holder solves this problem by combining a bookmark with a built-in tool organizer that attaches directly to your notebook. This clever accessory keeps pens, pencils, and highlighters secure and within reach every time you open your journal. Students, artists, and teachers all benefit from this simple project, which takes under an hour and costs almost nothing when made from fabric scraps.
In this guide, you will learn how to make a fabric pen holder using basic sewing techniques, with options for both beginners and intermediate crafters. You will also discover no-sew alternatives, precise elastic sizing formulas, and pro tips for crisp corners and long-lasting results. By the end, you will have a custom accessory that boosts productivity and adds personality to your workspace.
Choose Your Design Style
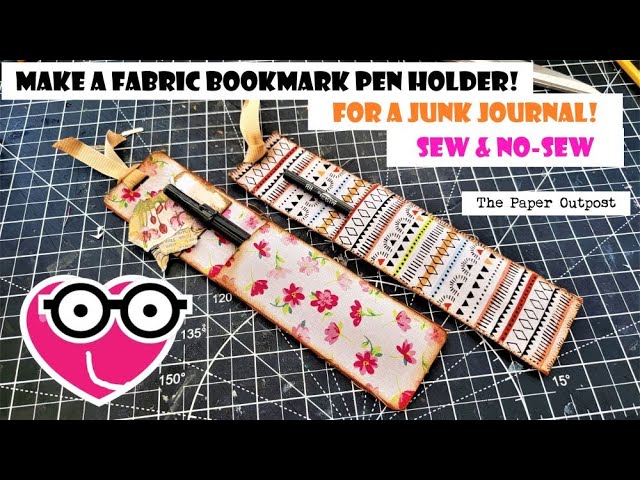
Pick a Sewn or No-Sew Version
Start by deciding whether you want to sew or skip the needle entirely. Sewn fabric versions offer durability, a polished finish, and room for customization, making them ideal if you have access to a sewing machine or can hand-stitch. No-sew paper or cardstock versions work perfectly for quick gifts, kids’ crafts, or situations where tools are unavailable. Both styles fit across notebooks, journals, and planners.
Compare Pocket Types
You can create a single-wide pocket that holds 2 to 3 pens together or a divided pocket with a center seam to separate tools. Divided pockets prevent pens from clumping and make grabbing a specific color effortless. If you use highlighters and a pencil daily, choose the split design. For minimalist use, a single pocket is faster to assemble.
Select the Right Size
Most fabric pen holders measure 2.5 inches wide by 8 inches tall, fitting standard A5 and composition notebooks. For larger A4 journals, increase the height to 9 inches. Use this quick reference:
- A5 Journal (8.5″ long): 8″ tall holder
- A4 Notebook (12″ long): 9″ tall holder
- Composition Book: 8″ tall and 2.5″ wide
Paper versions can stay smaller at 4″ by 6″, which works well for slim paperbacks.
Gather Materials and Tools
Essential Fabric and Interfacing
Use cotton fabric for ease and print variety, or Moda Chambray for a modern, sturdy appearance. You only need small scraps in these sizes:
- Main fabric: One 2.5″ x 8″ piece (front)
- Backing fabric: One 2.5″ x 8″ piece (back, matching or contrasting)
- Pocket fabric: One 2.5″ x 10″ strip (allowing for fold and seam)
Apply medium-weight interfacing to the wrong side of both main pieces to add structure and prevent flopping. Use fusible interfacing (like Shape Flex 101) or sew-in stabilizer (Pelon). Cut interfacing slightly smaller (about ¼ inch less) to avoid stiff edges.
Pick the Right Elastic
Use ½-inch Fold-Over Elastic (FOE) for softness and durability. It won’t dig into book spines and looks clean when finished. Cut length based on your notebook size:
| Notebook Type | Elastic Length |
|---|---|
| A5 Journal | 9″ |
| A4 Notebook | 16″ |
| Composition | 13″ to 14″ |
Formula: (2 × notebook length) minus (bookmark height) equals elastic length. For example, (2 × 8.5″) minus 8″ equals 9″.
Tools You Will Need
- Scissors or rotary cutter
- Ruler and fabric pen or chalk
- Sewing machine (or needle for hand sewing)
- Iron and pressing cloth
- Wonder Clips or pins
- Point turner or chopstick
- ¼” seam guide foot (optional but helpful)
Cut and Prepare Fabric Pieces
Measure and Cut Accurately
Lay fabric on a flat surface and use a rotary cutter with a ruler for straight edges. Cut the following pieces:
- Front: 2.5″ x 8″
- Back: 2.5″ x 8″
- Pocket: 2.5″ x 10″
If using directional prints like stripes or text, ensure the design faces the correct way before cutting. For scrappy quilting, use jelly roll strips (pre-cut 2.5″ wide) to save time.
Apply Interfacing
Place fusible interfacing adhesive-side down on the wrong side of the front and back fabric pieces. Iron for 10 to 15 seconds with no steam unless specified. Let it cool completely. For sew-in stabilizer, pin it in place and stitch through it later.
Pro Tip: Apply interfacing only to the lower half of the pocket piece if you want a flexible top edge that’s easier to load pens into.
Build the Pen Pocket

Fold and Press the Pocket
Take the 2.5″ x 10″ pocket strip and fold it in half lengthwise with wrong sides together, making it 2.5″ x 5″. Press the fold with an iron to create a sharp crease. This folded edge becomes the top of your pen slot.
Topstitch the Folded Edge
Sew along the pressed fold with a ¼” seam allowance. This secures the pocket shape and prevents it from unfolding during use. Use a straight stitch and backstitch at both ends for reinforcement.
Add a Divider (Optional)
To create two separate pen slots, measure the center of the pocket (1.25″ from each side). Sew a vertical seam from the folded edge down to the raw bottom edge. Now you can store a pen and highlighter separately.
Design Tip: If you plan to embroider initials or a design, do it before folding the pocket. Stitch on the lower half so it shows when the pen holder is in use.
Attach the Elastic Strap
Find the Center Point
Fold the front fabric piece in half vertically and press lightly to find the center. Mark with a chalk dot or clip. This is where the elastic will anchor.
Position the Elastic
Cut the elastic to your calculated length. Center it on the bottom edge of the front fabric with raw ends aligned. The elastic should extend upward, away from the fabric edge.
Avoid Twisting: Stretch the elastic slightly and check that it lies flat without spirals.
Tack the Elastic Ends
Sew a small ⅛” seam across each end of the elastic, stitching back and forth 3 to 4 times. This prevents slipping during assembly. Don’t sew through the entire fabric yet, just secure the elastic ends.
Pro Tip: If the elastic is longer than the fabric edge, fold the excess upward and pin it out of the way. It will be enclosed later.
Assemble the Pen Holder

Layer the Pieces Correctly
Stack the pieces in this order from bottom to top:
- Back fabric with right side up
- Pocket piece with raw edges aligned to the bottom edge and fold facing up
- Elastic centered with tacked ends facing up
- Front fabric with right side down
Ensure all raw edges align. Clip or pin the layers together, especially around the pocket and elastic.
Sew the Perimeter
Using a ¼” seam allowance, sew around the entire rectangle. Start just above the pocket area and stop when you reach the opening.
Leave a 2 to 3 inch gap on one long side for turning. Backstitch at the start and end.
Corner Tip: Stop with the needle down, lift the presser foot, pivot the fabric 90 degrees, lower the foot, and continue. This creates sharp corners.
Turn and Finish the Edges
Trim Corners and Turn Right Side Out
Cut diagonally across all four corners, close to the stitch line but not through it. This reduces bulk and helps corners turn sharply.
Reach through the opening and gently pull the entire piece right side out. Use a point turner, chopstick, or size 1.75 crochet hook to push out corners. Don’t tug hard, as this can stretch the fabric.
Press for a Crisp Finish
Iron the pen holder flat. Fold the raw edges of the opening inward so they match the sewn seams. Press again.
Warning: If using polyester FOE, do not iron directly on the elastic. Use a pressing cloth or iron around it to prevent melting.
Topstitch for Durability
Close the Opening
Sew an ⅛” seam around the entire perimeter. This closes the turning gap and secures all layers. Sew slowly over corners to maintain even spacing.
Reinforce Stress Points
Go over the elastic attachment points again with a zigzag stitch or a second row of straight stitching. This ensures the strap won’t pull loose with daily use.
Stitch Settings (Recommended):
– First pass: 3mm width, 1.5mm length
– Second pass: 3.5mm width, 2mm length
Use contrast thread for a decorative look or matching thread for subtlety.
No-Sew Paper Pen Holder Option

Cut and Fold Cardstock
For a zero-tools version, use thick cardstock or recycled notebook paper. Cut a piece to 4″ wide by 6″ tall.
Fold the top edge down by 1 inch to form a pocket. Secure with glue stick or double-sided tape. This depth holds 2 to 3 pens.
Add a Bottom Tab
Cut a small 1-inch triangle from the bottom center, leaving a ½-inch tab. This makes it easier to pull the holder out when the book is closed.
Decorate and Use
Personalize with markers, washi tape, or stickers. Slide it between pages with the pocket facing outward and insert pens upright.
Best For: Kids, temporary use, or eco-friendly gifts.
Customize and Upgrade
Add Embroidery or Monograms
Stitch initials or a tiny design on the lower half of the front fabric before assembly. Use machine embroidery for speed or hand-stitching for charm. Designs stay visible even when pens are inserted.
Mix Fabrics Creatively
- Pair floral prints with solid cotton
- Use stripes with polka dots (match one color)
- Try denim or chambray for a rugged look
Dark or busy prints hide ink marks and reduce washing frequency.
Upgrade Structure
For heavy pens or daily use:
- Add fusible fleece under interfacing
- Use double-layered fabric for the back
- Choose wider elastic (¾” to 1″) for thick journals
Fix Common Issues
Bulky Corners?
Trim closer to the stitch line after sewing, but not through it. Use small sharp scissors. Press with a damp sponge to flatten stubborn seams.
Elastic Keeps Twisting?
Check before sewing. Stretch it out and roll it between your fingers. If it spirals, replace it. Use Wonder Clips to hold it flat during assembly.
Machine Skips Stitches?
Place a scrap of fabric or cardboard under the presser foot when sewing over thick layers (like the pocket and elastic). This stabilizes the feed dogs.
Pen Holder Feels Floppy?
You skipped interfacing. Always use medium-weight stabilizer. For no-sew versions, laminate cardstock with clear tape for stiffness.
Final Tips for Longevity
Match Elastic to Notebook Size
A too-loose strap slips off, while a too-tight strap distorts the spine. Use the formula (2 × notebook length) minus (bookmark height) equals perfect elastic length. Test-fit before final stitching.
Wash Carefully
If needed, hand-wash in cold water and air-dry. Machine washing may weaken seams and degrade elastic over time. Choose darker fabrics if you won’t wash it frequently.
Make It a Gift
Bundle 2 to 3 handmade pen holders with mini pens or pencils. Add a gift tag that reads “Never lose your pen again.” Teachers, students, and creatives love this practical present.
Frequently Asked Questions About Fabric Pen Holders
What fabric works best for a fabric pen holder?
Cotton fabric is the most popular choice because it’s easy to cut, press, and sew. Lightweight upholstery fabric or Moda Chambray also works well for a sturdier feel. Medium-weight interfacing is essential regardless of fabric type, as it prevents the holder from flopping and keeps the pocket structured for daily use.
How do I calculate elastic length for my notebook?
Use this formula: (2 × notebook length) minus bookmark height equals elastic length. For an A5 journal measuring 8.5 inches long with an 8-inch bookmark, you need 9 inches of elastic. For an A4 notebook measuring 12 inches long, you need 16 inches. Always test-fit before final stitching.
Can beginners make a fabric pen holder without a sewing machine?
Absolutely. Beginners can hand-stitch the entire project using a simple running stitch or backstitch. Alternatively, the no-sew paper or cardstock version requires only glue stick or double-sided tape and takes about 10 minutes. Both options produce functional pen holders suitable for students and casual use.
How many pens can a fabric pen holder carry?
A standard single-pocket fabric pen holder holds 2 to 3 standard pens, pencils, or highlighters. A divided pocket design with a center seam separates tools so they don’t clumping together. For thicker markers or fountain pens, increase the pocket depth by using a wider pocket strip during construction.
How long does it take to sew a fabric pen holder?
Most sewers complete the project in 30 to 60 minutes, including cutting, pressing, and stitching. Beginners may take slightly longer, especially during the first attempt. The no-sew paper version takes just 10 to 15 minutes from start to finish, making it ideal for last-minute gifts or classroom crafts.
Can I wash a fabric pen holder in the washing machine?
Hand-washing in cold water is the safest method to preserve seams and elastic integrity. Machine washing may weaken stitching and degrade Fold-Over Elastic over time. If you must machine wash, place the holder in a mesh laundry bag and air-dry flat. Choosing darker or busy prints also reduces the need for frequent washing.
Key Takeaways for Making Your Own Fabric Pen Holder
A fabric pen holder combines practical organization with personal style, and the project rewards both beginners and experienced crafters. The most important decisions happen before you start cutting: choosing between a sewn or no-sew version, selecting the right pocket style, and calculating elastic length precisely for your specific notebook. These three choices determine how well your finished holder performs.
The construction process follows a reliable sequence: cut and interface fabric pieces, build the pocket, attach the elastic, layer everything correctly, sew the perimeter, turn right side out, and topstitch for durability. Each step builds on the last, and taking time to press seams and tack elastic properly prevents frustrating issues later. Pro tips like trimming corners diagonally and using a damp sponge for stubborn seams elevate the finished product from homemade to professional.
Your next step is simple: gather your scraps, pick your fabric, and start with the basic single-pocket version. Once you master the technique, experiment with divided pockets, embroidery, or mixed prints. In less than an hour, you will have a custom accessory that keeps your favorite pens within reach and adds a personal touch to every notebook you own.