
If you have ever admired the elegant curves and hidden compartments of a vintage roll-top desk, you are not alone. Building one from scratch is a challenging project that rewards patient woodworkers with a functional heirloom. The how to make a roll-top desk process demands precision joinery, proper material selection, and respect for traditional craftsmanship techniques that have remained largely unchanged since the 1850s.
This guide walks you through every stage of construction, from designing the tambour mechanism and shaping curved side panels to building drawers, applying finish, and installing a working lock. Whether you aim for historical authenticity or a modern interpretation, these step-by-step methods will help you create a desk that lasts for generations.
Design Your Roll-Top Structure
Before cutting any wood, you must finalize your desk dimensions and layout. A standard roll-top measures 30 to 36 inches wide, 20 to 24 inches deep, and stands 29 to 30 inches tall. The tambour mechanism requires an additional 2 to 3 inches of depth and about 1 inch of vertical clearance when fully open.
Choose Your Build Approach
Consider three main construction methods for your project:
TraditionalMethod involves all-solid-wood construction with hand-cut joinery. This approach delivers maximum authenticity and longevity but requires advanced woodworking skills.
HybridBuild uses ¾-inch birch plywood for internal frames and drawer boxes, edged with solid oak. This method offers superior warp resistance and easier assembly while maintaining a traditional appearance.
ModernShortcut involves using a pre-assembled workbench as the base. One builder successfully adapted a Harbor Freight workbench this way, skipping leg construction entirely while achieving a stable, functional desk.
Plan the Tambour Path Geometry
The tambour rolls along curved tracks routed into the side panels. The ideal channel profile is not a semicircle but rather a 90-degree internal corner with slight rounding. This shape maximizes interior height when open and reduces friction and binding during operation.
Create a full-size template from poster board or plywood. Test it by rolling a mock tambour made of cardboard strips and fabric through the path. Adjust the template until movement feels smooth and unrestricted.
Cut and Shape the Side Panels
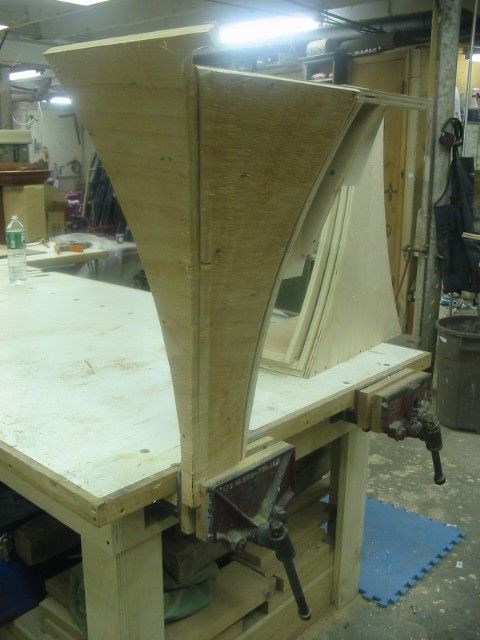
The side panels form the backbone of the desk, housing the tambour tracks and supporting all internal components. Precision here directly affects how smoothly the tambour operates.
Fabricate Curved Profiles
Follow these steps to create matching curved side panels:
Design a template by drawing the front rail curve on poster board. Include the top arch and lower foot profile. Transfer this template onto your 1×12 quarter-sawn white oak stock using a pencil.
Rough-cut the profile on a band saw, staying just outside the line to leave material for trimming. Attach the plywood template to your stock using double-sided tape.
Flush-trim the curve using a bearing-guided flush-trim bit in your router. This replicates the template perfectly across all panels.
Ensure symmetry by drilling a pivot hole at the curve’s base. Rotate the template to trace the matching profile for the opposite panel.
Mill the Guide Channels
Use a dovetail bit or custom-profile router bit to cut the tambour tracks into the inner face of each side panel. The channel should be approximately 3/8 inch deep with a 90-degree corner and 3/8-inch radius on the top edge.
Alignment is critical. Misaligned channels cause binding and premature wear. Use a doweling jig and drill press to transfer alignment marks from the top of the panel to the base if you need to rebuild any section.
Build the Tambour: Core Rolling Mechanism
The tambour is the defining feature of a roll-top desk. This flexible rolling shutter consists of interlocking wooden slats bonded to a fabric backing.
Cut and Profile the Slats
Cut 20 to 30 slats from quarter-sawn white oak, depending on your desk width. Each slat should be 3/4 inch wide, approximately 17 inches long, and between 1/16 inch and 13/16 inch thick. Thinner slats bend more easily but offer less rigidity.
Use a table saw with a stacked dado set to ensure uniform thickness. Profile each slat edge using a 3/8-inch radius router bit to create half-round profiles. Run each edge through the bit once, then flip and repeat to form convex and concave mating edges that interlock when assembled.
Test flexibility by bending a few slats around your tambour form. They should bend smoothly without cracking.
Assemble the Tambour
Prepare the backing material by cutting cotton duck fabric to the full tambour width and length. Apply wood glue evenly to the fabric, spreading it thoroughly.
Place the slats into the glue with the convex side facing down, butting each one tightly against the next. Press firmly to ensure good adhesion.
Clamp the assembly flat using weights or bar clamps. Allow it to cure for at least 12 hours before handling. After curing, staple or brad-nail the top and bottom slats for added durability. Trim excess fabric and sand the edges flush.
Construct the Drawer Case
Four identical drawer cases support the desktop and house the lower drawers. Building matching cases ensures balanced weight distribution and symmetrical appearance.
Cut Grooves and Tenons
Set your stacked dado blade to ¼-inch width to cut centered grooves in the stiles and rails. Widen the dado to slightly over ½ inch for the tenons by raising the blade height to ¼ inch and making one pass per face, flipping the stock as needed.
Assemble with Precision
Apply wood glue to the grooves and tenon shoulders. Insert the middle panel first, followed by the bottom rail and side panel. Tap the final stile into place with a mallet.
Clamp the assembly using a framing square to verify 90-degree angles. Allow the glue to cure fully before moving the case. The bottom stile extends below the rail to form a desk foot, improving overall stability.
Produce four identical cases for your desk.
Build the Desktop and Upper Top

The desktop must be both warp-resistant and visually traditional. Use a combination of plywood strength and solid wood aesthetics.
Construct the Desktop Field
Create the core from ¾-inch veneer-core plywood. Edge the surface with 1-inch solid oak strips, mitered at 45-degree corners. Join the miters using #20 biscuit joints at corners and along long edges.
Glue and clamp until the joints set. Bond a 1×12 solid oak board to the underside using pocket screws to prevent sagging and add traditional appearance.
Fabricate the Upper Case Top
Glue two or more 7/8-inch solid oak boards edge-to-edge using biscuits, glue, and cauls to ensure flatness. Plane the surface smooth after the glue-up completes.
Apply edge treatments by routing the top edges with a ½-inch cove bit for a soft profile. Use a ¼-inch round-over bit on the bottom edges in two passes to prevent chipping.
Install Pull-Out Shelves and Cubby Holes
Pull-out shelves and cubby holes provide organized storage behind the tambour.
Build Pull-Out Shelves
Construct the core from ¾-inch plywood. Apply solid oak edging to the front and sides. Join the shelf to side members using biscuit joints. The plywood core resists warping and eliminates breadboard-end complications.
Assemble Cubby Holes
Create partitions from ¼-inch resawn quarter-sawn oak. Use dado or rabbet joints cut with a stack dado set. Make 1/8-inch-wide dividers using shallow 1/16-inch table saw cuts.
Clip one back corner of each partition diagonally to provide clearance for tambour movement. Glue and brad the vertical partitions in place, but leave them unglued at the bottom to allow for wood movement and future repairs. Arrange the cubbies in a symmetrical grid behind the tambour.
Craft Drawers and Handles
Make Drawer Fronts
Create fronts from flat quarter-sawn white oak panels. Size them slightly undersized relative to the opening for smooth operation. Use double-width fronts for filing drawers.
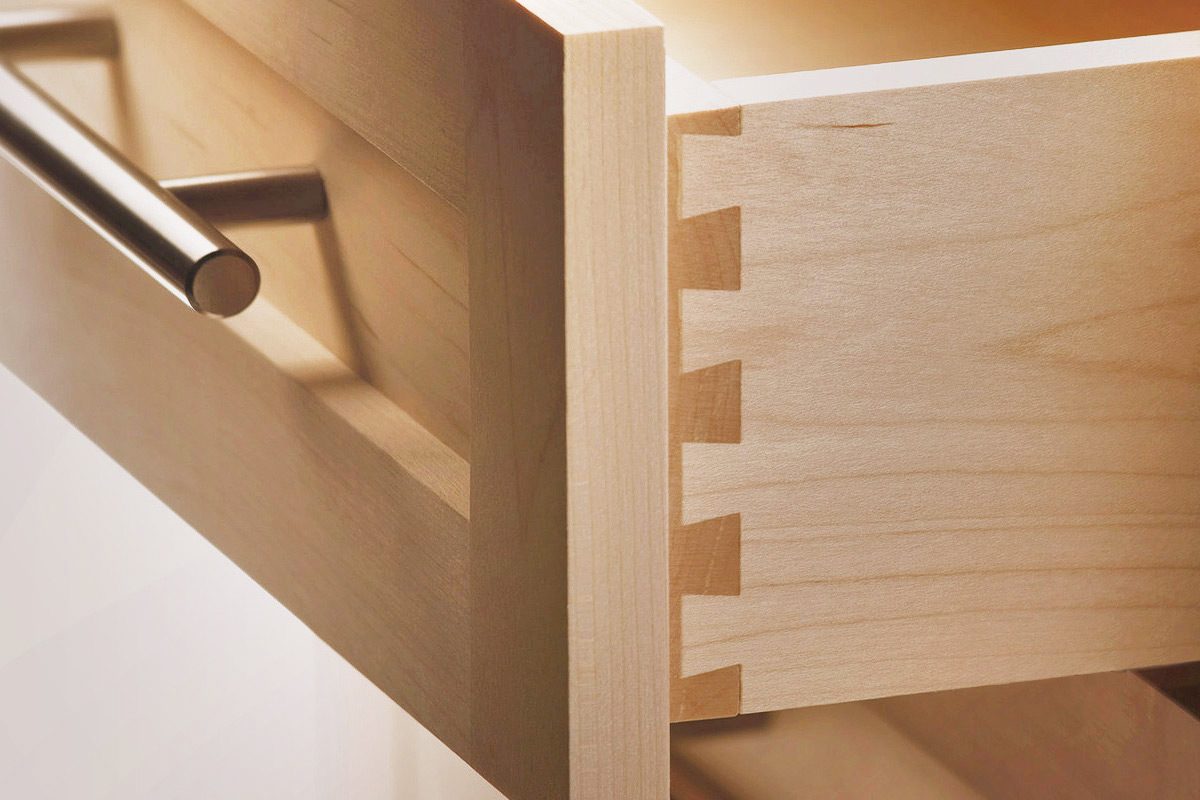
Join Drawer Sides
Construct sides and back from ½-inch cabinet-grade plywood. Plow a ¾-inch-deep groove in the sides to accept the back panel. The bottom panel slides into grooves but should not be glued, allowing for seasonal expansion.
Cut half-blind dovetails using a dovetail jig and router with collar and bit. Cut the pins first, then flip the workpiece to cut the tails. This provides strength and classic craftsmanship on the front corners.
Fabricate Handles
Shape the handle profile using a vertical handle-raising bit in your router table. Bevel the edge at 9 or 10 degrees on the table saw, using a sacrificial strip for safety.
Round the top edge using a 3/8-inch radius bit. Create the finger hole using a ½-inch coping bit with a stop block for consistency. Finish all corners with a ¼-inch radius bit to prevent splintering. Glue and brad the handles into place on the drawer fronts.
Assemble the Frame and Trim
Attach Bottom Frame Trim
Install glue blocks beneath the bottom frame. Apply continuous solid oak trim and secure with brads driven at angles for invisible fastening.
Round Interior Edges
Round the front and back edges of side panels using a 3/8-inch round-over bit in two passes. Apply a ¼-inch radius bit to interior corners to eliminate sharp edges.
Apply the Final Finish
Prepare Surfaces
Scrape off glue squeeze-out with a card scraper. Sand thoroughly, especially on the desktop and edges. Fill gaps and holes with wood filler, then sand smooth.
Choose and Apply Finish
Wipe-on polyurethane offers the best durability and hand-rubbed appearance. Lacquer with three coats works well over teak plywood for a glossy finish.
Apply the first coat with a lint-free rag and allow three to four hours of drying time. Lightly sand between coats using #0000 steel wool and wipe with a tack cloth. Apply the second and third coats similarly to build a deep, lustrous sheen.
Delay finishing the desktop and top shelf until after cubbies and tambour are installed to avoid damage. The finish will darken slightly over time, enhancing the wood’s natural patina.
Add Security with a Lock Mechanism
Install a barrel lock or custom mortised tumbler for functional security. Ensure the tambour closes fully while engaging the locking bar. Some builders include a mail bar and secret compartments behind false cubbies for added period authenticity.
Evaluate Function and Durability
Test Operation
Verify that the tambour rolls smoothly with minimal effort. Check drawer slides for binding, especially after humidity changes. Confirm that pens, letters, and tools are easy to retrieve from cubbies.
Perform Stress Testing
Simulate 1,000 or more open/close cycles. Monitor slat separation, fabric wear, and joint integrity. Canvas-backed tambours consistently outperform all-wood rollers in flexibility and lifespan.
Key Builder Lessons and Tips
Expect to invest five to six full days on this project, making it the largest build for many woodworkers. Template accuracy forms the foundation of symmetry and fit. Use internal glue blocks and strategic clamping for reinforcement.
Cotton duck fabric outperforms polyurethane-backed canvas for flexibility. This project is widely considered advanced, so do not be discouraged if it challenges your skills. One experienced builder described it as “way above my pay grade.”
Frequently Asked Questions About Making a Roll-Top Desk
How long does it take to build a roll-top desk?
Most builders report spending five to six full days on construction. This timeline assumes moderate to advanced woodworking experience and proper tool availability. Complex joinery and custom hardware can extend the project.
What is the best wood for a roll-top desk?
Quarter-sawn white oak provides the ideal combination of dimensional stability, straight grain, and distinctive fleck pattern. It resists warping and accepts finish beautifully. Some builders use birch plywood for internal components and solid oak for visible surfaces.
Why does my tambour bind when rolling?
Binding typically results from misaligned guide channels or slats that are too thick. Check that the channel profile matches the 90-degree internal corner with slight rounding. Sand slat edges slightly if they contact the channel sides. Ensure the fabric backing is stretched taut during assembly.
Can I use a pre-made desk as a base?
Yes. One builder successfully used a Harbor Freight workbench as the base, avoiding leg construction entirely. This approach sacrifices some traditional aesthetics but significantly reduces build time and complexity.
What makes the tambour roll smoothly?
The combination of interlocking half-round slat profiles, cotton duck fabric backing, and properly routed guide channels ensures smooth operation. The fabric must remain flexible, so use wood glue rather than polyurethane-based adhesives. The channel profile should maximize interior height while minimizing friction.
How do I prevent my desktop from warping?
Reinforce plywood desktops by bonding 1×12 solid oak boards to the underside using glue and pocket screws. This combines the dimensional stability of plywood with the traditional appearance and strength of solid wood.
Final Thoughts on Building a Roll-Top Desk
Building a roll-top desk is more than a woodworking project. It is an exercise in precision, patience, and historical preservation. The key to success lies in accurate templates, properly aligned guide channels, and a well-assembled tambour mechanism.
Every decision, from the interlocking tambour slats to the hand-shaped handles, contributes to a piece that blends 19th-century design with modern precision. With proper technique and patience, your desk will stand as a functional work of art for generations. The answer to how to make a roll-top desk is not just in the tools or wood. It is in the care, craftsmanship, and respect for tradition you bring to each step.


