
Imagine working at a sleek, modern desk that rotates 360 degrees with a gentle push. No more scooting your chair across the room or repositioning monitors every time you switch tasks. A swivel desk transforms how you use space, making it perfect for compact home offices, multi-functional rooms, or Airbnb rentals where every square foot counts. Unlike traditional wall-hugging desks, this rotating workstation stands proudly in the center of the room, fully finished on all sides and ready to pivot between work, video calls, media viewing, or social interaction.
This guide walks you through every step of building a swivel desk: selecting the right wood and tools, assembling a sturdy rotating frame, applying a flawless paint finish, and mounting it on a stable swivel base. Whether you are an advanced DIYer or stepping up your woodworking game, this project delivers lasting value, flexibility, and serious style for less than $200 in materials.
Gather Materials and Tools for Your Swivel Desk Build
Before cutting any wood, gather the right supplies. The strength and appearance of your swivel desk depend heavily on material quality and tool precision.
Select Durable, Smooth-Finished Materials
Use 3/4 inch cabinet-grade plywood for the main panels and desktop. This material resists warping, accepts paint well, and provides a clean, modern surface. For the frame and legs, ripped 2x4s trimmed down to 3 inches wide create a flat, solid backbone without the rounded edges of standard lumber. Add 1×3 and 1×2 solid wood trim to conceal seams and give crisp detailing.
Prefer a natural wood look? Upgrade to solid oak for unmatched durability and grain beauty. Oak may require whitewash or stain to neutralize pink undertones.
Stock up on these essentials:
• 2 sheets of 3/4 inch cabinet-grade plywood
• 2x4s ripped to 3 inches wide
• 1×3 solid wood for bottom trim
• 1×2 solid wood for face trim
• Wood glue
• 1-1/4 inch brad nails
• 1-1/2 inch pocket screws
• Wood filler
• Semi-gloss white paint or finish of choice
Essential Tools for Precision
A table saw is non-negotiable for this project. It rips plywood into uniform 15-3/4 inch strips and trims 2x4s to a clean 3 inch profile. Pair it with a Kreg pocket hole jig for strong, hidden joints. Other must-have tools include a drill driver, brad nailer, sander with 120-grit and fine-grit paper, mini roller, angled brush, measuring tape, square, and clamps.
Pro Tip: Drill 1-1/2 inch pocket holes in 2x4s first, then reset the jig to 3/4 inch for plywood. This saves time and keeps settings consistent throughout your build.
Plan Your Swivel Desk Layout and Configuration
A swivel desk must be balanced and symmetrical to rotate smoothly. Choose a configuration that fits your room and workflow.
Choose a Configuration That Works for Your Space
The L-shape or peninsula style works well for corner setups with dual access. A straight-line configuration aligns with one wall and leaves space for TV or shelving. The U-shape maximizes workspace in larger rooms. The centered freestanding option rotates freely in open layouts and delivers the best 360 degree functionality.
All designs should maintain equal weight distribution around the central pivot point for smooth rotation.
Set Standard Dimensions
Use these proven dimensions as a starting point:
| Section | Depth | Height | Length |
|---|---|---|---|
| Bookshelf Unit | 20 inches | 27 inches | Up to 96 inches |
| Desktop | 20 inches | 30 inches | Up to 70 inches |
| Legs | 30 inches tall | Adjust for ergonomics | — |
All parts are customizable. Measure your wall space first. This desk works in rooms from 8 to 12 feet wide.
Build the Bookshelf Frame
Start with the bookshelf section. It anchors one side of the desk and provides structural balance for the entire rotating system.
Cut and Assemble Frame Pieces
Rip two sheets of plywood into six 15-3/4 inch by 96 inch strips. Use four for shelves and two for side panels. Cut 2x4s to 3 inches wide by removing rounded edges with two passes on your table saw.
Follow these assembly steps:
1. Attach 2×4 end pieces to the top of the bookshelf with pocket screws
2. Install vertical 2×4 side supports using pre-drilled 1-1/2 inch pocket holes
3. Secure legs to the bottom of the frame, ensuring they are plumb
4. Slide 3/4 inch plywood into the frame and fasten with pocket screws from the outside
5. Make sure the center panel is perfectly centered before securing
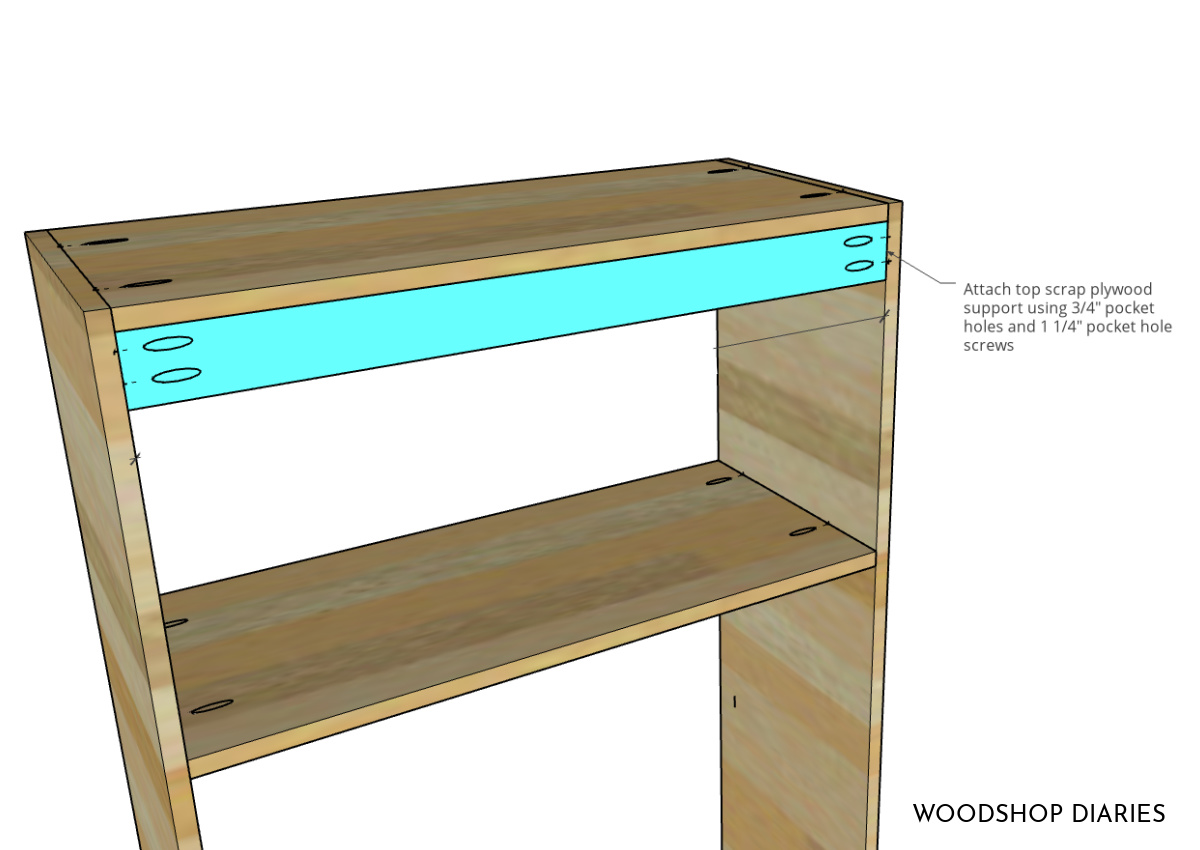
Add Shelves and Trim
Install fixed shelves between the legs using cleats. Then apply 1×3 bottom trim with pocket holes for hidden fastening. Attach 1×2 face trim on shelf fronts using wood glue and 1-1/4 inch brad nails. Sand joints lightly for a seamless look.
Construct the Desktop Frame
Replicate the same process used for the bookshelf section. Ensure the desktop matches the bookshelf in height and sturdiness.
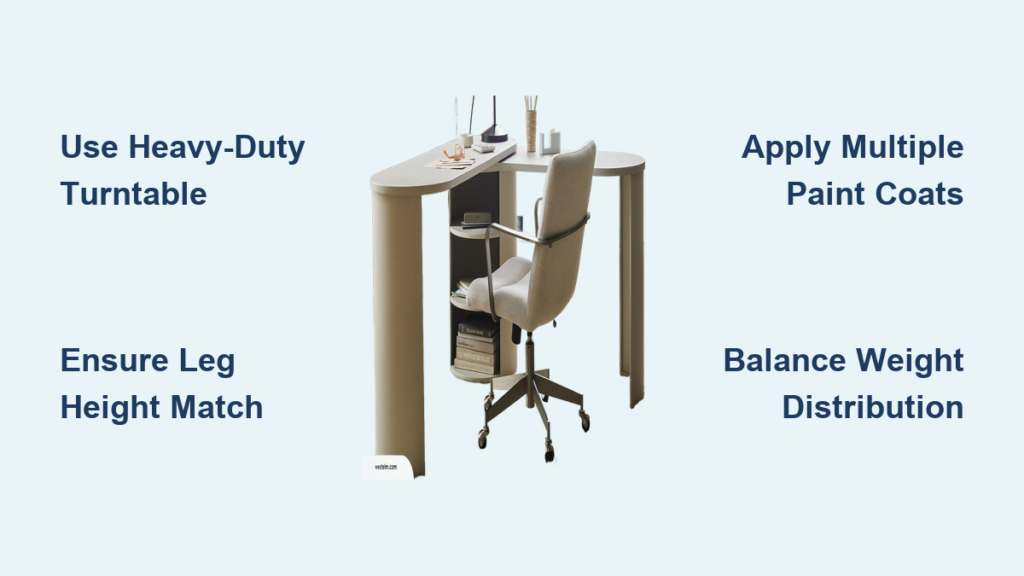
Match Leg Height Exactly
Measure and cut desktop legs to the same height as the bookshelf, typically 30 inches. Even a 1/8 inch difference causes noticeable wobble when rotating the desk.
Attach the Desktop Panel
Position the plywood flush to the outside edge of the frame. This creates a clean overhang and ensures symmetry when the desk rotates.
Reinforce with Cleats
Nail 1×2 cleats inside the desk leg. Then secure the remaining plywood panel to the inside of the leg using brad nails and wood glue for extra rigidity.
Visual Cue: When assembled, both units should sit flat, level, and aligned with no twisting or tilting.
Install the Swivel Base Mechanism
This is the most critical step. The rotating mechanism must support total weight and spin smoothly without binding or wobbling.
Mount a Heavy-Duty Turntable
Use a large-diameter lazy Susan bearing, typically 12 to 24 inches, rated for 500 pounds or more. These are commonly used in industrial furniture and available online or at hardware stores.
Follow these installation steps:
1. Mount the lower plate to a sturdy floor base, such as a square plywood platform anchored to the floor
2. Attach the upper plate to the center of the desk underside
3. Align both units precisely, as misalignment causes binding or wobbling
Warning: Never skip a support base during assembly. The desk can warp under its own weight before the swivel is properly installed.
Test Rotation and Balance
With the desk mounted, gently rotate it. It should turn freely with minimal effort. If it sticks, check for floor obstructions, ensure all legs are the same length, and verify the pivot point is centered. Add felt pads under legs and contact points to reduce friction and protect flooring.
Sand and Prepare for Finishing
A flawless finish makes a DIY desk look professional. Do not rush this stage.
Sand Thoroughly
Use 120-grit sandpaper on all surfaces, edges, and trim. Focus on seams, nail holes, and joints. Follow up with fine-grit paper around 220 grit for a silky touch.
Clean Before Painting
Vacuum dust with a soft brush attachment. Wipe down with a damp lint-free cloth. Let dry completely before applying any finish.
Fill Imperfections
Apply wood filler to brad nail holes and gaps. Let dry, then sand smooth. This step is essential for a clean, professional paint job.
Pro Tip: Slightly round sharp edges with sandpaper. This prevents chipping and gives a refined, finished feel.
Paint or Stain for a Modern Look

Your finish choice defines the desk style. Go bold or keep it neutral depending on your room decor.
Apply Semi-Gloss White Paint
For a bright, clean aesthetic ideal in small spaces, follow this process:
1. Use a mini roller on flat surfaces
2. Use an angled brush for corners and trim
3. Apply three light coats, not one thick coat
4. Lightly sand between coats with fine-grit paper
5. Wipe clean before reapplying
This technique delivers a durable, wipeable surface that resists scuffs and yellowing.
Try Whitewash or Stain for Natural Wood
For a warm, natural look with visible grain, whitewash oak to neutralize pink tones. Recommended stains include Dark Walnut, Provincial, Jacobean, or Early American. For modern styles, use gray or white wash. Always test your finish on a scrap piece first.
Add Custom Design Details
Elevate your desk from functional to statement piece with personalized touches.
Create Fluted Slat Accents
Hand-shape fluted slats into leg panels or side trim. This adds texture and visual interest without bulk.
Install a Branded Logo
Cut a round or rectangular logo from matching wood. Options include laser-cut for precision or CNC-engraved for repeatable detail. Mount it discreetly on a side panel or front face.
Integrate Hidden Features
Consider adding a flip-up monitor panel that hides tech, pull-out keyboard tray, internal cable management channels, or a rotating monitor arm mounted to center pole. These upgrades boost functionality without clutter.
Ensure Long-Term Durability
A well-built swivel desk can last 20 years or more with proper care.
Use Triple-Layer Joinery
Combine pocket screws for structural strength, wood glue for rigidity, and brad nails for alignment and finish hold. This trio prevents racking and withstands daily use.
Balance Weight Distribution
Avoid placing heavy items like printers on one side. Uneven loads strain the swivel mechanism over time.
Schedule Regular Maintenance
Dust weekly or wipe with a damp cloth. Touch up paint or stain as needed. Tighten swivel bolts every six months. Reapply floor felt pads if worn.
DIY Advantage: Unlike mass-produced furniture, damaged sections can be repaired or replaced easily.
Maximize Space and Function
This desk is not just furniture. It is a space-saving solution for modern living.
Use in Multi-Function Rooms
The swivel desk works perfectly in studio apartments where you need both work and sleep zones, Airbnb rentals requiring dual work and entertainment setups, and tiny homes where you must maximize utility in tight quarters. Rotate from laptop mode to TV-viewing position in seconds.
Enable Dynamic Room Flow
Place the desk in the center of the room to break up large spaces or define zones without walls. The freestanding design allows access from all sides.
Support Dual Workflows
Face one direction for focused work, then spin 180 degrees for video calls or collaboration. No furniture moving required.
Compare Cost to Retail Options
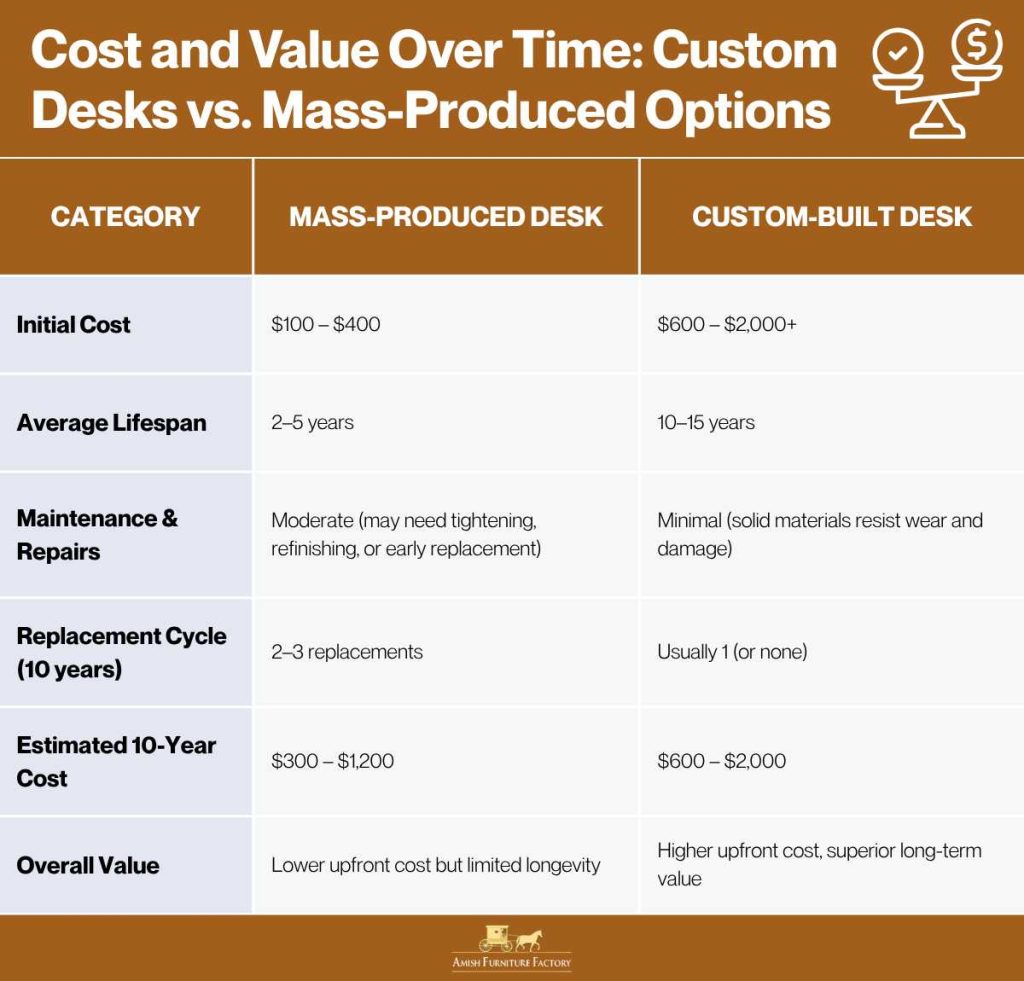
Building pays for itself quickly with massive savings compared to retail furniture.
| Item | DIY Cost | Retail Equivalent |
|---|---|---|
| Materials | Approximately $200 | — |
| Tools (table saw, jig) | One-time investment | — |
| Comparable Desk | — | $1,800 or more |
Savings: Over $1,600, enough to justify buying quality tools. As one experienced builder noted, you are saving $1,600 or more by building yourself. This is a big, nice piece, so invest in a table saw.
Final Assembly and Placement
Bring it all together with care and attention to detail.
Assemble with a Helper
Due to size and weight, work with a partner. Teamwork prevents injury and ensures proper alignment during installation.
Mount and Test
Follow these final steps:
1. Place the swivel base on a level floor
2. Lower the desk onto the turntable
3. Spin slowly and check for smoothness
4. Adjust leg pads if needed
Position in Room
Center the desk in open space for full rotation. Leave at least 24 inches clearance around all sides. Pair with a swivel office chair for complete mobility.
Customize for Your Needs
The beauty of DIY is that it adapts with you.
Resize for Your Space
Shorten or extend length to fit 8-foot or 12-foot walls. Just maintain symmetry around the center pivot point.
Change the Finish
Paint navy for a bold home office statement. Use gray wash for a Scandinavian vibe. Match your existing brand or decor.
Upgrade the Mechanism
For heavier loads, consider a motorized turntable with remote-controlled rotation, a center support column with bearing system, or a floor anchor kit for extra stability.
Frequently Asked Questions About Building a Swivel Desk
What is the best wood for building a swivel desk?
Cabinet-grade plywood works best for the main panels and desktop because it resists warping and accepts paint well. For the frame and legs, ripped 2x4s provide solid support. If you want a natural wood look, solid oak offers superior durability and grain beauty.
How much does it cost to build a swivel desk yourself?
The materials cost approximately $200, compared to $1,800 or more for comparable retail furniture. This saves over $1,600, making it worthwhile to invest in quality tools like a table saw and pocket hole jig.
What tools do I need to build a swivel desk?
Essential tools include a table saw for ripping plywood and lumber, a pocket hole jig for strong hidden joints, a drill driver, brad nailer, sander with multiple grits, mini roller and angled brush for finishing, measuring tape, square, and clamps.
How do I ensure the desk rotates smoothly?
Install a heavy-duty lazy Susan bearing rated for 500 pounds or more. Ensure all legs are exactly the same height, the pivot point is perfectly centered, and felt pads reduce friction. Test rotation before final placement and adjust as needed.
Can I customize the size and configuration of my swivel desk?
Yes, the design is highly customizable. You can modify dimensions to fit your space, change the configuration from L-shape to straight or U-shape, adjust the finish color, and add custom features like hidden storage or cable management.
Key Takeaways for Building Your Own Swivel Desk
Building a swivel desk saves over $1,600 compared to retail furniture while delivering unmatched flexibility in small or shared spaces. Use professional techniques like pocket hole joinery for industrial-grade strength, and finish like a pro with thorough sanding and multiple light coats of paint. Customize the size, shape, and style to fit your life, and enjoy a piece built once that lasts for decades. With the right plan, tools, and attention to detail, you can create a centerpiece that is as functional as it is beautiful.
Ready to rotate your workspace? Start gathering your materials, build with confidence, and enjoy the freedom of a desk that moves with you.


