
Tangled, dangling cords under your desk aren’t just an eyesore. They disrupt focus, pose tripping hazards, and make future upgrades a nightmare. But with the right strategy, you can hide cables on desk completely and create a sleek workspace that looks like it belongs in a design magazine. The good news? You don’t need to drill holes, cut cables, or spend hundreds of dollars.
This guide walks you through a step-by-step system to hide and manage desk cables effectively, whether you have a sit-stand desk, a glass workstation, or a standard office setup. From budget-friendly fixes to pro-level techniques, you will learn how to route, bundle, and conceal every wire so that from your seated view, not a single cord is visible.
Plan Your Cable Layout First
Before touching any tools or adhesives, map out your entire setup. A clean desk starts with smart planning, not random shopping.
Audit Your Devices
List everything plugged in under or near your desk. This includes monitors, laptops, docking stations, speakers, webcams, phone chargers, routers, printers, and subwoofers. Categorize each device by power source and connection type.
Eliminate what you do not need. Switch to wireless peripherals like keyboards, mice, and headphones. Use wireless charging pads where possible. Fewer cables means less work hiding them.
Measure Cable Paths
Use a piece of string to trace each cable is ideal route from outlet to device. Add six inches for slack. This helps you choose right-length or right-angle cables, avoiding coiled excess that creates bulk and visual clutter.
Position Power Where It Is Needed
Instead of stretching cords across the desk, move the power strip closer to your devices. Mount it under the desk near your monitor or PC. This cuts horizontal runs and keeps everything centralized.
Pro Tip: If your outlet is to the side, run one main power cord down the nearest desk leg and under a rug. A small slit hides the cord and keeps it flat.
Mount a Central Power Hub

A single, well-placed power source reduces clutter dramatically and simplifies long-term management.
Use a Surge Protector with USB Ports
Choose a low-profile surge protector with built-in USB-A and USB-C ports. This powers your phone, tablet, dock, and more without extra adapters. A six-foot cord gives flexibility for sit-stand desks.
Secure It Under the Desk
Mount the power strip securely using one of these methods. 3M Dual Lock tape provides reclosable, strong hold without damaging particle board. Clamp-mounted trays fit most desk thicknesses without drilling. Screws with pre-drilled holes work for permanent setups.
Avoid zip ties alone because they can pull loose over time. Use Velcro straps anchored to the desk or adhesive mounts for long-term hold.
Bundle and Route Cables Neatly
Now that your power is centralized, organize the cables running to each device with proper bundling techniques.
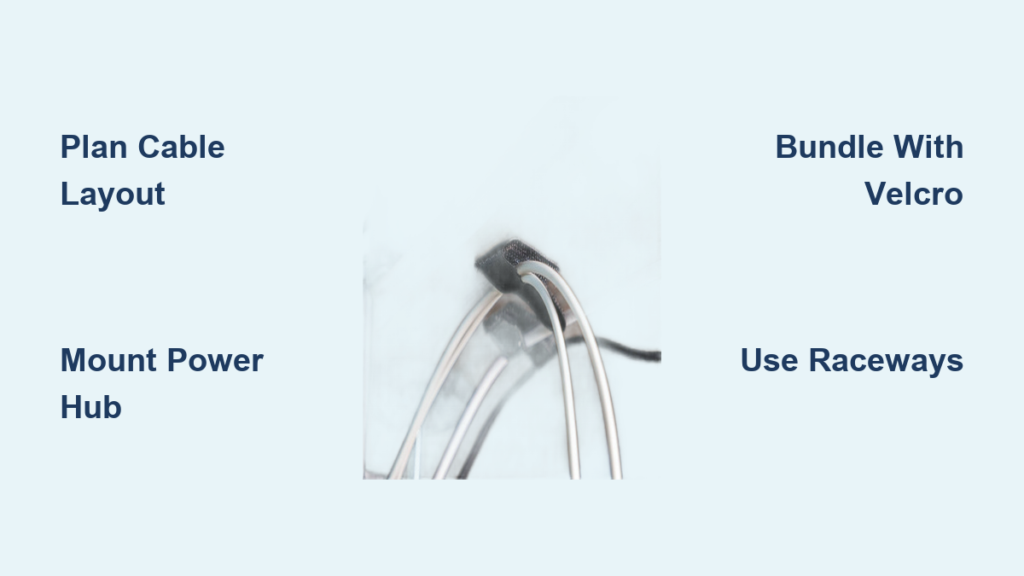
Use Velcro, Not Zip Ties
Zip ties look clean at first but make future changes painful. Use reusable Velcro cable ties or hook-and-loop wraps instead. They are just as tidy but easy to open and adjust.
Group cables by destination. All USB-C cables go to one bundle, HDMI to another. Color-code with different Velcro colors for quick identification.
Pro Tip: Use bread ties or twist ties temporarily to test bundle placement before finalizing your routing.
Install an Under-Desk Cable Tray
A metal mesh or fabric-covered tray mounted under the desk collects all cables and prevents dangling. Choose adjustable clamp trays for no-drill installation, or self-adhesive trays for temporary setups.
Place the tray along the back edge, just below the desktop, to catch all downward-routed cables. Match the tray color to your desk for low visibility.
Hide Vertical and Wall Runs
Even with a clean under-desk setup, the path from desk to wall can expose wires if not handled properly.
Run Cables Down Desk Legs
Use adhesive cable clips or zip tie mounts to secure cords along the back of desk legs. Stick them every six to eight inches to prevent sagging.
For a seamless look, paint J-channel raceways black and stick them to the leg. Feed all cables inside the channel for protected, invisible routing.
Use a Cable Spine for Sit-Stand Desks
If you have a height-adjustable desk, use a four-channel cable spine. It is flexible, expands and contracts with the desk, and prevents twisting during movement.
Avoid rigid PVC pipes because they can bind or disconnect when the desk moves up or down.
Try a Floor-to-Desk Solution
For desks in the middle of the room with no wall nearby, run cables under a rug with a slit. Use a leg-mounted surge protector near the outlet. Install a battery-powered USB hub to reduce plug count.
Renter-friendly tip: No drilling required. Use double-sided tape and modular raceways instead of permanent fixtures.
Conceal Behind Monitors and Equipment
Even a few inches of exposed cable behind your screen can ruin the clean aesthetic you have worked to create.
Use Monitor Arm Pass-Throughs
If you have a monitor arm, run HDMI, USB, and power cables through its internal channel. Most arms have a cable management slot. Use it.
Bundle cables with Velcro before threading through. Leave slight slack at the top for swiveling. Secure the bottom end to the desk or raceway.
Hide Cables Behind the Monitor
Place a tall plant, desk organizer, or stack of books behind the monitor to block the view. This creates a vignette, a styled scene that hides wires naturally.
Design hack: Even if cables are perfectly organized, the back of a monitor can look messy. Covering it improves the whole aesthetic.
Use Cable Sleeves and Raceways
For long horizontal runs or thick bundles, cable sleeves and raceways keep everything sleek and protected.
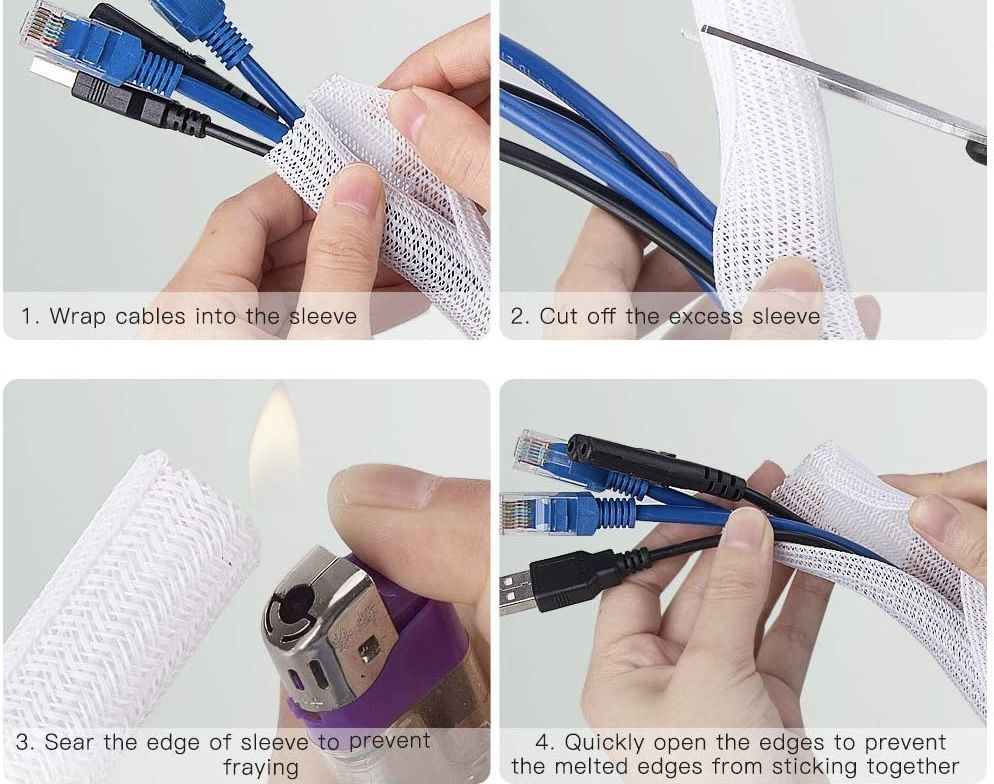
Wrap with Braided Sleeves
A split-sleeve wire loom bundles multiple cables into one smooth line. It is pet-proof and chew-resistant. The split design allows mid-run access without unwrapping everything.
Use it for power plus HDMI bundles, USB peripheral clusters, and audio cables.
Install J-Channel Raceways
J-channel raceways are self-adhesive, flexible for curves, and paintable for discretion. Stick them under the desk or along the back edge to create a protected path for all cables.
Pro Tip: Use server raceways, hollow tracks with removable lids, for maximum concealment and easy access whenever you need to modify your setup.
Store Excess and Upgrade Cables
Loose coils under the desk look messy. Tuck them away properly using dedicated storage solutions.
Tuck Slack into a Server Raceway
If you have extra cable length, coil it neatly and store it inside a server raceway or cable management box. These are like drawers for wires, hidden but accessible.
Use Right-Angle and Short Cables
Replace bulky, long cables with right-angle USB-C or HDMI cables that exit devices downward, not sideways. Order custom-length cables online to eliminate slack entirely.
Example: A right-angle USB-C cable on a MacBook prevents horizontal protrusion and makes routing behind monitors much easier.
Choose Aesthetic and Functional Accessories
Cable management does not have to look industrial. Blend it into your decor with stylish solutions.
Use Decorative Cable Boxes
Hide power strips and adapters in wooden or rattan boxes with slots for cords. These act like furniture, not tech clutter. Place them on the floor behind the desk or on a nearby shelf.
Match Colors to Your Desk
Choose black trays for dark desks, white for light ones. Use paintable raceways to blend with walls or baseboards.
Design tip: Keep exposed runs parallel to desk edges for a clean, intentional look.
Optimize for Different Desk Types
Not all desks are the same. Adjust your approach based on your specific setup.
Particle Board Desks
Avoid screws because they can split the material. Use 3M VHB or Dual Lock tape instead. Use clamp-mounted trays and self-adhesive raceways.
User-tested: Double-sided tape holds power strips firmly for years if not exposed to moisture.
Glass or Minimalist Desks
Use low-profile clips and color-matched sleeves. Avoid bulky trays. Consider floor-based solutions like cable boxes near baseboard, wall-mounted power stations, or floating shelves for routers and hubs.
Center-of-Room Desks
No wall nearby? Try rug-fed cables with slits, leg-mounted surge protectors, and wireless charging to reduce cord count. Avoid floor outlets unless you own your home.
Maintain and Future-Proof Your Setup
A clean desk today can become a mess in six months without regular maintenance.
Label Cables
Use colored rings or small tags to identify each cable. No more guessing which USB cord goes to your webcam.
Inspect Every Six Months
Check adhesive mounts for peeling. Check Velcro for wear. Check dust buildup in trays and sleeves. Clean with a dry microfiber cloth or compressed air.
Avoid Overloading Power Strips
Follow wattage limits. Use modular power strips with detachable cords for future upgrades.
Keep It Modular
Never glue or permanently fasten cables unless absolutely necessary. Use reclosable fasteners so you can swap devices easily.
Long-term win: One user kept their setup clean for three or more years by using only reusable, adjustable components.
Cost-Effective Setup Under $150
You do not need to spend a fortune. Here is a full pro-level kit for under $150.
| Item | Cost |
|---|---|
| Metal mesh under-desk tray | $25 |
| J-channel raceway six-pack | $20 |
| Velcro cable ties 100-pack | $12 |
| 3M Dual Lock tape | $12 |
| Adhesive zip tie mounts 100 pcs | $10 |
| Right-angle USB-C cable | $10 |
| USB-C power station | $35 |
| Braided cable sleeve 5 ft | $10 |
| Surge protector with USB | $25 |
| Total | $139 |
Everything listed is reusable, adjustable, and effective for years of clean desk performance.
Final Touches: Test and Refine
After installation, follow these final steps to ensure perfection.
First, plug in all devices and test monitors, audio, and charging functionality. Second, stand up and sit down to check for cable strain on sit-stand desks. Third, walk around the desk to ensure no wires are visible from normal angles. Fourth, tuck any bulges behind trays or into raceways. Fifth, adjust decor using a plant or tray to hide small gaps.
Real result: One user achieved a super clean desk where the only way to see a cable was to look for it on purpose.
Frequently Asked Questions About Hiding Cables on Desk
What is the easiest way to hide cables under a desk?
The easiest method is mounting an under-desk cable tray and using Velcro ties to bundle cables. Add adhesive clips along desk legs for vertical runs. This approach requires no drilling and takes under an hour.
How much does professional cable management cost?
A complete professional-grade setup costs approximately $130 to $150. This includes a cable tray, raceways, Velcro ties, mounting tape, and a surge protector with USB ports.
Can I hide cables without drilling?
Yes. Use 3M Dual Lock tape, self-adhesive raceways, clamp-mounted trays, and adhesive cable clips. These solutions work on rental-friendly surfaces and remove without damage.
What is the best cable management for sit-stand desks?
A four-channel cable spine is best for sit-stand desks. It flexes with the desk is movement, prevents twisting, and keeps all cables organized through the full height range.
How do I hide cables running across the floor?
Run cables under a rug with a small slit cut for the cord. Use a floor-based cable management box near the baseboard. Alternatively, use a leg-mounted surge protector to minimize floor runs.
Key Takeaways for Hiding Cables on Desk
Hiding cables on desk is not about perfection. It is about creating a workspace that feels calm, professional, and functional. Start with planning your device layout and measuring cable paths. Centralize your power with a mounted surge protector. Use Velcro ties instead of zip ties for reusability.
Invest in an under-desk cable tray and route vertical cables down desk legs with adhesive clips. For sit-stand desks, use a flexible cable spine. Match all accessories to your desk color for visual cohesion.
With under $150, a few hours of work, and the right tools, you can transform a chaotic setup into a streamlined command center. Focus on planning, modularity, and reusability, and you will enjoy a clean desk for years to come.


