
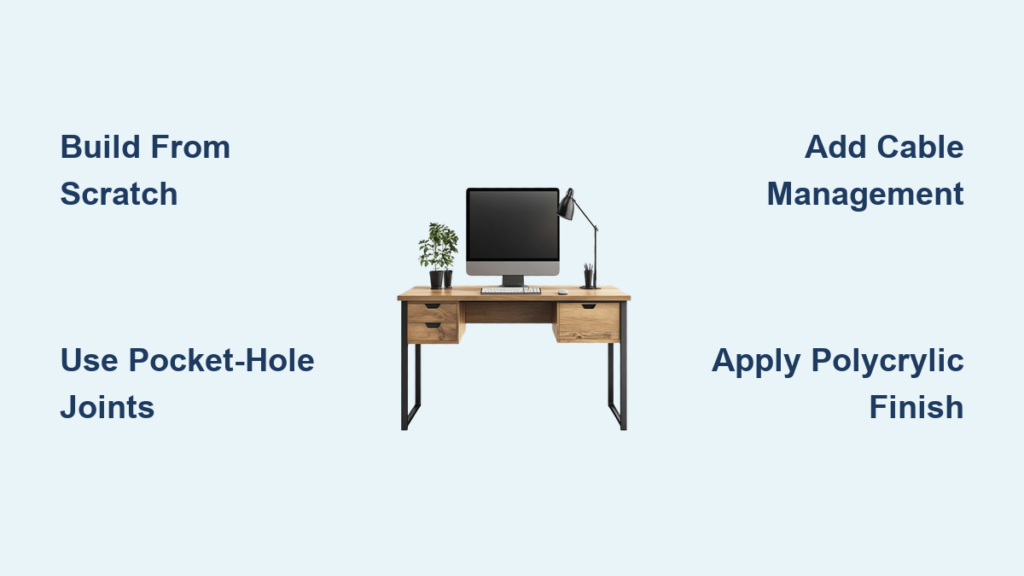
You’re tired of wobbly store-bought desks that can’t handle your dual monitors, tangled cables, and heavy workflow. What if you could build a custom computer desk that fits your space, style, and gear perfectly? With the right plan, tools, and materials, building your own desk isn’t just possible, it’s rewarding. This guide walks you through every step of how to build a computer desk from scratch, using proven techniques and real-world insights.
Whether you’re working with solid wood, plywood, or repurposed materials, this guide covers design, construction, finishing, and smart upgrades like cable management and keyboard trays. You’ll learn how to avoid common mistakes, choose affordable yet durable materials, and assemble a desk that lasts for years. No fluff, just actionable steps to get you building.
Design Your Custom Computer Desk for Ergonomics and Function
Plan Around How You Work
Build your desk around your actual workflow. Standard desk height is 30 inches, ideal for seated typing with elbows at 90 degrees. If you plan to stand while working, aim for 40 to 42 inches or install adjustable legs. Position your keyboard tray 4.5 inches below the desktop for neutral wrist posture.
Leave at least 24 inches of vertical clearance under the desk for your legs. For L-shaped or corner desks, ensure 36 inches or more of open floor space for chair movement.
Map Out Your Equipment
Determine where your monitor, CPU, printer, and peripherals will go before cutting any wood. Most users place the monitor front and center, with the CPU tucked to the side or mounted under the desk. If you have multiple monitors, extend the desktop width to 60 to 72 inches.
Include space for a pull-out keyboard tray, a drawer for accessories, and internal shelving for storage. Think about cable routing early. Drill holes in the desktop or frame to route power and data cables neatly.
Choose a Style That Lasts
Shaker-style desks offer timeless appeal with clean lines and frame-and-panel construction. Use ¾-inch plywood or solid wood for panels, and add thumbnail molding for a refined look. For modern or industrial styles, consider pipe legs or exposed joinery.
Build adjustable shelf-pin holes every 1 to 2 inches in cabinet sides. This lets you reconfigure shelves as your needs change over time.
Select the Best Materials for Your Budget

Solid Wood for a Premium Top
Use three 2×10 pine or beech boards glued edge-to-edge for a thick, sturdy desktop. Each board is 1.5 inches thick and 9.25 inches wide, yielding a final desktop about 2.5 inches thick and 27.75 inches wide. This provides plenty of room for monitors and gear.
Alternate the grain pattern when arranging boards to reduce warping. Let the wood acclimate for 48 hours before gluing. Cost runs about $35 for lumber. Finish with stain and polycrylic for durability.
Plywood: Budget-Friendly and Stable
¾-inch birch plywood is flat, stable, and cheaper than solid wood. It spans long distances without sagging and works well for L-shaped or floating desks. Hide raw edges with iron-on edge banding, then sand and stain to match the surface.
Watch for minor flex under heavy loads. Avoid placing 50 pounds or more in the center unless you add a center support beam.
When to Use MDF
18mm MDF is ultra-flat and perfect for painted finishes. It won’t warp and accepts paint evenly. However, it’s heavy, not moisture-resistant, and can’t be stained, only painted. MDF works best for desks in dry environments with a modern, minimalist finish.
Prefab and Repurposed Options
Consider these alternatives to reduce costs.
• Butcher block countertops: Buy pre-made 2-foot by 6-foot slabs for $150 to $250. No glue-up needed.
• IKEA desktops: Use their beech or pine tops as a base. Customize the legs and frame.
• Salvaged wood: Old tables, doors, or bed frames can be sanded and reused. Free or low-cost.
Gather Essential Tools for the Build
Core Tools You Must Have
A circular saw or table saw cuts boards to size. Use a guide for straight cuts. A drill or driver drives screws and pre-drills holes to prevent splitting. A pocket-hole jig, the Kreg 720 Pro recommended, creates strong, hidden joints essential for frames, cabinets, and drawers.
Clamps, either pipe or bar, hold boards tightly during glue-ups. An orbital sander with 80 to 220 grit smooths surfaces and blends seams. A router with a round-over bit softens desktop edges for comfort.
Helpful Add-On Tools
A planer or jointer flattens board edges for tight glue joints, though these are optional if using factory-edge boards. A shelf-pin jig drills evenly spaced holes for adjustable shelves. A concealed hinge jig ensures perfect alignment on cabinet doors. A hole saw with a 1-inch bit drills cable pass-throughs in the desktop.
Build Without a Workshop
Use pre-cut lumber from hardware stores and assemble with a hand saw plus power drill. You can even build a pipe desk using galvanized fittings and a spade bit. No advanced tools needed.
Construct a Solid Wood Desktop Step by Step
Step 1: Cut and Arrange Boards
Cut three 2×10s to 60 inches long. Lay them side by side, ensuring factory edges face down. Flip them so the best face is up. Arrange with alternating end-grain patterns to balance internal tension and reduce warping.
Step 2: Apply Glue and Clamp
Apply Titebond III waterproof wood glue to all mating edges. Spread evenly with a credit card. You want a thin, consistent layer. Clamp with pipe clamps every 12 to 16 inches. Tighten until glue squeezes out slightly. Wipe excess with a damp cloth.
Insert pocket-hole screws from the underside to pull joints tight and reinforce alignment. Use 2.5-inch screws, spaced every 8 to 10 inches.
Step 3: Let It Cure
Wait at least 2 hours before removing clamps. For full strength, cure overnight. Once dry, sand the surface flat with 80, then 120, then 220 grit. Focus on seams. Sanding removes minor height differences.
Apply the Perfect Finish to Your Desktop
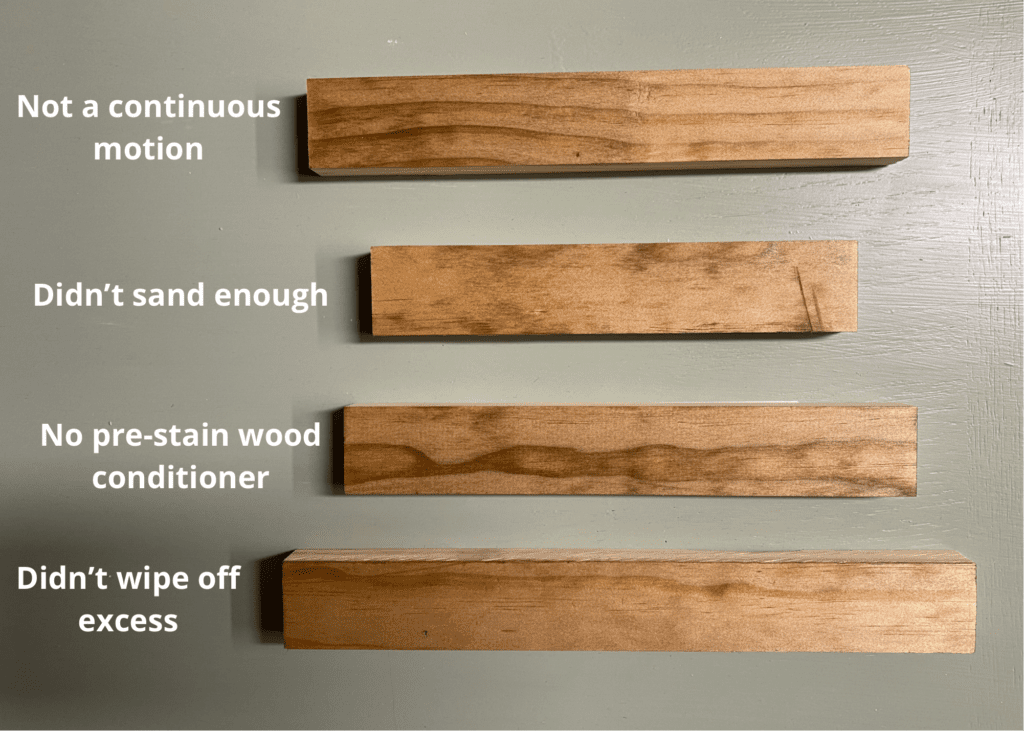
Stain Without Blotching
Pine is soft and porous. Skip pre-stain conditioner and you’ll get ugly blotches.
Apply Minwax Pre-Stain Conditioner evenly. Wait 15 minutes, then wipe off excess. Apply the first coat of espresso or dark walnut stain, wait 15 minutes, then wipe off. Let dry overnight. Apply a second coat for depth.
Seal for Durability
Use water-based polycrylic for a low-sheen, durable finish. It won’t yellow and cleans up with water. Apply 3 coats. Sand lightly with 220 grit between coats. Wipe with a tack cloth before each coat. Let cure 24 hours before use.
Prefer a natural look? Try tung oil. Apply 5 or more coats, letting dry 24 hours between. It’s softer than poly but enhances grain beautifully.
Build a Sturdy Frame and Legs
Make Strong Legs
Cut 2×4s to 32 inches. Glue two together to form a 3-inch by 3.5-inch post. Clamp and cure overnight. Trim edges on a table saw to make a 3-inch square leg. For style, taper the bottom 6 inches at a 60-degree angle on a miter saw.
Attach legs to the frame or directly to the desktop using metal flanges or pocket screws.
Assemble Side Panels
Cut ¾-inch plywood to 30 inches high by 24 inches wide for side panels. Reinforce with 2×2 framing along the edges using pocket screws. Use the Kreg jig’s wings to support large panels during drilling. This prevents tear-out and keeps the panel flat.
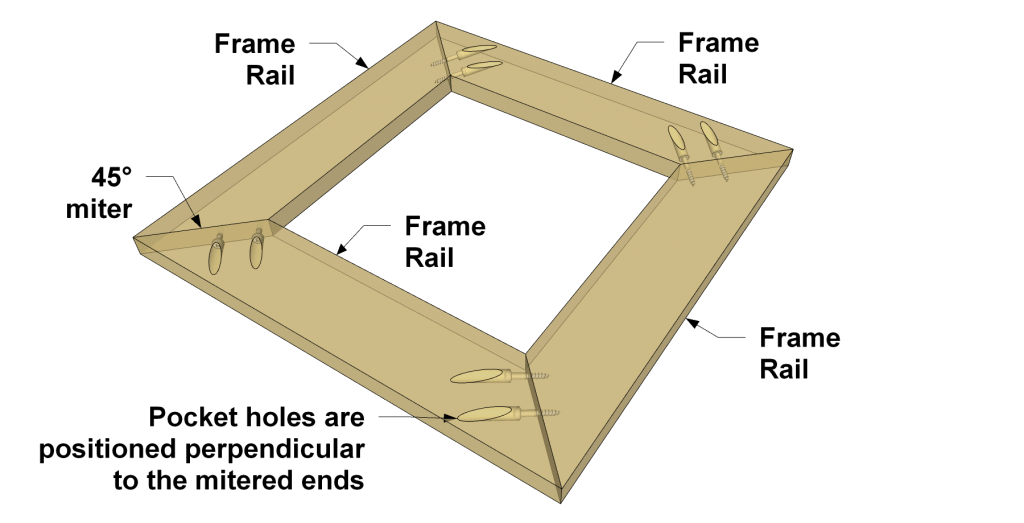
Add Stretchers for Stability
Install 2×4 stretchers between legs at the front and back. This ties the frame together and prevents racking. Use pocket-hole screws at 90-degree angles for maximum strength.
Add Storage Solutions and Keyboard Trays
Build a Pull-Out Keyboard Tray
Cut a ¾-inch plywood tray to fit between legs, typically 20 inches by 12 inches. Attach 16-inch ball-bearing drawer slides to mounting blocks screwed between legs. Set the tray bottom 4.5 inches below the desktop. Mount a full-overlay drawer front with a concealed hinge for a seamless look. Use soft-close slides to prevent slamming.
Add Drawers and Cabinets
Build drawer boxes with ¼-inch plywood bottoms in dado grooves. Assemble sides with pocket screws. Install 16-inch full-extension ball-bearing slides. For cabinet doors, use ¾-inch plywood or solid wood. Mount with concealed hinges for a clean finish.
For thick doors with molding, use pivot hinges mounted on the outer edge. Drill a 5/8-inch hole, tap in the bushing, and test fit.
Include Adjustable Shelving
Drill 3/8-inch shelf-pin holes every 2 inches in cabinet sides using a shelf-pin jig. Insert pins and add shelves as needed.
Install Cable Management Systems
Drill Cable Pass-Throughs
Use a 1-inch spade bit to drill holes in the desktop near the back edge. Place one hole near the monitor, another near the CPU. For a hidden look, drill from the back panel into the desktop cavity.
Install a Back Panel
Cut ¼-inch plywood to 6 inches high by desk width. Attach vertically behind the desktop. Drill multiple holes for power strips, monitor cables, and Ethernet. Route all cords through this panel. Label cables with tags or colored tape for easy identification.
Smart Upgrades and Custom Features
Add LED Lighting
Install USB-powered LED strips under the front edge of the desktop for ambient lighting. Use adhesive-backed strips. No wiring needed. Place under shelves or inside cabinets for task lighting.
Build a Monitor Stand
Attach a 12-inch by 24-inch shelf 4 to 6 inches above the desktop for elevated monitors. This keeps eyes level and frees up desk space. Use L-brackets or build into the cabinet frame.
Go Corner or L-Shaped
Use Kee Klamp fittings or mitered corners to join two desks at 90 degrees. Great for small rooms. Use a 6-foot by 2-foot top for the main side and a 4-foot by 2-foot for the return. Support the joint with a corner brace.
Understand the Costs and Value
What You’ll Spend
The total cost for a full build ranges from $150 to $250. Solid wood for the desktop costs about $35. Birch plywood runs $50. Pocket screws and glue add $15. Stain and polycrylic run $20. Drawer slides and hinges cost $35. Pre-made legs or pipe fittings add $40.
Reality Check
You won’t save money compared to an IKEA desk, which runs $100 to $150. But you gain custom size, durability, and pride in craftsmanship. Best value comes from refinishing a used desk or using salvaged wood. This cuts costs to under $100.
Avoid These Common Building Mistakes
These errors can ruin your project.
• Skipping pre-stain conditioner leads to blotchy finish on pine.
• Not using clamps during glue-up causes warped or uneven desktop.
• Forgetting cable holes creates a tangled mess you can’t fix.
• Over-tightening pocket screws strips the wood.
• Not testing drawer slide height means the tray hits the floor.
Dry-fit everything before gluing. Check alignment, clearance, and operation.
Final Touches That Matter
Sand all edges smooth with no splinters. Wipe with tack cloth before finishing. Install brass knobs for Shaker style or sleek pulls for modern. Level the desk on uneven floors using adjustable leg caps. Add felt pads under legs to protect flooring.
Frequently Asked Questions About Building a Computer Desk
What is the best wood for a DIY computer desk?
Pine or birch plywood offers the best balance of cost and durability. Pine is affordable and takes stain well with pre-conditioner. Birch plywood is stable and flat. Hardwoods like oak or walnut cost more but provide premium looks and durability.
How tall should a computer desk be?
Standard height is 30 inches for seated use. For standing desks, aim for 40 to 42 inches. The keyboard tray should sit 4.5 inches below the desktop for proper ergonomics.
Can I build a desk with basic tools?
Yes. A hand saw, power drill, and pocket-hole jig can complete a basic build. Pre-cut lumber from hardware stores eliminates the need for a saw. Pipe desks require only a drill and spade bit.
How long does it take to build a computer desk?
A basic desk takes one weekend. Complex builds with drawers and cabinets take two weekends. Allow extra drying time for glue and finish. Plan for 2 to 4 hours of actual building time for simple projects.
Is building a desk cheaper than buying one?
Not necessarily. Basic IKEA desks cost $100 to $150. A custom build runs $150 to $250. You save money only if using salvaged materials or refinishing a used desk. The real value lies in custom sizing and craftsmanship.
How do I prevent my desktop from warping?
Alternate grain patterns when gluing boards. Let wood acclimate 48 hours before building. Use pocket-hole screws for reinforcement. Apply a proper finish to seal all surfaces. Keep the desk away from direct sunlight and extreme humidity.
Key Takeaways for Building Your Perfect Computer Desk
Building a computer desk isn’t about saving money. It’s about creating a workspace that fits you perfectly. With solid wood, smart storage, and clean cable management, your DIY desk will outlast any flat-pack alternative.
Start with a clear design that prioritizes ergonomics. Choose materials that match your budget and skill level. A solid wood top from three 2×10 boards costs about $35 and looks premium. Use pocket-hole joinery for strong, invisible joints. Apply pre-stain conditioner before staining softwoods.
Take your time with the finish. Three coats of polycrylic protect your work for years. Add cable management early. Drill pass-through holes before assembly. A back panel keeps cables hidden and accessible.
Use the right tools. A pocket-hole jig transforms your results. Clamps ensure flat glue-ups. An orbital sander preps surfaces for finishing.
Start simple, use the right tools, and take pride in every joint. In a weekend, you’ll have a desk that’s not just functional, but uniquely yours.


