
Is your desk lamp not working when you need it most? You are not alone. Whether it is a plug-in, USB-powered, or cordless model, desk lamps can fail for a variety of reasons, from simple bulb burnout to hidden circuit faults. The good news: most issues are fixable with basic tools and a methodical approach.
This guide walks you through every step to diagnose and repair a non-working desk lamp. You will learn how to test power sources, inspect switches, find broken wires, and troubleshoot advanced electronic failures like flickering LEDs or mysterious shorts. No guesswork. Just proven steps that restore function fast.
Test the Power Source First
Before opening the lamp, confirm it is not just a power supply issue. Many dead lamps are actually starved of electricity due to faulty outlets, cables, or batteries.
Check Wall Outlet Function
Plug in another device like a phone charger or small fan to verify the outlet works. If nothing powers on, try these steps:
• Reset the circuit breaker
• Test nearby GFCI outlets, which are common in offices and bedrooms
• Avoid extension cords during testing; plug directly into the wall
A dead outlet is more common than you think, especially in older buildings.
Verify USB Power Supply
For USB-powered lamps, use a known-working wall adapter and cable. Test across multiple sources like a laptop USB port, power bank, or phone charger. Measure output voltage with a multimeter:
• 5.0V plus or minus 0.25V means the supply is good
• Fluctuating or low voltage indicates a faulty supply
Warning: Cheap USB adapters often fail silently. Even if the light flickers, unstable voltage can mimic internal lamp failure.
Confirm Battery Charge Status
Cordless lamps may show a charged indicator but still not turn on. This usually points to internal hardware issues. To rule out battery problems:
• Charge using a different cable and power source
• Cross-test the charging cable with another device
• Measure battery voltage with a multimeter if accessible. Typical range is 3.7V to 4.2V for lithium-ion batteries
User clue: When someone says “It is charged. We have others. This never happened before,” it suggests sudden failure despite proper charging, which is a red flag for internal disconnection or short circuit, not battery fault.
Replace or Test the Bulb

A burned-out bulb is the easiest and most common cause of lamp failure.
Swap with a Known-Good Bulb
For lamps with replaceable bulbs, use an identical type and ensure wattage and base size match, such as E26 or GU10. If the lamp still does not work after replacement, the problem lies beyond the bulb.
Inspect Non-Replaceable LED Modules
Many modern lamps use built-in LED arrays. These rarely fail entirely, but individual LEDs or solder joints can fail. Look for:
• Dark spots on the LED strip
• Burnt or discolored areas on the circuit board
• Cracked or lifted solder pads
Use a multimeter in continuity mode to test LED segments by touching probes to input pads and powering the lamp briefly. A working LED will light dimly or register continuity. No response means the issue is likely upstream in the switch, wiring, or power regulation.
Diagnose the Switch Mechanism
Faulty switches are a top cause of lamp failure. They wear out over time, especially in frequently used lamps.
Test Mechanical Switches
Common types include rocker, push-button, and toggle switches. Follow these steps:
- Unplug the lamp
- Open the base by removing screws under rubber feet or labels
- Locate the switch and disconnect wires
- Set multimeter to continuity or ohms
- Touch probes to switch terminals
- Press the switch
A reading that changes from infinite ohms to approximately 0 ohms means the switch works. No change indicates a dead switch that needs replacement.
Pro find: A common failure is a disconnected brown neutral wire at the switch terminal. This breaks the circuit completely, mimicking a dead bulb or power issue.
Troubleshoot Soft-Touch and Electronic Buttons
Advanced LED lamps use capacitive or membrane buttons tied to a control PCB. Symptoms of failure include no response to touch, flickering without input, or only one brightness level working. To test:
• Manually bridge the button contact points on the PCB with a metal tool
• Use tweezers to short the two pads where the button connects
If the lamp turns on or changes mode when bridged, the buttons or PCB traces are faulty. Inspect for cracked solder joints under the button area.
Expert tip: Manually grounding the brightness pin activated the lamp, which proves the driver works but the input signal is missing due to failed switch or trace.
Inspect Socket and Electrical Contacts
Even with a good bulb and power, poor contact prevents the lamp from lighting.
Examine Center Contact and Shell
In screw-base sockets, the center pin must spring up to touch the bulb base, and the outer shell must be clean and tight. Fixes include:
• Cleaning corrosion with isopropyl alcohol and cotton swab
• Bending the center contact slightly upward if flattened
• Ensuring no loose wires behind the socket
Visual cue: If the bulb wobbles or does not seat firmly, the socket may be damaged internally and require disassembly for repair.
Check Internal Wiring Connections
Loose or broken wires are a frequent culprit, especially at stress points near the base or switch.
Open the Base Safely
Follow these steps:
- Unplug or remove battery
- Flip the lamp over
- Remove screws under rubber feet or labels, usually three screws
- Gently pry apart the housing. Some models use adhesive, so tap lightly to break the seal
Pro tip: Take photos before disconnecting any wires and label them if needed.
Look for Disconnected Wires
Inspect all connections at the switch, socket, and power input. A common failure is a brown neutral wire detached from the switch terminal, which kills the circuit entirely. Fix this with solder:
- Strip wire end and clean terminal
- Apply flux
- Heat terminal and apply rosin-core solder
- Let cool, then insulate with heat shrink tubing or electrical tape
Repair result: One user restored full function by resoldering a single loose wire, with no parts cost and just ten minutes of work.
Fix Power Supply and Voltage Issues
Flickering, unstable brightness, or no power may stem from voltage regulation circuit problems.
Measure Output Voltage Under Load
Use a multimeter by connecting probes to power input lines on the PCB and reading the voltage while the lamp is on. Expected output is 12V DC for most LED lamps with a stable reading within plus or minus 5%. Fluctuating voltage like 13V to 3V to 15V indicates the power supply unit or regulator is failing.
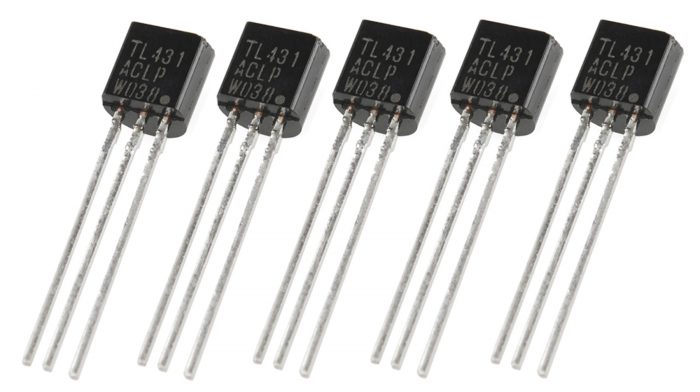
Replace Faulty TL431A Regulator
The TL431A is a programmable Zener diode used in feedback circuits to stabilize output voltage. Signs of failure include flickering light, output voltage too high or low, and an 8-ohm short reading on the PCB. To replace:
- Identify the TL431A, which looks like a transistor. Check pinout for cathode, reference, and anode
- Desolder carefully
- Install a new TL431A
- Re-test voltage
Success case: After replacement, output stabilized at 12V, flickering stopped, and controls worked normally.
Find and Fix Hidden PCB Shorts
Some faults are elusive, like intermittent shorts that vanish when you touch the board.
Identify an 8-Ohm Short
During testing, a reading of approximately 8 ohms between power lines suggests a short. Steps to isolate include removing components one by one like the regulator and capacitor, then re-measuring resistance after each removal. If the short persists, suspect a PCB trace fault or hidden IC failure.
Use Physical Manipulation to Reveal Faults
Gently wiggle pins and components while measuring resistance.
Key discovery: The 8-ohm short vanished after lifting the regulator pins, and resistance jumped to 116 ohms with output stabilizing at 4.9V. This proves the fault was a cracked solder joint or cold connection, not a dead component. Fix this by reflowing solder on all pins, inspecting for hairline cracks in traces, and re-soldering suspect joints.
Follow Safe Repair Procedures
Avoid creating new problems by using correct techniques and tools.
Disassemble with Care
- Unplug or remove battery
- Remove base screws
- Separate housing gently
- Label and photograph all connections before disconnecting
Note: Some lamps use adhesive. Do not force it. Tap the seam lightly with a rubber mallet or use a plastic pry tool.
Solder Like a Pro
For lasting repairs, use a temperature-controlled iron at approximately 350 degrees Celsius. Apply flux to improve solder flow and aim for shiny, cone-shaped joints. Avoid cold joints that appear dull or cracked. Insulate all repaired connections using heat shrink tubing for the best results or electrical tape as a temporary fix.
Reassemble and Test Fully
Never skip final verification.
Power Up Safely
- Reconnect all wires
- Temporarily close housing with tape
- Plug in or charge
- Watch for smoke, heat, or sparks. Cut power immediately if seen
Test All Functions
Test the on/off switch, brightness controls, color temperature if applicable, and charging indicator for cordless models. Let the lamp run for 15 minutes to catch thermal-related failures.
Seal the Housing
Once confirmed working, apply epoxy or strong adhesive if the original seal was glued, reinstall screws, and replace rubber feet.
Prevent Future Failures
Keep your lamp running longer with simple maintenance.
Clean Contacts Annually
Use isopropyl alcohol and cotton swab to clean the bulb socket, switch contacts, and charging port for cordless models.
Avoid On/Off Overuse
Frequent switching wears out mechanical switches. Turn off only when necessary.
Use Surge Protection
Plug AC lamps into a surge protector, especially during storms or in older buildings.
Store Batteries Properly
For cordless lamps not used for weeks, charge to 40% to 60%, store in a cool dry place, and recharge every three months.
Inspect Cables Regularly
Look for fraying, kinks, or exposed wires. Replace damaged cables immediately.
Frequently Asked Questions About Desk Lamp Repair
Why does my desk lamp not turn on even after replacing the bulb?
If bulb replacement does not fix the problem, the issue likely lies in the power delivery system. Test the outlet or USB power source first, then check the switch for continuity with a multimeter. Loose or disconnected wires inside the base are also common culprits.
How do I test if my USB desk lamp power adapter is working?
Use a multimeter to measure voltage output. For USB, expect 5.0V plus or minus 0.25V. If voltage fluctuates or reads low, the adapter is faulty. Test with a known-good adapter to confirm before replacing the lamp.
Can a desk lamp be repaired if the switch is broken?
Yes. Most desk lamp switches can be tested with a multimeter for continuity. If the switch fails the test, it can be replaced with an identical type. Mechanical switches like rockers and toggles are inexpensive and widely available.
What causes a cordless desk lamp to stop working even when fully charged?
A cordless lamp that shows full charge but will not turn on typically has an internal hardware fault. This could be a disconnected wire, failed switch, or short circuit in the internal circuitry. Open the base and inspect all connections to diagnose the issue.
How do I fix flickering LED desk lamp lights?
Flickering is usually caused by unstable voltage from the power supply or faulty voltage regulator. Measure the output voltage with a multimeter under load. If it fluctuates, the TL431A regulator may need replacement. Also check for cold solder joints or cracked traces on the PCB.
Is it worth repairing an old desk lamp or should I replace it?
Most desk lamp repairs cost less than $5 in parts and take under 30 minutes. If the lamp has sentimental value or a design you prefer, repair is worthwhile. Simple issues like bad switches, loose wires, or burned-out bulbs are always worth fixing before considering replacement.
Key Takeaways for Fixing Your Desk Lamp
When your desk lamp is not working, follow this fast-action checklist. Test the outlet, cable, or battery first to rule out power issues. Swap the bulb as the easiest fix. Check the switch using a multimeter for continuity. Inspect wiring, especially the neutral brown wire at terminals. Clean socket contacts to restore connection pressure. Measure voltage to ensure stable input of 5V or 12V. Replace the TL431A regulator if flickering or unstable output occurs. Find hidden shorts by wiggling pins and reflowing solder joints. Reassemble and test all functions before sealing the housing.
Most desk lamp repairs take under 30 minutes and cost nothing but your time. With this guide, you are equipped to fix any model, whether plug-in, USB, or cordless, and keep the light on when you need it most.


