
You’ve spent hours researching standing desks, only to find that off-the-shelf models don’t match your space, style, or budget. What if you could build a desk that rises and lowers at the touch of a button, fits perfectly in your home office, and supports all your gear, all while saving hundreds? Building your own adjustable standing desk is not only possible, it’s practical if you follow the right blueprint.
This guide covers everything you need to know. You’ll learn how to select the right motorized frame, sync actuators properly, build a flawless desktop, and integrate sleek finishes. Whether you’re a woodworker, tinkerer, or tech-savvy DIYer, this step-by-step process walks you through creating a professional-grade sit-stand desk tailored to your height and workflow.
Choose Your Build Strategy Based on Skill Level
Your path depends on skill level, budget, and how much control you want over the final product. Selecting the right approach upfront prevents costly mistakes and wasted time.
Beginners should avoid full custom mechanical systems. Instead, buy a motorized desk frame and attach a custom top. This approach guarantees stability, smooth motion, and safety. Brands like iMovR, Desky, or FlexiSpot offer reliable dual-motor frames with height memory and anti-collision features.
Intermediate builders can customize further by designing leg enclosures, adding cable management, or integrating lighting. Advanced users may attempt a DIY linear actuator system, but expect challenges with synchronization and structural rigidity.
A pre-built frame with a handmade desktop delivers 90% of the customization at 50% of the risk. This is the smartest starting point for most builders.
Building from scratch often costs more than expected. Motors, actuators, power supplies, and materials add up fast. Standing desk converters cost $100 to $300 and sit on your current desk for fast setup, though stability is limited. Refurbished sit-stand frames cost $200 to $400 and offer reliable, tested performance with warranty. Frame-only plus custom top costs $250 to $800 and provides the best balance of cost, performance, and personalization.
The Lander Lite Base costs $249. Pair it with a $150 walnut top for a total under $450. Comparable retail desks start at $800.
Design With Ergonomics in Mind
A desk that looks great but hurts your back isn’t worth building. Start with human-centered design to ensure your finished desk supports healthy posture throughout the day.
Your desk must support both seated and standing postures without strain. Seated height should be 71 to 76 cm (28 to 30 inches) with elbows forming a 90-degree angle when typing. Standing height should be approximately 5 to 10 cm below elbow height. For a 175 cm (5’9″) person, this is 107 to 112 cm (42 to 44 inches). Aim for an adjustable range of 61 cm (24 inches) to 122 cm (48 inches) to accommodate all users and tasks.
Measure your elbow height while standing barefoot. That’s your target standing desk height.
Size matters. Too small limits function, too deep strains your reach. Single monitor setups work well with 60-inch width by 30-inch depth. Dual monitors and peripheral-heavy setups need 72-inch width by 30-inch depth. L-shaped corner desks should measure 72 by 48 inches on the L-leg.
Avoid depths over 30 inches (76 cm) unless using a keyboard tray. Anything deeper forces you to stretch, increasing shoulder fatigue.
Select the Right Height Adjustment System
The mechanism determines reliability, noise, and ease of use. Choosing wisely upfront saves headaches later.
Electric motorized systems suit daily sit-stand switching well, though cost and wiring complexity can be drawbacks. Manual crank systems work for budget builds and low-tech users, but the slow operation inconveniences many. Acme screw plus chain systems suit custom engineered builds but require precision machining. Desktop converters work for renters and temporary setups, though stability and height range are limited.
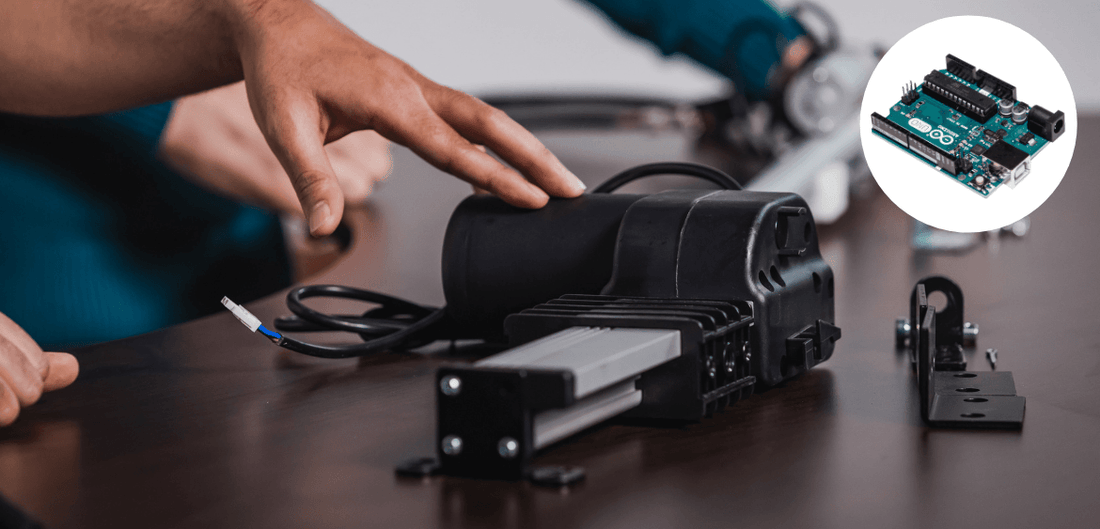
Off-the-shelf linear actuators rarely stay synchronized without correction. Even identical motors wear differently, causing one side to lift faster over time and creating dangerous tilt.
Simple solutions exist for actuator drift. Reset-to-bottom protocol requires always lowering fully before raising to re-home both actuators. Mercury switch plus relays use analog tilt detection to cut power to the leading side. Digital leveling with Arduino or ESP32 uses an MPU6050 gyro sensor to detect imbalance and adjust motor run time after button release.
Closed hydraulic systems like SUSPA MOVOTEC are pro-grade options. They’re self-synchronizing with no electronics needed and appear in high-end commercial desks. If building from scratch, invest in synchronized lift columns or implement auto-leveling.
Build a Stable Frame and Base

Stability isn’t optional. A wobbly desk damages equipment and discourages use. Taking time on the foundation pays off for years.
Two-leg frames are prone to side-to-side sway. Four-leg or U-shaped bases distribute weight evenly and resist tipping. Increase pedestal depth to reduce front-to-back rocking. Install a 2-by-6 horizontal stretcher bar between legs using pocket screws to prevent lateral movement.
Telescoping legs need smooth internal motion. Line inner tubes with UHMW tape (ultra-high molecular weight polyethylene tape) to reduce friction and play. Use nylon set screws to allow micro-adjustments as components wear. Apply dry PTFE or silicone spray every 3 to 6 months for lubrication.
One builder reported only 3 inches of tube overlap at full height, causing dangerous rocking. Ensure minimum 4 to 6 inches of overlap at max extension.
Construct a Flawless Custom Desktop
Your desktop defines the look and feel of the entire build. Choosing the right material and proper construction techniques ensure a result you’ll be proud of.
Baltic birch plywood offers flat, stable, and affordable construction, though edge treatment is required. Solid wood like cherry or walnut provides beautiful grain and durability but needs flattening and costs more. MDF is smooth and paint-ready but heavy and swells with moisture. Bamboo is eco-friendly and hard but has limited thickness options. Tempered glass offers a modern look but is expensive and fragile.
Avoid particle board. It sags under load and fails with repeated adjustments.
Large desktops require gluing multiple boards. Warped or uneven stock ruins the result. Build a 5-foot planer sled from 3/4-inch Baltic birch to flatten boards. Temporarily secure boards with hot glue and shims. Run through planer to flatten both faces. Use track saw plus guide rail to cut straight edges. Join with Domino, biscuits, or dowels, alternating grain direction.
Clamp tightly and let glue cure 24 hours under pressure.
Solid wood expands and contracts with humidity. Attach 1-by-2 pine boards with glue, brad nails, and clamps for edge banding, mitering corners. Glue and screw triangular backer blocks under trim joints. Drill 1/4-inch clearance holes in desktop and use washer-head screws (1-5/8 inches) to allow movement.
Never rigidly glue the desktop to the frame. It will crack over time.
Wire the Electrical System Safely

A poorly wired desk is a fire hazard. Plan carefully and test everything before final assembly.
Actuators typically require 12 VDC with 18-inch stroke and 600 lb capacity per leg. Use a 12 VDC power supply with 8 to 10A to support dual motors. Use 14 to 16 AWG stranded wire for low-voltage runs.
Use a momentary DPDT (dual-pole, dual-throw) center-off switch to control up and down motion. Center position provides off with no power. Up position reverses polarity to raise actuators. Down position reverses again to lower.
Mount the switch in a small wooden enclosure under the desktop within easy reach and clear of obstructions. Use quick-connect terminals for modular wiring. Route cables beneath desk using Velcro ties or nylon webbing.
Test first with a multimeter to verify polarity changes before connecting motors.
Add Functional Upgrades
Turn a basic desk into a productivity hub with smart additions that improve daily workflow.
Build a keyboard drawer from scrap wood with 14-inch full-extension slides. Create 13-inch wide cubby compartments for laptops, notebooks, or baskets. Use clamp-on dual monitor arms to free up space and improve ergonomics.
Manage cables with a rear cable tray mounted along the back edge to route monitor, USB, and power cables. Bundle vertical drops neatly with braided sleeves. Secure power strips and UPS units with under-desk straps using nylon webbing.
3D-printed brackets using carbon-fiber ASA provide lightweight, strong mounts for audio interfaces and other gear.
Finish With Professional Trim and Color
Great function deserves great form. The right finish transforms a DIY project into a professional piece.
Cut parallel grooves with table saw at 1/3 blade height to create fluted plywood. Glue to leg enclosures for decorative detail. Alternatively, use 2-1/4-inch fluted casing from home improvement stores. Miter corners for seamless joints.
Sand to 220 grit and wipe with tack cloth before staining. Use dye stain like Super Black India ink for bold contrast or cinnamon dye for warmth on softwoods to prevent blotchiness. Spray shellac first to lock in dye, then apply 3 coats of wipe-on polyurethane on desktop and 2 coats elsewhere. Avoid bubbles by using foam roller plus brush.
Assemble and Test Thoroughly
Final integration ensures safety and performance. Rushing this step leads to problems later.
Align desktop with support frame. Insert 1-5/8-inch washer-head screws through 1/4-inch clearance holes. Reattach center stretcher bar. Do not over-tighten. Allow slight float.
Cycle desk from lowest to highest position 5 times. Watch for uneven lifting, binding in legs, wire pinching, and switch responsiveness.
Pass criteria include smooth, quiet operation, automatic stop at limits, and level surface at all heights.
Maintain for Long-Term Reliability
A DIY desk lasts years if maintained properly. Neglect leads to premature wear and costly repairs.
Check bolt tightness on legs, stretcher, and motor mounts monthly. Inspect wiring for fraying or heat damage. Lubricate telescoping tubes with dry PTFE spray every 3 to 6 months. Clean under desk to prevent dust buildup.
Use quick-connects and modular wiring so actuators can be replaced in minutes if needed.
Budget and Space-Saving Alternatives
Not ready for a full build? These options provide standing desk benefits without major construction.
IKEA LACK or LINNMON tops with risers cost under $22 for a quick upgrade. Add anti-slip pads for stability. Books or bins work for temporary height but avoid for daily use due to instability.
Wall-mounted fold-down desks work well in apartments and can be motorized. Kitchen counters with monitor risers provide standing height. Pair with anti-fatigue mat and portable monitor arm for comfort.
Key Takeaways for Building Your Standing Desk
Building an adjustable standing desk is a rewarding project. Success lies in smart component choices rather than reinventing the wheel.
Start with a pre-built motorized frame unless you’re engineering-savvy. Use closed hydraulic or auto-leveling systems to prevent drift. Build desktop from Baltic birch or solid wood, flattened and joined properly. Allow for wood movement with floating screws and clearance holes. Wire with DPDT switch plus quick-connects for safety and serviceability. Finish with dye stain plus polyurethane for durability and beauty. Test thoroughly and maintain monthly.
A well-built DIY standing desk can outperform commercial models in stability, size, and customization, all for less than half the price.
Frequently Asked Questions About Building a Standing Desk
What is the best height adjustment system for a DIY standing desk?
The best system depends on your skill level. Beginners should use pre-built motorized desk frames (available from iMovR, Desky, or FlexiSpot) paired with a custom desktop. These frames include synchronized lift columns and come with warranties. Advanced builders can attempt DIY linear actuators but must implement auto-leveling circuits to prevent drift.
How much does it cost to build a standing desk yourself?
A quality DIY build costs $250 to $800 depending on components. A frame-only (like Lander Lite Base at $249) plus a custom desktop (around $150 for walnut) totals approximately $400. This compares favorably to commercial desks starting at $800 or more with similar or inferior specifications.
What causes standing desk instability and how do you fix it?
Instability comes from insufficient telescoping tube overlap, narrow base, or poor bracing. Fix it by ensuring 4 to 6 inches of tube overlap at maximum height. Use four-leg or U-frame designs. Install stretcher bars between legs. Line telescoping tubes with UHMW tape to reduce friction and play.
How do you synchronize dual actuators on a standing desk?
Actuators drift over time because identical motors wear differently. Solutions include reset-to-bottom protocol (always lower fully before raising), mercury switch plus relays for analog tilt detection, or digital auto-leveling using Arduino with MPU6050 gyro sensor. Closed hydraulic systems like SUSPA MOVOTEC are self-synchronizing and require no electronics.
What materials work best for standing desk desktops?
Baltic birch plywood offers the best balance of stability, flatness, and cost. Solid wood (cherry, walnut) provides premium appearance but costs more and requires flattening. Avoid particle board, which sags under load. Tempered glass offers a modern look but is expensive and fragile.
How do you maintain a DIY standing desk for long-term use?
Perform monthly maintenance checks. Tighten bolts on legs, stretcher, and motor mounts. Inspect wiring for fraying or heat damage. Lubricate telescoping tubes with dry PTFE spray every 3 to 6 months. Clean under desk to prevent dust buildup. Use quick-connect wiring for easy actuator replacement when needed.


