You’ve found the perfect desktop, but now you need legs that match its quality. Learning how to build desk legs gives you control over strength, style, and cost. This guide covers everything from material selection and precise joinery to professional finishing techniques. You’ll avoid the wobble that plagues cheap store-bought legs and create a foundation that lasts for years.
Whether you prefer sleek trapezoidal shapes, rustic X-braced frames, or industrial pipe legs, this step-by-step approach walks you through each phase. By the end, you’ll know exactly how to build desk legs that complement your workspace and withstand daily use.
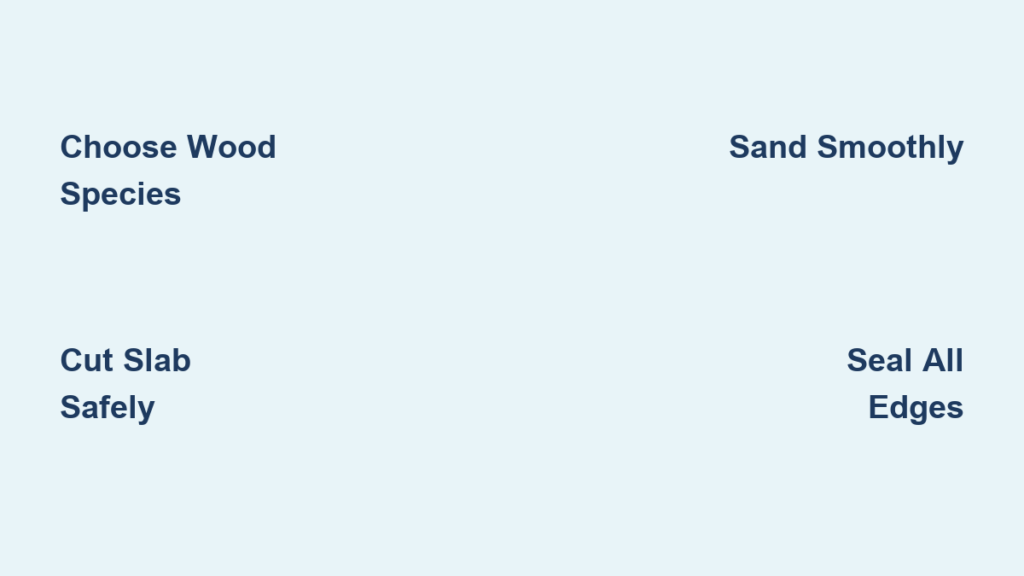
Plan Your Desk Leg Design for Function and Style
Your leg design should directly match how you use your desk. Trapezoidal legs offer clean modern lines and moderate stability, perfect for small home offices. X-legs add bold character and excellent lateral strength, ideal for long desks or standing-height models. Tapered wood legs bring elegance and visual lightness, while pipe or hairpin legs deliver industrial flair with minimal bulk.
Match Leg Style to Your Desktop
Pair your leg choice with your desktop material for a cohesive look. Butcher block tops pair well with black metal legs or matching walnut wood legs. Painted MDF works with bold colors or contrasting shapes. Glass or acrylic desktops require minimal, transparent, or ultra-thin supports to avoid visual clutter.
Calculate Correct Leg Height
Standard desk height ranges from 28 to 30 inches. Subtract your desktop thickness from your target height to find the right leg length. For example, if you want 28 inches total and have a 1.5-inch thick top, cut legs to 26.5 inches. Always measure twice and use a long level once assembled to confirm all corners are even.
Scale Support to Desk Size
Wider desks need stronger support systems. For desks under 48 inches wide, four standard legs work well. For 48 to 60 inches, add cross-braces or aprons between legs. For desks over 60 inches, include a central support leg or X-bracing to prevent sagging. Front overhang should be 1 to 2 inches for knee clearance and balanced proportions.
Select the Right Materials for Your Build
Material choice determines both the appearance and durability of your desk legs. Hardwoods offer the best combination of strength and beauty, while metals provide industrial strength with minimal visual weight.
Choose Hardwood for Long-Term Durability
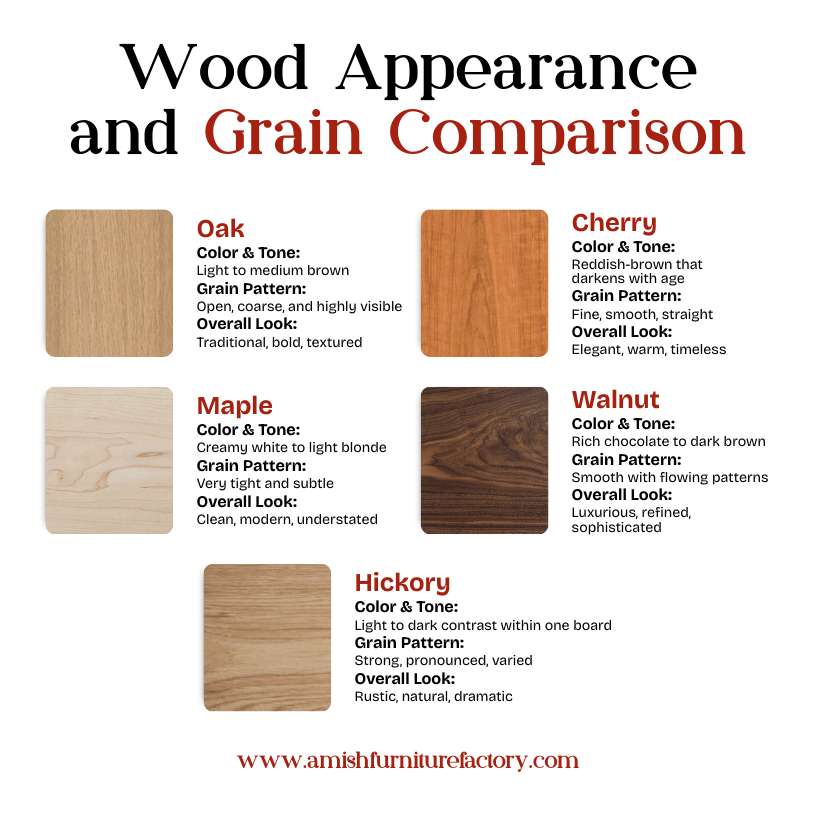
For DIY wood legs, select hardwoods like oak, maple, walnut, or hickory. These species resist dents, hold screws securely, and age gracefully. Use 8/4 lumber, which is 2 inches thick, for solid stable legs. Softwoods like pine cost less and cut easily but dent quickly, making them better for painted or temporary builds. Always joint and plane rough lumber before glue-up, ensuring one flat face and one square edge for strong joints.
Build Thick Legs Through Lamination
Create thick legs from thinner boards through lamination. Cut matching blanks slightly oversized, then apply PVA wood glue evenly with a spreader. Clamp from center outward to keep edges flush, wiping excess glue with a damp cloth before it dries. Let cure overnight, then clean squeeze-out with a scraper or card scraper.
Consider Metal for Strength and Style
Hairpin legs handle up to 500 pounds and install in minutes with screws. Pre-made sets from specialty retailers offer custom heights and finishes. Black iron pipe legs give an industrial look. Use floor flanges to attach pipes to the desk bottom. Avoid flimsy options like basic plastic legs for heavy tops, as they prone to wobble.
Cut and Shape the Legs
With materials prepared, you can now cut and shape your leg designs. Each style requires specific techniques and angles.
Build Trapezoidal Legs for Modern Style
Trapezoidal legs use angled cuts for visual interest and clean lines. Set your miter saw to 10 degrees and lock the angle for consistency. Cut two side pieces at 29 inches for a 28-inch desk with a 1-inch top. Cut top and bottom crosspieces at 12 inches. Use a 12-inch template to verify angles before cutting all pieces, and dry-fit to check alignment.
Make X-Legs with Half-Lap Joints
X-legs provide natural bracing and eliminate wobble through their intersecting design. Cut four legs at 49 to 55-degree angles. Position legs in an X shape and mark the intersection point. At the crossing, make parallel 1/8-inch spaced miter cuts to half the leg thickness. Chisel out waste to form a half-lap joint, then join with wood glue and 2.5-inch screws. This joint locks the legs together and resists lateral movement.
Taper Classic Legs for Elegance
Tapered legs reduce visual weight and improve elegance. Mark a 1/2-inch taper from top to bottom on your leg blank. Cut on a band saw or table saw, then sand smooth with 120-grit progressing to 220-grit. Taper only one face for a subtle effect, or all four faces for full refinement.
Join Legs Securely for Stability

Strong joinery prevents wobble and ensures your desk handles daily use. Several methods work well for different skill levels and leg designs.
Reinforce with Dowel Joinery
Dowel joints add strength to angled or laminated connections. Drill 5/16-inch holes at joints, using two per corner. Wrap tape around the drill bit to mark depth consistently. Apply glue to both holes and dowels, then insert and clamp until dry. Flush-cut protruding dowels with a pull saw, then sand smooth.
Use Pocket Holes for Hidden Strength
Pocket hole joinery is beginner-friendly and creates strong hidden joints. Use a Kreg jig to drill angled pilot holes. Pre-drill in hardwoods to prevent splitting, then drive screws to pull joints tight. This method works especially well for attaching aprons or cross-braces to leg assemblies.
Support Angled Joints with Clamping Aids
Angled joints like X-legs need even pressure to close properly. Place 10-degree offcut shims under clamps to align force perpendicularly to the joint. Clamp to an MDF reference sheet to keep legs square during assembly. Save leftover angled scraps as self-matching clamping blocks for future projects.
Finish for Protection and Style
A proper finish protects your legs and completes the visual design. The right coating enhances grain while providing durability.
Sand Smoothly Through Progressive Grits
Start with 80 to 120 grit to remove saw marks and tool marks. Progress to 150 grit, then finish with 220 grit for a silky surface. Focus extra attention on edges, corners, and joint areas. Wipe with a tack cloth before applying any finish to remove all dust.
Remove Glue Before Final Sanding
Dried glue ruins smooth finishes and prevents proper coating adhesion. Remove glue before final sanding using a scraper for small spots, a block plane for larger areas, and a card scraper to smooth glue film. Use an old chisel for stubborn residue. Never sand glue off, as it clogs paper and generates heat that can burn the wood.
Apply the Right Finish for Your Material
For wood legs, tung oil enhances grain with a natural look and easy repair. Polyurethane offers durable scratch resistance in glossy or matte options. Stain plus topcoat lets you customize color while sealing with protection. For metal legs, clean with a damp cloth and dry thoroughly. Spray with rust-inhibiting primer, then metal paint. Let finish cure fully for 24 to 72 hours before installing.
Install Legs Properly for Secure Attachment
Proper installation ensures your legs support the desktop securely and remain stable during use.
Attach with Screws or Threaded Inserts
For direct screw attachment, use #10 or #12 wood screws at least 1.5 inches long. Pre-drill holes to prevent splitting, then drive straight into leg tops from below the desktop. For removable legs, use threaded inserts. Drill the correct-sized hole, tap in the insert with a screwdriver, and use machine screws for repeated assembly.
Mount Pipe Legs with Flanges
Screw a floor flange to the underside of your desk. Thread 3/4-inch black iron pipe into the flange. Add a cap or adjustable foot to the bottom. Use a pipe wrench to tighten without overtightening and stripping threads.
Use Brackets for Hybrid Support
L-brackets work well for lightweight desks or apron connections. Use heavy-duty steel versions for durability. Wall-mounted brackets support the back edge while front legs handle the front. Anchor into wall studs for secure attachment, keeping floor clear and reducing leg load.
Prevent Wobble and Protect Your Floors
Wobble ruins the functionality of even the best-built desk. Taking preventive measures ensures long-term stability.
Fix Wobble with Adjustable Solutions
Wobble comes from uneven floors, poorly aligned legs, or weak joints. Use adjustable feet or felt pads with leveling screws to compensate for floor irregularities. Place shims under short legs to achieve level. Add cross-braces or aprons for additional rigidity. Test with a long level across the desktop surface before finalizing.
Protect Hardwood and Tile Floors
Hardwood and tile scratch easily from desk legs. Use felt pads for light protection and quiet movement. Rubber stoppers prevent sliding and absorb vibration. Adjustable glides offer self-leveling, ideal for uneven floors. Avoid bare metal contact on finished floors.
Choose the Best Leg Type for Your Needs
Different projects call for different leg solutions. Understanding your priorities helps select the right approach.
Build X-Legs for Budget Strength
DIY X-legs cost under $50 and provide excellent stability. Use 2x4s or 2x6s, cut at 49 to 55 degrees, and join with half-lap joints and screws. This approach is strong, stable, and educational for beginners.
Buy Hairpin Legs for Speed and Style
Hairpin legs offer mid-century modern appeal with 125-pound capacity per leg. Install in minutes with screws. Available in black, brass, and chrome finishes. Expect to pay $60 to $150 per set, worth every penny for reliability.
Try Pipe Legs for Industrial Look
Black iron pipe in 3/4-inch diameter offers customizable height through threaded connections. Durable and rigid, pipe legs can be painted or oiled for different finishes. Combine with flanges and caps for a clean appearance.
Upgrade to Motorized Legs for Ergonomics
Electric sit-stand kits from brands like Uplift or Flexispot raise and lower with a button. Save height presets for quick adjustments. Capacity ranges from 200 to 300 pounds. Cost runs $300 to $600 or more, best for shared desks or health-focused users.
Balance DIY vs. Purchase for Your Skill Level
Knowing when to build versus buy saves time and ensures quality results.
Compare Time, Cost, and Skill Requirements
DIY legs cost less but require significant time for planning, milling, joining, and finishing. Purchased legs cost more but install in minutes with minimal tools. DIY offers full customization while purchased legs limit options. Consider your tool inventory and skill level honestly before deciding.
Best Hybrid Approach
Build a stunning desktop yourself and purchase high-quality legs. This saves time while ensuring stability without sacrificing design. Focus your craftsmanship where it shows most, and buy engineered legs for reliable performance.
Match Style and Finish for Cohesive Design
Legs should complement your desktop and overall room aesthetic.
Pair Materials Intentionally
Butcher block tops work well with black metal legs for modern contrast. Match walnut desktop with walnut legs for seamless warmth. White desks pair nicely with brass pipe legs for Scandinavian-industrial fusion. Avoid mismatched finishes unless intentionally creating contrast.
Customize Color and Texture
Paint wood legs for bold statements like matte black or navy. Oil pipe legs for aged industrial patina. Stain wood legs to match your desktop for cohesion. Test all finishes on scrap material first before applying to final pieces.
Ensure Long-Term Durability
Proper maintenance keeps your desk legs performing well for years.
Maintain Wood and Metal Differently
Wipe wood legs with a damp cloth and avoid standing water. Re-oil annually if using natural finishes. Check metal legs monthly for rust. Touch up paint if scratched. Clean with mild soap. Inspect adjustable feet for wear every six months.
Repair or Replace as Needed
Hairpin and pipe legs swap out easily if damaged. Repair wood leg cracks with epoxy or splines. Contact manufacturers for motorized leg electronic issues. Modular designs last longer because individual parts can be replaced.
Frequently Asked Questions About Building Desk Legs
What is the standard desk height with legs included?
Standard desk height ranges from 28 to 30 inches, measured from floor to desktop surface. This assumes legs between 26 and 28 inches depending on desktop thickness. Adjust based on your specific needs and chair height.
How do I calculate the correct leg length for my desk?
Subtract your desktop thickness from your target desk height. For a 28-inch desk with a 1.5-inch thick top, cut legs to 26.5 inches. Always measure your actual desktop before cutting.
Are X-legs more stable than straight legs?
Yes, X-legs provide excellent lateral stability through their intersecting design. The half-lap joint at the crossing point locks legs together and resists side-to-side movement, reducing wobble significantly.
Can I use pipe legs on a hardwood floor?
Yes, but protect your floor with felt pads or rubber stoppers under the pipe ends. Bare metal scratches hardwood and tile surfaces. Add adjustable feet with protective bases for best results.
How much weight can hairpin legs support?
Quality hairpin legs support up to 125 pounds per leg, or 500 pounds for a four-leg configuration. This handles most desktop setups including heavy butcher block tops with monitors and peripherals.
Key Takeaways for Building Desk Legs
Building desk legs gives you complete control over strength, style, and cost. Choose materials matched to your desktop and use case. Hardwoods offer beauty and durability, while metal provides industrial strength. Plan your design around desk width and expected load. Use proper joinery like dowels or pocket holes to prevent wobble. Apply appropriate finishes for protection and aesthetics. Consider the hybrid approach of building your desktop and purchasing engineered legs for the best balance of craftsmanship and reliability. With careful planning and execution, your desk will have legs that last for years while matching your personal style perfectly.