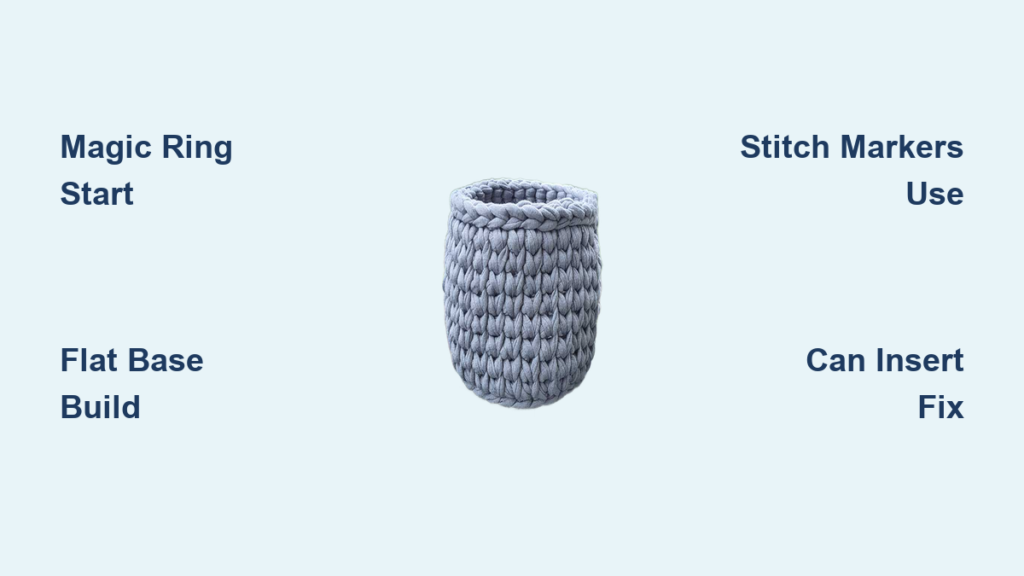
Pens rolling off your desk, hiding between papers, or vanishing into drawers is a frustration every workspace faces. Learning how to crochet a pen holder offers a quick, satisfying fix that doubles as a creative outlet. With just a hook, yarn, and a few basic stitches, you can craft a custom organizer that matches your style and stands the test of time.
This guide walks you through every stage of the process. You will learn how to pick the right yarn and hook, master foundational stitches, build a flat base, shape straight walls, and add durable finishes. We will also cover troubleshooting tips for common issues like wobbly bases and spiraling seams, plus clever variations including t-shirt yarn baskets and journal pouches.
Choose the Right Materials for Your Pen Holder
Pick the Best Yarn Type
The yarn you select determines how sturdy your finished holder will feel.
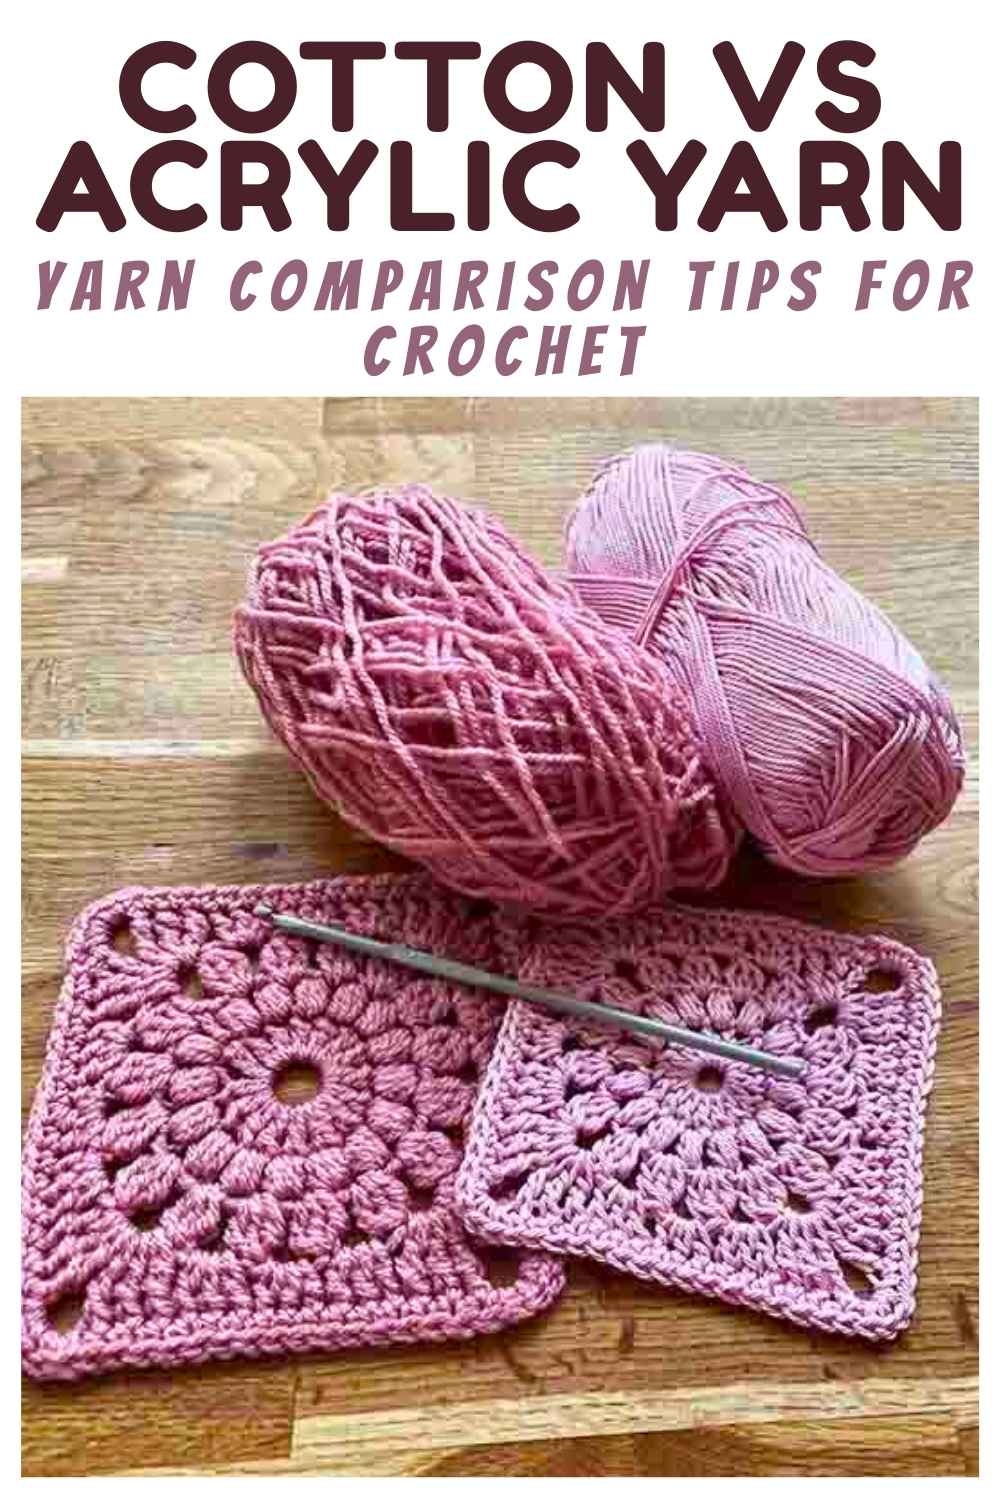
- Cotton yarn (such as Lily’s Sugar’n Cream) provides stiffness and structure. It keeps holders standing upright without sagging.
- Acrylic yarn is soft, affordable, and available in countless colors. It works best for flexible holders, especially when paired with a can insert.
- T-shirt yarn is thick, durable, and eco-friendly. It holds its shape naturally without needing a lining.
- Scrap yarn lets you mix leftovers for a colorful, zero-waste project.
- Lightweight yarns like sport or worsted weight are ideal for slim pouches that attach to journals.
Match Your Hook to the Yarn
Pairing the correct hook with your yarn ensures even stitches and proper gauge.
- 2.5 mm: Best for fine yarns and small planner pouches.
- 3.5 mm: Standard size for acrylic yarn projects.
- 4.5 mm (US 7): Required for cotton patterns like the Highbury design.
- 7.0 mm: Ideal for working with t-shirt yarn.
- 9.0 mm: Use for loose slip-stitch borders on bulky yarn.
Always test a small swatch if your base starts to pucker or ripple.
Gather Essential Tools
You only need a few basics to get started.
- Crochet hook (sized to your yarn)
- Yarn needle with a large eye
- Sharp scissors
- Stitch markers to track round starts
- Optional inserts: a clean 15 oz can or mason jar
- Leather strips and rivets for handles (0.375″ wide by 8″ long)
- Pressing cloth and iron for shaping t-shirt yarn
Master Key Crochet Stitches
Start Every Project with a Magic Ring
The magic ring creates a tight, gap-free center for circular projects.
How to make it:
1. Wrap yarn around three fingers to form an X shape.
2. Insert your hook under the top right arm and hook the left arm, pulling it through.
3. Chain 1, then work your first round of stitches (such as 6 single crochets) into the loop.
4. Pull the tail firmly to close the ring completely.
Learn the Modified Half Double Crochet (mhdc)
For sturdier walls, the mhdc creates a denser fabric than standard hdc.
Why it works: It uses a “yarn under” motion at the start, producing a tighter weave.
Steps:
1. Bring the yarn from front to back (yarn under).
2. Insert your hook into the stitch and pull up a loop (3 loops on hook).
3. Yarn over and pull through all three loops.
Use this stitch in cotton or double-stranded projects for maximum rigidity.
Try Long Single Crochet for Texture
Long single crochet (Lsc) creates raised ridges that add visual interest.
How to do it:
1. Insert your hook into the stitch below the current row.
2. Pull up a loop to the height of a single crochet.
3. Yarn over and pull through both loops.
Alternate Lsc with regular single crochet for a ribbed effect.
Work Between the Bars for Tighter Fabric
To eliminate gaps between stitches, change where you insert your hook.
- Insert the hook between the top loops (the “V”) of the previous stitch.
- Or work into the bar between stitches rather than under the loops.
This tightens the weave and prevents pens from slipping through.
Build a Flat, Stable Base
Follow a Consistent Increase Pattern
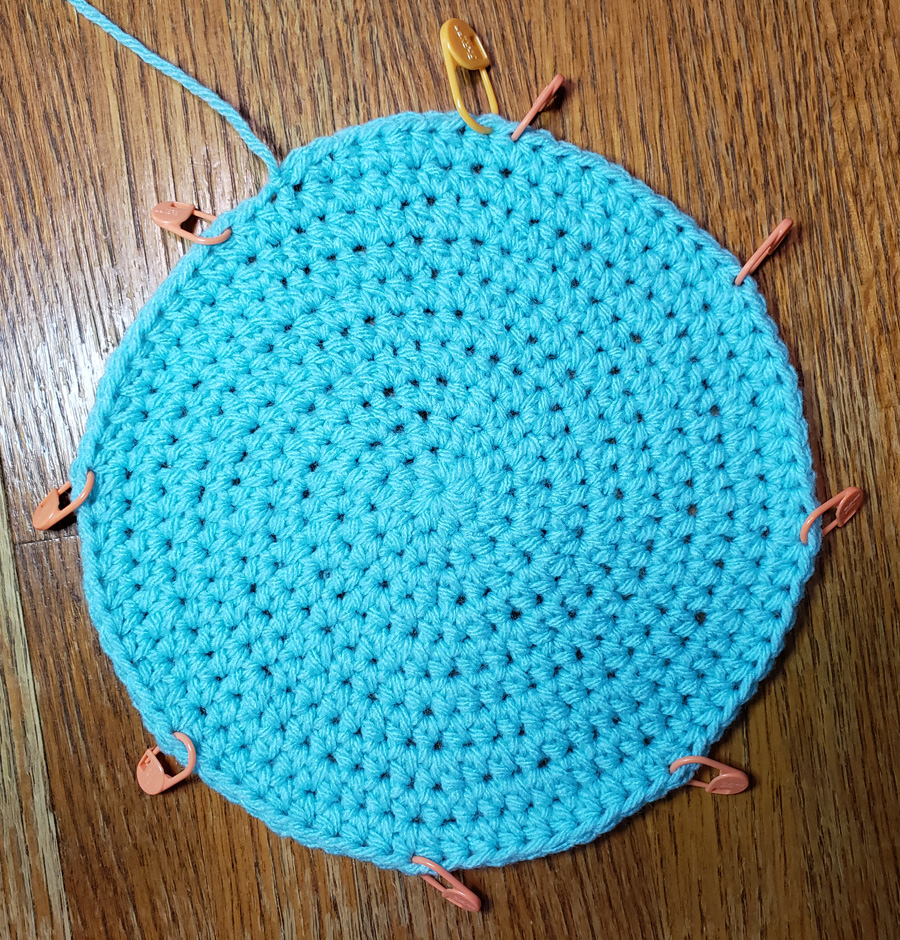
A flat circle is the foundation of any standing pen holder. Work through this standard sequence:
- Round 1: 6 sc in magic ring (6 sts)
- Round 2: 2 sc in each stitch (12 sts)
- Round 3: 1 sc, inc repeat (18 sts)
- Round 4: 2 sc, inc repeat (24 sts)
- Round 5: 3 sc, inc repeat (30 sts)
- Round 6: 4 sc, inc repeat (36 sts)
Stop increasing once your base reaches 3 to 3.5 inches in diameter.
Avoid Puckering or Ruffling
Your base should lie completely flat against the table.
- Puckering? You increased too quickly. Skip the next increase round.
- Ruffling? You need more increases. Add an extra round with 4 sc, inc.
Check flatness every round. For t-shirt yarn, gently steam the base with a pressing cloth to set the shape.
Use Stitch Markers from the Start
Place a stitch marker in the first stitch of each round. This simple habit helps you track progress, prevent missed stitches, and spot spiraling seams early. Move the marker up as you complete each round.
Shape Vertical Walls Correctly
Stop Increasing at the Right Moment
Once your base is wide enough, stop all increases. Work one stitch per stitch around using sc, hdc, or mhdc. Most pen holders need 4 to 5 inches of vertical height to fit standard pens.
Prevent Spiraling Seams
If your seam drifts upward, your joins are too consistent. Fix this by alternating join methods:
- Round A: Slip stitch to the first sc, chain 1, start the next round in the same stitch.
- Round B: Skip the first stitch and work the last stitch into the slip stitch from the previous round.
This pattern keeps the seam straight. Use a stitch marker to track each round.
Work in the Back Loop Only
For a defined ridge and sharper base-to-wall transition, insert your hook only into the back loop of each stitch. This creates a flexible hinge that helps walls stand straight, especially in t-shirt yarn or cotton projects.
Reinforce Your Pen Holder for Durability

Fold the Top Edge for a Sturdy Rim
The fold-over technique, used in the Highbury pattern, doubles wall thickness.
How to do it:
1. Work the main body with two strands held together.
2. For the last 5 rows, switch to a single strand.
3. After finishing, fold the top edge inward to create a double-layered rim.
This adds weight and prevents the rim from flopping outward.
Insert a Can for Rock-Solid Structure
Want a holder that never collapses? Use a 15 oz can as an internal frame.
Steps:
1. Crochet the body slightly taller than the can.
2. Slide the can inside.
3. Fold the top edge over the rim of the can.
Your pen holder will stay upright even when filled with heavy tools.
Weave Ends Securely
Loose tails weaken the finished piece and look unprofessional.
Best method:
1. Cut the yarn, leaving a 6-inch tail.
2. Thread the tail onto a yarn needle.
3. Weave in a zigzag pattern through the inner ridge of stitches.
4. Pull tight and trim excess.
For high-stress areas like handle attachments, use nylon thread and tie 2 to 3 knots before weaving.
Customize Your Crochet Pen Holder Design
Add Stripes or Color Blocks
Switch colors every few rounds for a bold, eye-catching look.
How to change color:
– Complete the last stitch of a round but stop before the final pull-through.
– Pull the new color through both loops.
– Begin the next round with the new yarn and weave in the old end.
Create a Two-Tone Border
Use a contrasting color for the final border. Try a loose slip stitch around the top edge with a 9mm hook to create a soft, rolled rim. This works especially well on t-shirt yarn projects.
Attach Handles or Embellishments
Leather handles:
– Cut a strip 0.375″ wide by 8″ long.
– Position it on opposite sides of the rim.
– Attach with rivets for a polished look.
Decorative touches:
– Sew on crocheted flowers like tulips, cacti, or puffy blooms.
– Add buttons or charms to the rim.
– Embroider initials with embroidery floss.
Themes like pineapple, camera, or llama make wonderful personalized gifts.
Troubleshoot Common Crochet Problems
Fix a Wobbly or Leaning Holder
Uneven tension or stitch count is the usual culprit.
- Count stitches each round to ensure they match the pattern.
- Block the finished piece with light steam to even out the shape.
- Insert a can for added stability.
Close Gaps Between Stitches
Loose tension or the wrong hook size creates gaps.
- Downsize your hook by 0.5 mm.
- Work into the bars between stitches instead of under the loops.
- Switch to mhdc or tighter single crochet for denser fabric.
Stop the Base from Curling
Puckering means too many increases. Skip a round or work even for one round, and relax your tension on increase rounds. Ruffling means not enough increases. Add a round with 5 sc, inc to expand gently.
Prevent Spiraling Seams
A climbing seam results from joining in the same spot every round.
- Alternate join methods as described earlier.
- Use stitch markers to track each round.
- Consider working in a continuous spiral with a marker to track rounds.
Explore Design Variations
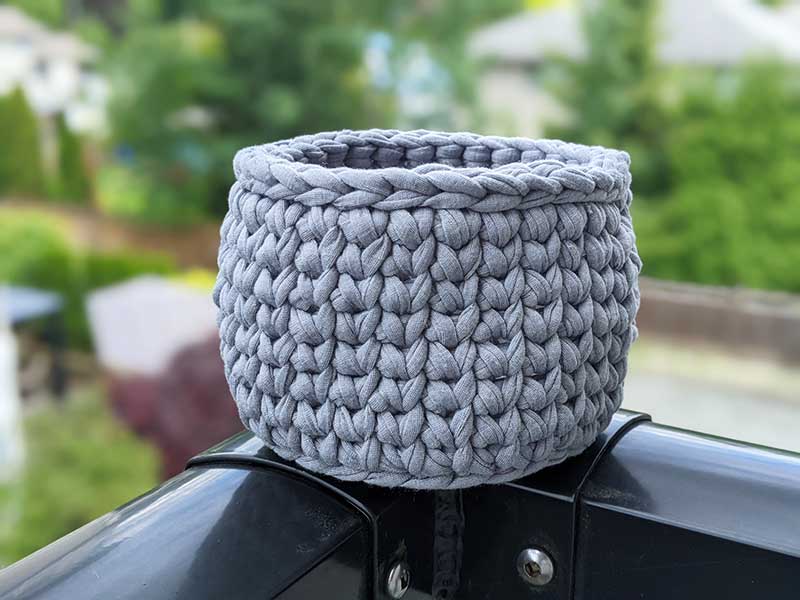
Make a T-Shirt Yarn Basket
This variation works beautifully for heavy tools, kitchen utensils, or bathroom storage.
Steps:
1. Use a 7mm hook and t-shirt yarn.
2. Start with a magic ring and 6 sc.
3. Increase following the standard pattern.
4. When transitioning to walls, work through the back loop and bar for a 90-degree angle.
5. Finish with a loose slip stitch border using a 9mm hook.
6. Shape with steam and let cool to set the form.
No lining is needed because the yarn holds its shape naturally.
Crochet a Journal Pouch
Perfect for planners, sketchbooks, and travel journals.
How to make:
1. Chain 8.
2. Work 7 sc in the second chain from the hook and across (7 sts).
3. Turn and work 7 sc back. Repeat for 60 rows.
4. Fold the strip in half.
5. Join the sides with sc through the bumps on the back ridge.
6. Add 3 sc in the corners to round them.
7. Attach a 120-chain string to one end and wrap it around the journal to secure.
Slide pens into the top for a compact, portable organizer.
Try a Textured Double Crochet Holder
This fast, decorative variation adds visual flair.
Base:
– Magic ring, chain 2.
– 12 dc in the ring. Join.
Body:
– Round 1: Chain 2, 2 dc in each stitch (24 sts).
– Round 2: Chain 1, 1 back loop single crochet in each stitch.
– Round 3 and beyond: Work 1 sc in the space between the top loops of each stitch.
– Alternate sc and Lsc for a ribbed texture.
Work in continuous rounds to avoid visible seams.
Finish Strong and Gift Ready
Weave in All Ends
Never skip this final step.
- Use a yarn needle to thread tails through inner stitches.
- Zigzag for 1 to 2 inches, then trim.
- For decorations, double-knot and use strong thread.
A clean interior looks professional and lasts longer.
Shape and Set the Form
For t-shirt yarn or cotton holders, lightly steam the base and walls. Reshape with your hands and let cool completely to set the memory of the fibers. This prevents warping during everyday use.
Pair with a Pen Set for Gifting
Crocheted pen holders make thoughtful, handmade gifts.
Upgrade the presentation:
– Fill with 3 to 5 nice pens or pencils.
– Add a crocheted flower or embroidered name.
– Wrap in tissue paper with a handwritten note.
These gifts are perfect for teachers, students, and creatives.
Frequently Asked Questions About How to Crochet a Pen Holder
What is the easiest yarn for beginners to use?
Acrylic yarn is the easiest for beginners. It is soft, affordable, comes in many colors, and handles well on the hook. Cotton yarn works too but offers less stretch while you learn.
How long does it take to crochet a pen holder?
Most standard pen holders take under an hour to complete. T-shirt yarn baskets may take slightly longer due to the thicker material and larger hook size.
Can I crochet a pen holder without knowing advanced stitches?
Yes. A basic pen holder only requires single crochet, increases, and the magic ring. These foundational stitches are beginner-friendly and produce a sturdy, functional result.
What size hook should I use for cotton yarn?
A 4.5 mm hook (US size 7) is recommended for cotton yarn patterns like the Highbury design. Always check your specific pattern for the recommended size.
How do I keep my pen holder from collapsing?
Use cotton or t-shirt yarn for natural rigidity, double-strand your yarn for extra stiffness, or insert a clean 15 oz can inside the finished holder. The can acts as a structural frame that prevents any collapse.
Can I make a pen holder without a magic ring?
You can chain 4 and join to form a ring, but the magic ring creates a tighter center with no hole. For beginners, the chain method is a fine alternative.
Key Takeaways for Crocheting Your Own Pen Holder
Learning how to crochet a pen holder opens the door to countless creative possibilities. Start with the right yarn and hook combination, master the magic ring and basic increases, and build a flat base before transitioning to vertical walls. Reinforce your work with techniques like the fold-over rim or a can insert for long-lasting durability.
Your next step is simple: gather your materials, choose your favorite color, and start stitching. Within an hour, you will have a functional, beautiful organizer that reflects your personal style and keeps your workspace clutter-free.