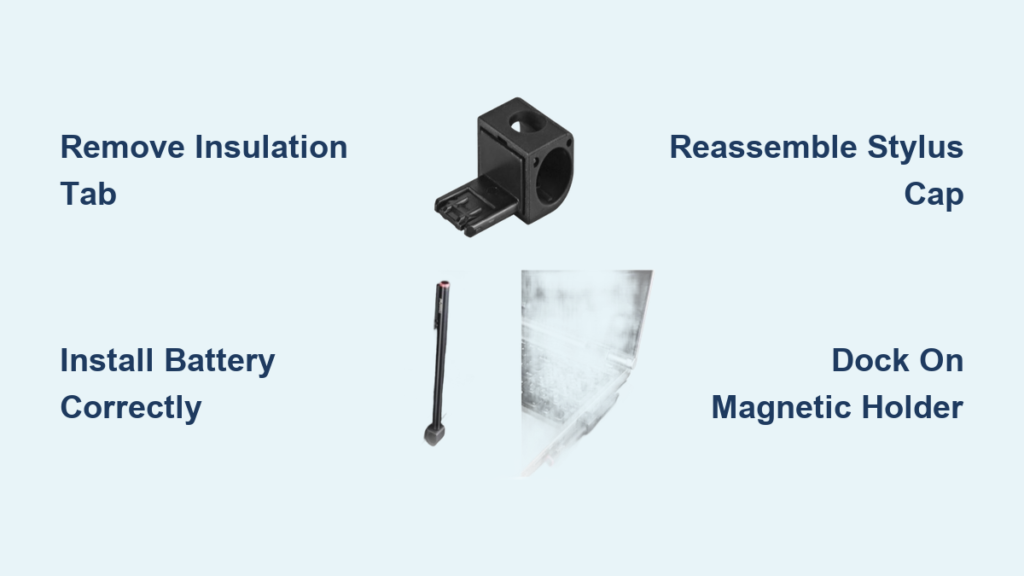
You just unboxed your Lenovo Tab Pen, but the stylus refuses to respond when you tap the screen. Before assuming the device is defective, the issue likely lies in a missed setup step. Unlike modern smart pens, the Lenovo Pen does not use Bluetooth pairing or a charging cable. Instead, it relies on a precise mechanical activation sequence that most users overlook.
This guide explains how to use the Lenovo pen holder, activate your stylus from scratch, customize its buttons, and keep it working reliably. By the end, you will know exactly how to get your pen responding instantly and how to store it safely on your tablet.
Open the Battery Compartment

Your Lenovo Pen arrives with a battery pre-installed, but it is intentionally disabled by a safety feature. Before anything else, you must access the internal chamber.
Unscrew the Stylus Cap
Locate the top end of the pen body and rotate the stylus cap counterclockwise until it loosens. Pull it off gently to reveal the battery chamber inside. You will see a small cylindrical battery already seated in the slot.
⚠️ Pro Tip: Place the cap on a clean, flat surface. Its small size makes it easy to misplace during setup.
Skipping this step means the pen cannot power on, no matter how new the battery appears.
Remove the Insulation Tab

Inside the chamber, you will find a thin plastic strip connected to the battery. This insulation tab blocks the electrical circuit and prevents the pen from activating during shipping.
Why This Tab Exists
Manufacturers insert this strip so the battery does not drain while sitting on warehouse shelves. Leaving it in place means the pen receives zero power, even with a fresh battery inside.
How to Pull It Out
- Gently slide the battery out of the chamber.
- Locate the small plastic strip (usually white or transparent) attached to the contact point.
- Remove the tab completely. Do not leave any fragment behind.
- Store the tab in a safe spot. You can reinsert it later for long-term storage to preserve battery life.
✅ Visual Cue: After removal, you should see two clean metal contact points, one at the chamber base and one on the cap interior.
Install the AAAA Battery With Correct Polarity

With the insulation tab gone, you can now reinsert the battery. Orientation matters here, and getting it wrong is a common mistake.
Polarity Guidelines
The positive (+) end of the AAAA battery must face downward, into the pen body. The negative (–) end must face upward, toward the cap. Look for engraved markings inside the chamber to confirm the correct direction.
❌ Common Mistake: Inserting the battery negative side down, as you would in most household devices. The Lenovo Pen reverses this orientation.
Once correctly positioned, slide the battery fully into the chamber.
Reassemble and Activate the Pen
With the battery properly seated, screw the stylus cap back onto the pen body by turning it clockwise until snug. Avoid overtightening, which can damage the threading.
Instant Activation
There is no power button on the Lenovo Pen. The device activates automatically once the circuit closes. To verify it works:
– Tap the pen tip lightly on your Lenovo tablet screen.
– The system should register input immediately with no pairing delay.
If nothing happens, revisit the previous steps. Double-check the insulation tab removal and battery polarity before assuming a defect.
✅ Success Signal: Instant screen response confirms proper activation.
Attach the Pen to the Magnetic Holder
The term “Lenovo pen holder” refers to the magnetic attachment strip found on the side edge of compatible tablets like the Tab P11 and P12. This holder keeps your pen secure and ready for instant use.
How to Dock the Pen
- Align the pen along the side edge of your tablet.
- Let the internal magnets pull the pen into place.
- Listen for a soft click that confirms a secure attachment.
⚠️ Note: Not all Lenovo pens charge through the magnetic strip. The standard Tab Pen uses a replaceable AAAA battery and only attaches for storage purposes.
Benefits of Using the Holder
- Prevents accidental loss or damage.
- Keeps the pen within reach at all times.
- Some models disable screen input when docked to avoid stray touches.
✅ Pro Tip: Always return the pen to the magnetic holder when not in use. This protects the nib and prevents misplacement.
Master the Programmable Buttons
Your Lenovo Pen includes two side buttons that boost productivity when used correctly. Understanding their default behavior is the first step toward a faster workflow.
Left Button: Double-Click for Mode Switching
By default, double-clicking the left (primary) button toggles between tools in supported apps. Common transitions include:
– Switching from pen to eraser.
– Changing from brush to selection tool.
– Activating shape recognition.
This shortcut is ideal for artists and note-takers who frequently change functions.
Right Button: Single-Click for Eraser
A single press of the right (secondary) button activates the eraser function in most drawing and annotation apps. It works like flipping a pencil to use the rubber end, fast and intuitive for quick corrections.
Customize the Buttons in Settings
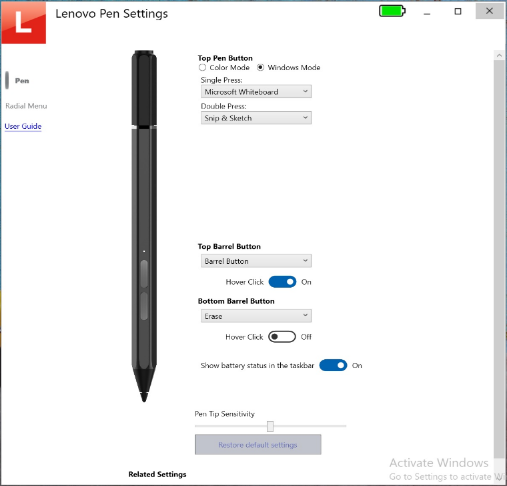
To unlock the full potential of your Lenovo Pen, configure the buttons through your device operating system. This turns the pen into a personalized productivity tool.
Step-by-Step Configuration
- Open Settings on your Lenovo tablet.
- Tap Devices, then select Pen.
- Choose your connected pen from the device list.
- Select Left Button or Right Button.
- Pick a new action (such as “Take Screenshot” or “Launch App”).
- Confirm and exit the menu.
🔄 Changes apply instantly with no restart required.
Available Custom Actions
- Open Notes
- Take screenshot
- Undo last action
- Launch camera
- Custom keyboard shortcut (in supported apps)
⚠️ Limitation: Available options depend on your tablet model and Android version. Older devices may show fewer choices.
Troubleshoot a Non-Responsive Pen
If your Lenovo Pen stops working after setup, do not replace it yet. Most issues resolve in minutes with a few targeted checks.
No Response When Tapping the Screen?
- Check battery polarity: Remove the cap and verify the + end faces down.
- Confirm insulation tab removal: Even a tiny fragment can break the circuit.
- Clean contact points: Wipe the battery ends and chamber interior with a dry cotton swab.
- Test a fresh AAAA battery: Stock batteries often ship with partial charge.
Buttons Not Responding?
- Reset to defaults in Pen settings under “Restore Defaults.”
- Restart the tablet to clear temporary glitches.
- Update system software through Settings > System > Updates.
✅ Quick Fix: If the pen works intermittently, tighten the cap. Loose contact disrupts power flow.
Replace the AAAA Battery

When the pen stops responding despite correct setup, the battery is likely depleted. Replacement takes less than a minute.
Steps to Swap the Battery
- Unscrew the stylus cap.
- Remove the old AAAA battery.
- Insert a new AAAA battery with + facing down.
- Re-screw the cap and test the pen on screen.
🛒 Where to Buy AAAA Batteries:
– Electronics stores (Best Buy, Micro Center)
– Online retailers (Amazon, Walmart.com)
– Pharmacies (CVS, Walgreens)💡 Battery Life Tip: Reinsert the insulation tab when storing the pen for weeks or months to prevent slow discharge.
Maintain Your Lenovo Pen Long-Term
Proper care keeps your pen functioning smoothly for years. A few small habits make a major difference in longevity.
Clean the Nib Regularly
- Wipe the pen tip with a soft, dry cloth after heavy use.
- Avoid alcohol or harsh cleaners that degrade the nib material.
- Replace the tip when it feels scratchy or worn (replacement kits available from Lenovo).
Store Safely Between Sessions
- Always return the pen to the magnetic holder or a protective case.
- Keep the pen away from extreme heat, moisture, and direct sunlight.
- Avoid drops, since internal components are sensitive to impact.
Update Firmware When Available
Some newer Lenovo pens support firmware updates through the Lenovo Pen app or system settings. Check periodically for performance improvements and bug fixes.
Frequently Asked Questions About the Lenovo Pen Holder
Does the Lenovo Pen Holder Charge the Pen?
The magnetic holder on supported tablets secures the pen for storage, but it does not charge the standard Lenovo Tab Pen. The Tab Pen uses a replaceable AAAA battery rather than a rechargeable cell. Only certain Lenovo pens with built-in rechargeable batteries charge through magnetic contact.
Why Is My Lenovo Pen Not Working After Setup?
The most common cause is a leftover insulation tab blocking the circuit. Remove the cap, pull out the battery, and confirm the plastic strip is fully removed. Also verify that the + end faces down into the pen body before reassembling.
Which Lenovo Tablets Have a Built-In Pen Holder?
Tablets like the Lenovo Tab P11 and Lenovo Tab P12 feature a magnetic pen holder along the side edge. Other models may include a loop, slot, or case-based holder instead. Check your specific tablet specifications to confirm the holder type.
Can I Customize the Lenovo Pen Buttons?
Yes. Navigate to Settings > Devices > Pen on your Lenovo tablet. From there, you can assign custom actions to both the left and right buttons, including launching apps, taking screenshots, or triggering undo commands.
How Long Does an AAAA Battery Last in a Lenovo Pen?
Battery life depends on usage frequency, but most AAAA batteries last several months under normal conditions. Heavy users who draw or annotate for hours daily may need to replace the battery every few weeks. Reinserting the insulation tab during long storage periods extends battery life significantly.
Where Can I Buy a Replacement AAAA Battery?
AAAA batteries are available at most electronics stores, pharmacies, and online retailers. Common sources include Amazon, Best Buy, Walmart, CVS, and Walgreens. Always confirm the package specifies AAAA size before purchasing.
Key Takeaways for Using Your Lenovo Pen Holder
Mastering how to use the Lenovo pen holder comes down to a few precise physical steps. Remove the stylus cap, pull out the insulation tab, and install the AAAA battery with the positive end facing down. Once reassembled, the pen activates automatically with no pairing or charging required.
After setup, customize the programmable buttons through your tablet settings to match your workflow, dock the pen on the magnetic holder between sessions, and replace the battery whenever performance drops. With these habits in place, your Lenovo Pen becomes a reliable tool for writing, sketching, and annotating for years to come.
Your next step is simple: open the cap, remove the insulation tab, and tap your pen to the screen. You will see instant response and be ready to create within seconds.