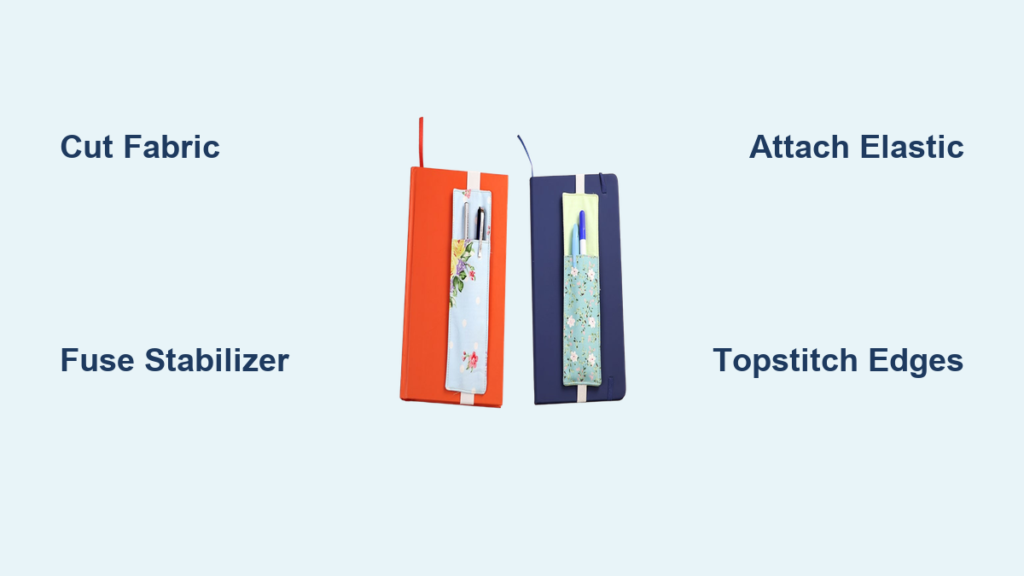
Losing your pen inside a backpack or desk drawer is frustrating. A handmade pen holder solves that problem, especially when stitched right onto your notebook. A sewn pen holder bookmark combines function and creativity, keeping your favorite pen secure while marking your current page. This project takes under 15 minutes, uses fabric scraps, and requires only basic sewing skills.
Whether you’re a beginner or making gifts for students, teachers, or journal lovers, this guide walks you step by step through building a durable, stylish pen holder that stays put. You’ll learn how to choose the right materials, attach elastic securely, and finish with a clean, professional look, all without complicated tools.
Choose Your Pen Holder Type

Not all pen holders work the same way. The design you pick affects durability, capacity, and how the holder feels during everyday use.
Pick a No-Sew Cardstock Option
Need something fast and portable? Try the cardstock slit bookmark. Cut a 2″ by 6″ rectangle from stiff cardstock, fold it in half lengthwise, and cut two parallel slits 1″ from the top and bottom edges. Thread your pen through both slits so tension holds it in place. Add a ribbon loop tied through a hole at the fold to wrap around your notebook. This version takes under 5 minutes and needs no sewing at all, making it perfect for quick gifts or classroom handouts.
Build a Fabric Pocket with Elastic
For everyday use, the fabric pocket with elastic loop is ideal. It holds one or two pens securely and attaches firmly to any journal or planner. Use cotton fabric and fusible fleece to add structure. An elastic band wraps around the notebook spine, keeping the whole unit in place. This version is machine-washable (spot cleaning is recommended), customizable in color, and great for beginners learning how to sew a pen holder.
Upgrade to a Quilted Pouch Design
Want a sturdier, gift-worthy finish? Use fusible fleece or heavy interfacing to create a quilted pen holder. This version resists sagging, handles heavier pens like fountain models, and gives a polished look. Fold-over elastic (FOE) adds softness and durability. It’s ideal for travel, professional journals, or handmade gift sets paired with a new notebook.
Gather Materials and Tools

You likely already have most of what you need, especially if you sew or craft regularly.
Use Scrap-Friendly Fabric Sizes
Cut two pieces of cotton fabric at 8″ by 3″ for the front and back. For the pocket, cut one piece at 10″ by 3″. These dimensions fit standard composition notebooks and A5 journals. If using jelly roll strips (2.5″ wide), cut two at 8″ and one pocket strip at 10″. No additional trimming needed.
Add Stabilizer for Structure
Fusible fleece prevents floppiness. Cut two stabilizer pieces at 7.5″ by 2.5″, slightly smaller than the fabric to reduce bulk. For the pocket, use a 4.5″ by 2.5″ piece. Iron it onto the wrong side of each fabric piece. This adds body and helps the holder keep its shape after repeated use.
Select the Right Elastic
Use ¾” to 1″ wide elastic for best grip. Narrower than 3/8″ may stretch out over time. For softness and clean edges, choose 1″ fold-over elastic (FOE). Cut it to 13 inches for standard notebooks. To fit other sizes, use this formula:
Elastic Length = (2 × Notebook Height) − Bookmark Length
For example, an 8.5″ tall A5 notebook needs (2 × 8.5) − 8 = 9 inches of elastic.
Prepare Essential Sewing Tools
You’ll need:
– Scissors or rotary cutter
– Iron and pressing board
– Friction pen or washable marker
– Wonder Clips (better than pins for elastic layers)
– Point turner (chopstick or knitting needle works)
– Sewing machine with a standard foot
Cut and Prepare Fabric Pieces
Precision here ensures a neat final product.
Cut Fabric to Standard Dimensions
Lay your fabric flat. Using a ruler and rotary cutter or scissors, cut:
– Two main body pieces: 8″ by 3″
– One pocket piece: 10″ by 3″
– Two stabilizer pieces: 7.5″ by 2.5″
– One pocket stabilizer: 4.5″ by 2.5″
If using contrasting fabrics for front, back, and pocket, now’s the time to lay them out for visual balance.
Fuse Stabilizer to Fabric
Peel the paper backing from the fusible fleece. Center it on the wrong side of each fabric piece, leaving a ¼-inch border of fabric around all edges. This prevents stiff seams. Press with a hot iron for 10 to 15 seconds per section until fully adhered. Let cool before handling.
Prep the Pocket for Assembly
Fold the pocket piece in half (right sides together) along the 10″ length. Press the fold with an iron. Optionally, topstitch the folded edge with a 3mm stitch length for reinforcement. This keeps the pocket opening crisp and prevents fraying.
Attach the Elastic Loop Correctly
This step secures your pen holder to the notebook. Doing it right prevents slippage later.
Use the Encased Seam Method
This is the most reliable technique. Place the bottom body piece right-side up. Lay the pocket piece on top, aligning the bottom and side edges. Position the elastic ends across the center of the fabric, extending about ½ inch beyond the raw edges. Stay stitch each end with a 1/8″ seam to lock them in place. Then fold the elastic inward toward the center so it lies flat and won’t get caught in the outer seam.
Prevent Elastic Twisting
Before sewing, stretch the elastic slightly and check that it lies flat without twists. Use Wonder Clips to secure both ends in place. Look at the elastic from above. Both sides should run parallel. A twisted band causes uneven tension and poor fit.
Assemble and Sew the Layers
Now build the full unit with clean seams and sharp corners.
Layer in the Correct Order
Stack from bottom to top:
1. Main body piece (right side up)
2. Pocket piece (right side up, bottom-aligned)
3. Elastic (ends folded in, centered)
4. Top body piece (right side down)
Align all raw edges. Clip or pin the layers together, avoiding the elastic ends.
Sew Around the Perimeter
Set your machine to a ¼-inch seam allowance. Start sewing at one end, stitching all the way around. Leave a 2 to 3 inch gap on one side. This is your turning hole. Backstitch at the beginning and end for strength. When you reach corners, lower the needle, lift the presser foot, pivot the fabric 90 degrees, then continue.
Trim Corners and Turn Right Side Out
Use sharp scissors to clip the corners diagonally, getting close to but not through the stitches. This reduces bulk. Turn the bookmark right side out by pulling through the gap. Use a point turner or chopstick to gently push out the corners. Be careful not to poke through the fabric.
Finish with Professional Topstitching

This closes the gap and gives your pen holder a clean, durable edge.
Press the Bookmark Flat
Iron the entire piece flat, making sure the raw edges of the turning gap are folded inward to match the seam line. Press the pocket flat so it lies smoothly against the body.
Close the Gap and Topstitch
Fold the opening’s edges in about ¼ inch and press. Then sew a continuous topstitch around the entire perimeter, about 1/8 inch from the edge. This closes the gap and flattens the seam allowances. As you pass over the elastic ends, manually pull the elastic loop away from the needle path to avoid catching it.
Add a Center Divider (Optional)
To hold two pens separately, sew a vertical line down the center of the pocket. Measure 1.5″ from each side and stitch from the top edge to just above the stabilizer. Use a contrasting thread for a decorative touch.
Customize and Personalize Your Design
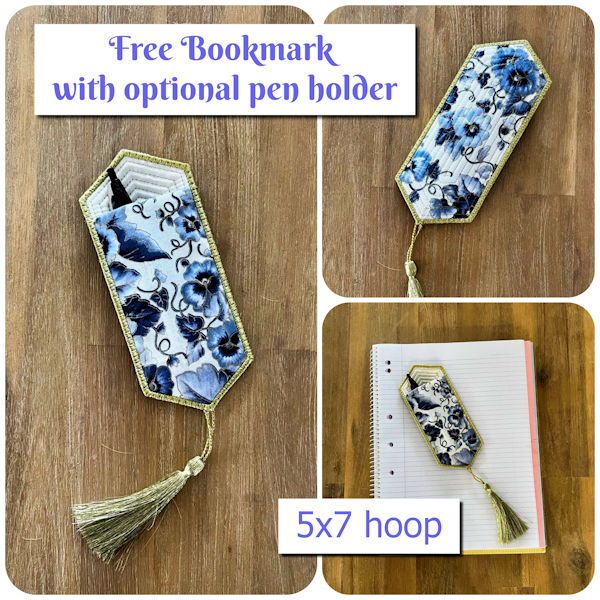
Make it uniquely yours or perfect for gifting.
Mix Patterns and Colors
Pair stripes with florals, or use different scales of polka dots. Darker or busier prints hide dirt better, which is ideal for daily use. For masculine styles, try chambray or navy solids. For kids or planners, use bright, fun prints.
Embellish Before Assembly
Add embroidery, iron-on patches, or fabric paint to the front piece before fusing stabilizer and assembling layers. This avoids sewing over thick embellishments later.
Use Decorative Thread
Topstitch with variegated or confetti thread for a playful effect. A bold color along the edge draws attention and hides minor stitching imperfections.
Troubleshoot Common Issues
Even small mistakes can affect function. Here’s how to fix them.
Fix Bulky Seams
If seams feel thick, you likely cut the stabilizer too large. Cut it ¼ inch smaller than the fabric next time. Also, clip corners well before turning to reduce internal bulk.
Stop Elastic from Twisting
Always check the elastic’s alignment before sewing. Pin both ends securely and visually confirm it lies flat. If it twists during sewing, stop and reposition.
Prevent Loose Fit
If the holder slips off, the elastic is too long. Recalculate using the formula: (2 × notebook height) − bookmark length. Trim and re-sew the elastic ends inside the seam.
Sharpen Rounded Corners
If corners aren’t crisp, push them out fully with a point turner before pressing. Clip corners closer to the stitching (but not through it). Press firmly while shaping.
Avoid Catching Elastic in Stitching
During topstitching, pull the elastic loop out to the side as you sew over the attachment point. Hold it clear with your fingers to prevent the needle from snagging it.
Maintain and Use Your Pen Holder
Keep it looking great and working well over time.
Clean Without Damage
Spot clean with a damp cloth. Avoid frequent machine washing, as it can degrade elastic. If needed, hand wash gently and air dry flat.
Store Pens Properly
Insert pens with the cap facing up so they don’t leak onto fabric. Remove them when not in use for long periods.
Match to Notebook Size
Use the elastic formula for planners, art journals, or binders. For an A4 notebook (12″ tall), elastic should be (2 × 12) − 8 = 16 inches.
Frequently Asked Questions About Sewing a Pen Holder
What fabric works best for a pen holder bookmark?
Cotton or cotton-blend fabrics work best for durability and ease of sewing. These materials hold their shape well and are widely available in scrap-friendly sizes.
How long should the elastic be for different notebooks?
Use this formula: Elastic Length = (2 × Notebook Height) − Bookmark Length. For an 8.5″ tall A5 notebook, you need 9 inches. For a 12″ tall A4 notebook, use 16 inches.
Can beginners sew a pen holder without experience?
Yes. This project is ideal for beginners learning how to sew a pen holder. The steps are straightforward, and the project takes under 15 minutes with basic sewing skills.
How do I prevent the elastic from stretching out over time?
Use elastic that is at least ¾” to 1″ wide. Narrower elastic under 3/8″ tends to lose its grip quickly. Spot cleaning instead of machine washing also extends elastic life.
Can I hold two pens in one pen holder?
Yes. Sew a vertical line down the center of the pocket to create two separate compartments. This works well for carrying multiple pens or a pen and pencil together.
Is this project good for handmade gifts?
Absolutely. With low material costs and a 15-minute build time, pen holders make thoughtful, practical gifts. Pair one with a new notebook for a complete gift set.
Key Takeaways for Sewing Your Own Pen Holder
Learning how to sew a pen holder is a fast, practical skill that pays off in everyday organization. The most important points to remember are these: choose your design based on intended use (cardstock for speed, fabric for durability, quilted for gifts), calculate elastic length using the notebook height formula, and always cut stabilizer slightly smaller than fabric to avoid bulky seams.
Start with a simple fabric pocket version to build confidence. Once you’ve mastered the basics, experiment with patterns, decorative threads, and embellishments. In less than 15 minutes, you’ll have a functional accessory that keeps your pen secure and your page marked. Try making a batch this weekend for gifts, classroom use, or your own collection of journals.