
You’ve bought a sleek desk grommet to tidy up your workspace, but drilling a hole in your desk feels risky. One wrong move and you could crack the surface or misalign the fit. The good news? Installing a desk grommet is a simple DIY task when done right, no professional help needed. Whether you’re using a basic cable grommet or upgrading to a powered outlet, this guide walks you through how to install desk grommet securely and cleanly. You’ll learn the exact tools, correct hole size, ideal placement, and pro techniques to avoid chipping or misalignment. By the end, your desk will have a flush, professional-grade cable pass-through that boosts both function and aesthetics.
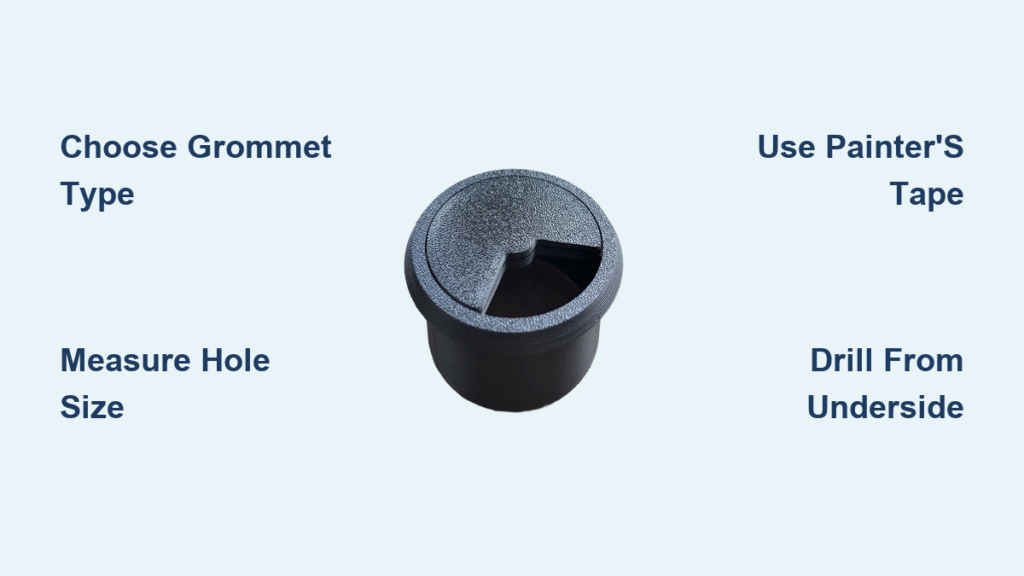
Choose the Right Desk Grommet Type
Before picking up a drill, confirm which grommet suits your setup. The wrong type can lead to loose fits or difficult installation.
Standard vs. Powered Grommets
Standard cable grommets are single-piece rubber or plastic rings that protect cords and hide them through the desk. They’re ideal for basic cable management and cost around $20. Powered grommet outlets integrate AC sockets and USB ports directly into the grommet, but they require electrical wiring. Hardwired models need a licensed electrician, so factor that into your decision.
Retrofit two-piece kits are designed for desks already assembled. You install them from underneath, so you don’t need to flip the desk over. This makes them perfect for IKEA furniture or hollow-core desks.
Pro Tip: If you own an IKEA or hollow-core desk, choose a retrofit kit. It’s easier to install without full disassembly.
Verify Grommet Size and Fit
Measure the base diameter of your grommet before buying a drill bit. Common sizes include 2 inches for standard grommets and 2 3/8 inches for B-Todd and premium desks. Always test-fit the grommet into a scrap piece of wood or cardboard first. If it’s loose, go down a bit in size. If too tight, slightly increase the hole.
Gather Required Tools for Grommet Installation
Use the correct tools to ensure a clean, chip-free hole and secure fit.
Essential Tools
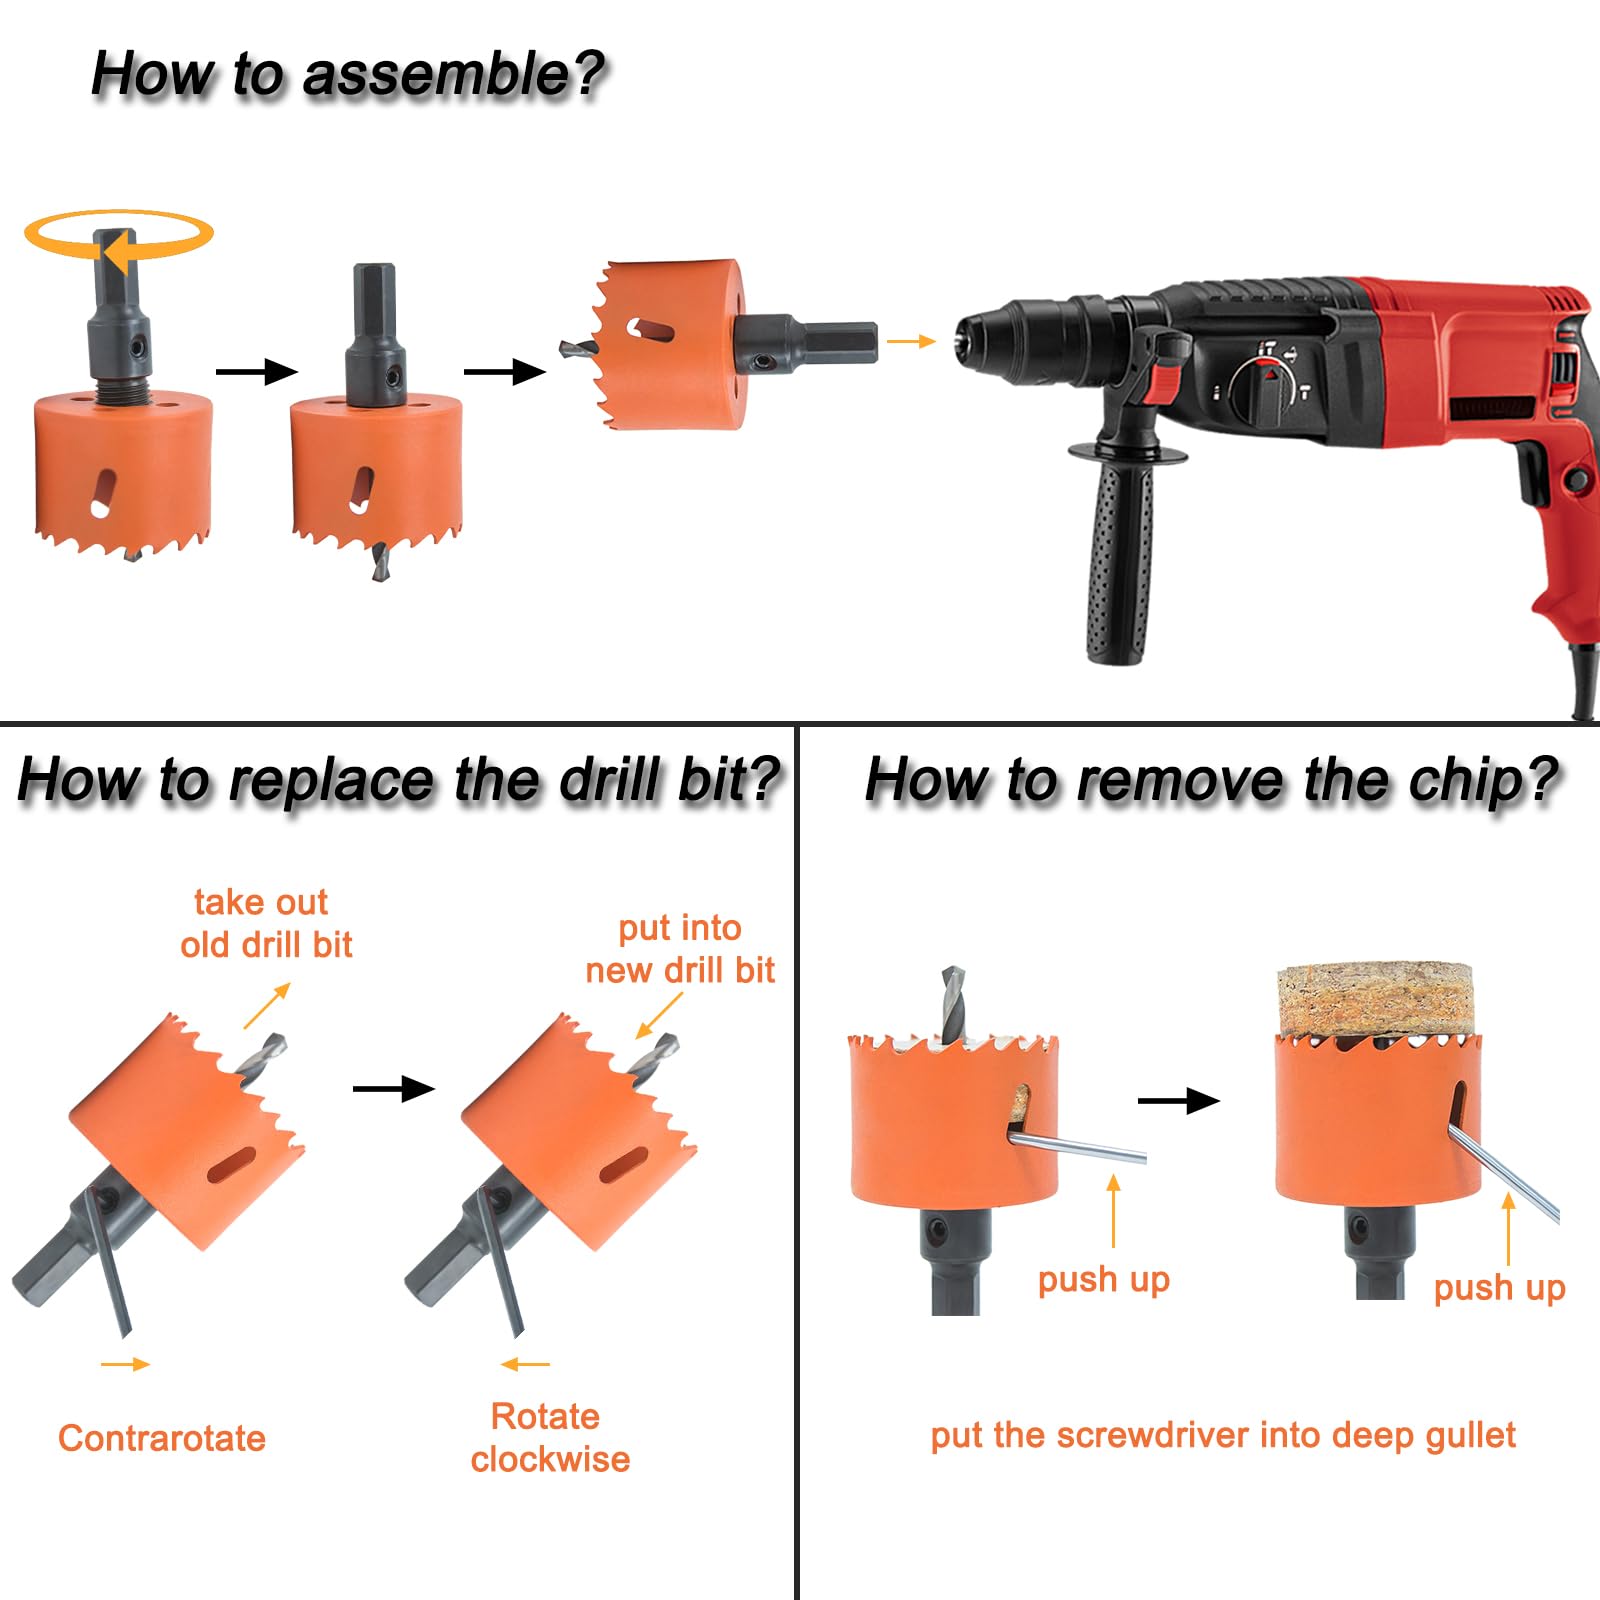
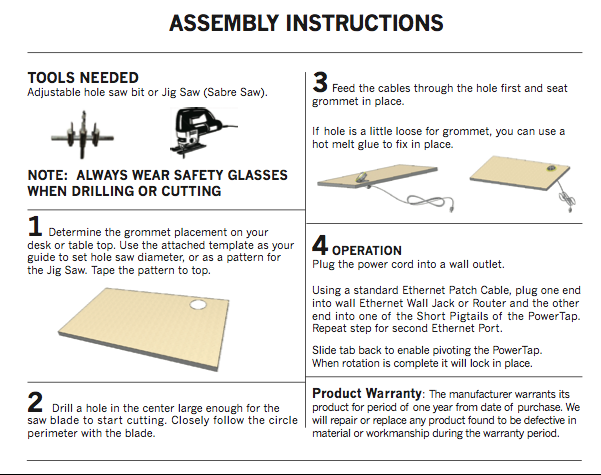
You will need a power drill with adjustable torque, a hole-saw bit matching your grommet size, a pilot drill bit to create a guide hole, a tape measure and pencil for marking, and safety goggles. The goggles are non-negotiable during drilling.
Protective Materials
Blue painter’s tape is critical for preventing laminate chipping. Apply multiple layers over the drill site. You’ll also want a vacuum or brush for quick debris cleanup, and optionally a backing board for hollow-core desks to prevent blowout.
Warning: Never use duct tape. It can tear veneer. Stick to low-adhesion blue painter’s tape.
Find the Perfect Grommet Location on Your Desk
Placement affects both usability and visual balance. Get it wrong, and your cables won’t reach, or worse, the grommet ends up too close to the edge.
Optimal Positioning Rules
Standard positioning is 2 inches from the front edge and 8 inches from the side edge. This aligns with B-Todd desk design and ergonomic setups. For power grommets, allow 3 inches from the edge for safer margin.
Align with Cable Flow
Place the grommet where your monitor, laptop charger, lamp, or power strip naturally sits. Avoid centering it unless symmetry is key. Most users prefer front-left or front-right placement.
Check for Obstructions
Flip to the underside of the desk and inspect for support braces, crossbeams, or pre-existing wires. For hollow-core desks, you only need to drill through one surface layer.
Checklist: Mark the spot on both top and bottom to ensure alignment.
Prepare the Desk Surface for Drilling
Skipping prep leads to splintered edges and ruined finishes, especially on laminated or veneered desks.
Apply Painter’s Tape
Cut a square of blue painter’s tape over the drill point. Add 2 to 3 overlapping layers for maximum protection. Mark the center with an X where measurements intersect.
Mark the Center Accurately
Use a ruler or tape measure to confirm distance from front and side edges. Check alignment across the desk thickness and pinpoint the exact center for the hole-saw bit.
Set Drill for Clean Cutting
Set your drill to maximum speed and maximum torque. This prevents stalling, which causes tear-out. Let the bit do the work. Don’t force it. Use a pilot hole to keep the hole saw on track.
Expert Note: A slow or low-torque drill can rip the material instead of cutting it cleanly.
Drill the Grommet Hole Without Cracking
The direction and technique you use determine whether the hole looks factory-installed or DIY-damaged.
Drill from the Underside
Drilling from the underside is the best practice. The bit exits through the top surface, so the tear-out happens on the hidden side, leaving your visible desktop smooth.
Steps for drilling from below:
Position the desk so you can access the underside. Align the hole-saw’s center bit with your marked point. Start drilling slowly, then let the bit reach full speed. As the bit breaks through, slightly lift to reduce exit splintering.
Visual Cue: When the center bit appears on the top surface, ease off pressure.
Drill from the Top If Necessary
If the desk can’t be flipped, double down on painter’s tape protection. Use sharp, clean hole-saw bits. Apply steady, light pressure and let the drill cut naturally.
Clean Up and Inspect Your Drilled Hole
A clean hole ensures a flush grommet fit and professional look.
Remove Debris
Peel off all tape layers. Use a vacuum to suck out wood chips and dust. Brush edges lightly if needed.
Check for Smooth Edges
Run your finger around the hole. There should be no splinters or rough spots. The circle should be even with no oblong distortion. Use fine-grit sandpaper if slight smoothing is needed.
Don’t skip this: Rough edges can damage cables over time.
Insert and Secure the Grommet
Now for the easy part, inserting the grommet securely.
For Standard Single-Piece Grommets
Insert from the top side of the desk. Press down firmly with your palm or a rubber mallet. Ensure it sits flush with the surface. There should be no wobbling or tilting.
Test: Wiggle the grommet. It should feel tight and stable.
For Retrofit Two-Piece Kits
These kits are used on pre-assembled or hollow desks. Remove the rear flange (backing piece). Push the main body up through the hole from underneath. Slide the top flange over the protruding part. Secure using clips, screws, or compression ring. Confirm both sides are snug and flush.
Pro Tip: Some kits include rubber washers. Use them to prevent vibration and noise.
Upgrade to a Power Grommet Outlet
Want outlets and USB ports at your fingertips? A powered grommet adds functionality but requires caution.
Installation Steps
Install the base grommet first using the same method as above. Insert the power module into the grommet opening. Secure with set screws or locking ring per manufacturer instructions. Connect wiring to building power only if hardwiring, and hire an electrician for that step.
Safety Checks
The outlet must sit flush with the desk surface. There should be no exposed wires or loose connections. Test all ports with a device before daily use.
Warning: Never plug the power module in until installation is complete. Risk of short circuit.
Route Cables Through Your New Grommet
Now that the grommet is in, organize your cords neatly.
Feed Cables in Order
Start with the thickest cables first, then work to thinnest. This typically means power strips or surge protectors first, then monitor power and HDMI, followed by laptop charger, and finally USB hubs, audio, and Ethernet.
Maximize Capacity
Most grommets fit 5 to 8 cables at once. Avoid overstuffing. Use a cable sleeve or velcro tie above the grommet. Leave space for future additions.
Benefit: The rubber or plastic lining protects cables from abrasion and reduces wear at the entry point.
Final Inspection and Testing
Before calling it done, run through this checklist.
Visual and Functional Check
Verify the hole is clean and chip-free. Confirm the grommet is flush and secure. Check for no damage to internal desk structure. Ensure cables feed smoothly without pinching. For powered grommets, verify outlets and USB work. Confirm the workspace looks tidy and professional.
Long-Term Tips
Avoid yanking cables out. Pull from the plug, not the cord. Clean the grommet annually to remove dust buildup. Consider upgrading to a larger grommet if adding more devices.
Where to Buy Desk Grommets
Need a reliable source? Cableorganizer.com specializes in cable management hardware. Average cost is around $20 for standard models. Options include basic, retrofit, and powered grommets.
Smart Buy: Choose a retrofit kit if you’re not taking the desk apart. It saves time and reduces risk.
Frequently Asked Questions About Desk Grommet Installation
What size hole do I need for a desk grommet?
Most standard desk grommets require a 2-inch hole. Premium brands like B-Todd use 2 3/8 inches. Always measure your specific grommet’s base diameter before drilling.
Can I install a grommet in a hollow-core desk?
Yes. Use a retrofit two-piece kit designed for pre-assembled furniture. These install from underneath, so you don’t need to flip the desk. Consider adding a backing board to prevent blowout.
How do I prevent chipping when drilling laminate desks?
Apply multiple layers of blue painter’s tape over the drill point. Drill from the underside whenever possible. Set your drill to maximum speed and torque, and let the bit do the work without forcing it.
Do I need an electrician to install a powered desk grommet?
It depends on the model. Plug-in powered grommets simply connect to an existing outlet. Hardwired models that connect directly to your home’s electrical system require a licensed electrician.
How far should a desk grommet be from the edge?
Standard placement is 2 inches from the front edge and 8 inches from the side edge. For powered grommets, allow 3 inches from the edge for safer clearance.
Can I remove and reinstall a desk grommet?
Yes, though the hole will remain. Standard grommets can be pried out carefully. Retrofit kits may be removable. Just know that the drilled hole will stay unless you fill it.
Key Takeaways for Installing Your Desk Grommet
Installing a desk grommet is a small upgrade with a big impact. With the right tools, precise measurements, and careful drilling, you’ll achieve a clean, professional cable management solution in under an hour. The most critical steps are choosing the correct grommet type for your desk, measuring carefully before drilling, and protecting the surface with painter’s tape. Whether you’re using a simple rubber grommet or a full power hub, this guide ensures your setup is safe, secure, and sleek. Now go reclaim your desk from cable chaos.


