
You found a solid wood desk at a thrift store, estate sale, or tucked away in your basement, and it needs a fresh look. Scratches, worn finish, stains, or outdated color don’t mean it’s doomed. With the right approach, you can transform it into a stunning centerpiece for your home office. Restaining a desk isn’t just about appearance; it’s about restoring function, durability, and character. This guide walks you through every step, from stripping the old finish to applying a flawless protective topcoat.
You’ll learn how to repair damage, choose the right stain, avoid common mistakes, and achieve professional results. Whether you’re preserving an antique’s patina or giving a mid-century piece a modern twist, the process connects you to craftsmanship in a way store-bought furniture never can.
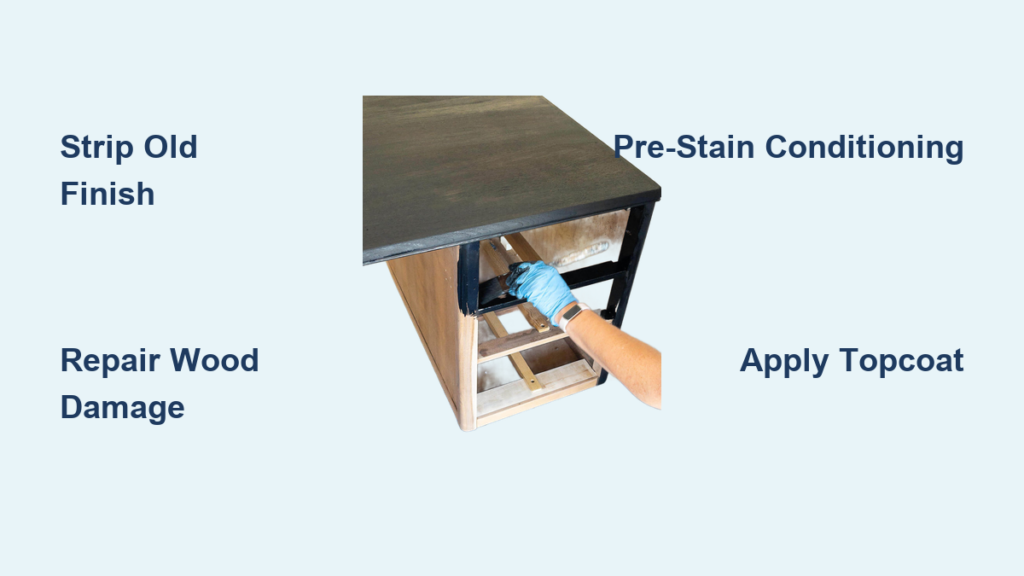
Strip the Old Finish Before Restaining a Desk

Removing the existing finish is the foundation of any successful desk restoration. Skipping or rushing this step leads to poor adhesion, uneven staining, and finish failure. The method you choose depends on your desk’s material, condition, and workspace.
Use Chemical Stripper Safely
Chemical strippers like Citristrip are ideal for detailed or vintage desks with carvings, veneer, or delicate hardware. They soften varnish, polyurethane, and paint without aggressive sanding that can damage thin wood.
Work in a well-ventilated area, preferably outdoors or in a garage. Wear nitrile gloves, safety goggles, and a respirator. Apply a thick, even layer with a brush to small sections of 1 to 2 square feet. Wait 15 to 30 minutes for the finish to bubble and soften. Scrape off with a plastic putty knife, always moving with the grain. Use a stiff-bristled brush to clean crevices and corners. Wipe residue with denatured alcohol or mineral spirits. Repeat until all finish is gone.
Citristrip may not fully remove old varnish. Follow up with mineral spirits and 0000 steel wool for a clean surface.
Try Oven Cleaner and Sunlight Method
For flat-surface desks and eco-conscious refinishers, fume-free oven cleaner offers a surprisingly effective alternative, especially when combined with sunlight. Spray or apply the oven cleaner generously over the surface. Place the desk in direct sunlight for 2 to 4 hours to accelerate breakdown. Rinse thoroughly with water, catching runoff in a basin. Scrub with Dawn Power Wash and a nylon brush. Let dry completely before sanding.
One DIYer achieved a coastal oak look using only oven cleaner and sun, skipping bleach or stain entirely.
Sand When Appropriate
Sanding works best on flat, solid wood surfaces without intricate details. It’s faster than chemical stripping but risks damaging veneer or creating uneven spots. Start with 120 to 150 grit on an orbital sander for large areas. Switch to 220 to 300 grit for smoothness. Use a hand sanding block on edges and corners. Avoid rotary sanders because they can gouge wood quickly. For veneered surfaces, sand lightly to avoid sanding through since veneer is often only 1/16 inch thick.
Strip first, then lightly sand with 150 to 220 grit to smooth the surface and remove residue. This preserves grain detail while ensuring a clean base.
Repair Wood Damage Before Staining
Even the most worn desks can be restored. Cracks, dents, and loose joints are fixable with basic tools and materials. Addressing these issues before staining ensures a seamless, professional result.
Fix Cracks and Splits
Inject wood glue into the crack using a syringe or small brush. Clamp tightly with bar clamps or vice clamps. Wipe off excess glue with a damp cloth. Allow 24 hours for full cure. Sand flush with 220-grit paper.
Do not force glue into tight cracks because overfilling creates a mess and delays drying.
Fill Dents and Holes
Use stainable wood filler for small to medium imperfections. For deep damage, use epoxy filler because it bonds stronger and resists shrinking. Apply filler slightly overfilled and let dry completely. Sand smooth with 220-grit sandpaper. Touch up with a wood marker in a matching tone to blend with stained wood.
Handle Veneer with Care
Veneer is fragile. If it’s lifting or chipped, do not sand aggressively. Avoid moisture-heavy stripping methods. If unstable, consider covering the desktop with a new material like quartz. Accept minor flaws as part of the desk’s character.
Treat Open-Grain Woods
Oak and mahogany have large pores that absorb stain unevenly. For a smooth, even finish, apply grain filler with a cloth, rubbing it into the pores. Remove excess before it dries. Let dry fully, then sand lightly with 220-grit paper.
Prepare Wood for Staining
Proper prep ensures your stain looks consistent and professional. Skipping this step leads to blotchiness, especially on softwoods like pine.
Dry Thoroughly After Stripping
Wood absorbs moisture during rinsing. If not fully dry, it won’t absorb stain evenly and may cause finish peeling. Allow 24 to 48 hours after oven cleaner rinsing. In humid climates, wait up to two weeks. Test dryness by touching the wood; no coolness or dampness should remain.
Raise the Grain
Water and chemicals raise wood fibers, creating a rough texture. Fix it before staining by lightly misting the surface with water. Let dry completely, which takes 1 to 2 hours. Sand gently with 220-grit paper using a hand block.
Test Stain Color First
Always test your stain on a hidden area like the underside of the desktop. Apply stain and let dry fully. Check for color depth, blotchiness, and compatibility with your finish. Adjust choice if needed.
Apply Pre-Stain Conditioner
This step is critical for softwoods like pine and poplar and for blotch-prone woods. Use oil-based conditioner if using oil-based stain. Apply evenly with a cloth or brush. Wait 5 to 15 minutes, then wipe off excess. Let dry before staining.
For oak, use a gray-toned pre-stain wash to neutralize the orange tone before applying clear or cool-toned finishes.
Apply the Stain
Staining transforms the desk’s appearance. Done right, it enhances grain, hides flaws, and sets the tone for your space.
Choose the Right Stain
Oil-based stains like Minwax Golden Pecan offer richer color, deeper penetration, and longer dry time of 6 to 8 hours. Water-based stains dry faster in 2 to 4 hours, have less odor, and minimal yellowing.
Minwax Golden Pecan darkens mid-century desks and masks minor imperfections beautifully.
Apply Stain Correctly
Wear gloves, goggles, and a respirator. Stir the stain don’t shake to avoid bubbles. Apply with a foam brush or lint-free cloth, following the grain. Use a generous coat for full penetration. Let sit 5 to 15 minutes; longer sitting time results in darker color. Wipe off excess with a clean cloth. Never let pools dry.
Stain-soaked rags can spontaneously combust. Store them in a sealed metal container with water until disposal.
Add Multiple Coats If Needed
Wait at least 4 hours between coats. Lightly sand with 220-grit paper if surface feels rough. Most projects need only one coat.
Seal and Protect the Finish

A protective topcoat locks in the stain and shields the desk from daily wear. Choose based on durability, sheen, and maintenance needs.
Use Sanding Sealer for Porous Woods
For oak, mahogany, or other open-grain woods, apply a liberal coat of sanding sealer. Let soak 5 to 15 minutes. Wipe off excess. Dry fully, then sand with 220-grit paper.
Apply Polyurethane Topcoat
This is the most durable option for desks. Choose water-based polyurethane for a clear, non-yellowing finish. Oil-based offers more durability but yellows over time. Stir gently no shaking to prevent bubbles. Apply thin, even coats with a sponge brush. Let dry 4 to 6 hours for water-based or 8 to 12 hours for oil-based. Lightly sand with 220-grit between coats. Wipe dust with a tack cloth. Apply 3 coats on the desktop and 2 on legs and sides.
Wait 24 to 72 hours before using the desk.
Try Alternative Finishes
General Finishes Flat Out Flat provides an ultra-matte, non-yellowing finish perfect for modern, minimalist styles. Beeswax polish can be applied after stain has off-gassed; wait 2 to 3 days. Rub in with a soft cloth. Wait 20 or more minutes. Wipe off excess and buff for a warm, lustrous finish. No respirator is needed, making it ideal for low-traffic or decorative desks.
Restore or Upgrade Hardware
Hardware can make or break the look of your refinished desk. Clean, polish, or replace it to match your new aesthetic.
Clean Removable Hardware
Soak knobs, pulls, and hinges in warm soapy water or vinegar. Scrub with a soft brush. Dry thoroughly before reattaching.
Polish In-Place Hardware
For glued or fixed hardware, use Bar Keeper’s Friend, a non-abrasive cleanser. Mix with water to form a paste. Apply with a scrubber brush. Rinse with a damp cloth. Dry immediately.
One refinisher polished 28 brass pulls in place, achieving a golden tone that complemented a cool quartz top.
Upgrade the Desktop

Replace a damaged or outdated desktop with a modern material for a high-end look.
Choose Quartz or Marble
Quartz offers high scratch resistance, high stain resistance, low maintenance, and medium DIY difficulty. Marble offers low scratch resistance, low stain resistance, high maintenance, and low DIY difficulty. Quartz costs $100 to $500, while marble costs $300 to $800.
Quartz is the winner because it’s durable, non-porous, and available in stylish colors.
Source Stone Remnants
Visit local granite or quartz shops and ask for remnants, which are leftover pieces from larger jobs. Provide exact measurements and edge preferences. The shops handle cutting, edging, and polishing.
One user paid $100 for quartz plus $400 for fabrication, totaling $500 and saving 75% compared to a $2,000 retail desk.
Final Touches and Maintenance
Your refinished desk is nearly ready. Now, reassemble, protect, and enjoy your work.
Reassemble Carefully
Reattach legs, drawers, and hardware. Use labeled bags to match screws and components. Tighten screws gradually to avoid stripping.
Protect Your Investment
Use coasters, desk pads, or mats to prevent scratches and heat damage. Avoid direct sunlight to reduce fading. Clean with a damp cloth and mild soap. For waxed finishes, reapply beeswax every 1 to 2 years. For polyurethane, light sand and recoat in high-use areas as needed.
Long-Term Care by Finish Type
Polyurethane finishes require mild soap and water cleaning with recoating every 3 to 5 years. Beeswax finishes require damp cloth cleaning and annual re-waxing. Quartz tops require soap and water cleaning with no sealing needed.
Frequently Asked Questions About Restaining a Desk
Can I restain a desk without stripping it first?
You can sand the existing finish off if it’s not too thick, but stripping ensures better adhesion and a more even result. Skipping this step often leads to blotchy or peeling stain.
How long does it take to restain a desk?
The process takes 1 to 2 weeks total, accounting for drying time between stages. Actual working time is 8 to 12 hours spread across multiple days. Rushing drying leads to poor results.
What happens if I don’t use pre-stain conditioner?
Softwoods like pine absorb stain unevenly, resulting in blotchy, dark spots. Pre-stain conditioner evens absorption for a smoother, more uniform finish.
Can I restain a veneer desk?
Yes, but with caution. Veneer is only 1/16 inch thick, so aggressive sanding can sand through. Use chemical stripper rather than sanding, and avoid getting the surface too wet.
How do I know if my desk has lead-based paint?
Pre-1978 furniture may contain lead. Test with a lead paint test kit before sanding. If lead is present, use proper PPE and containment, or hire a professional.
What’s the best stain color for a mid-century desk?
Minwax Golden Pecan is popular for mid-century pieces because it darkens wood while warming the tone. It also masks minor imperfections effectively.
Key Takeaways for Restaining Your Desk
Restaining a desk is more than a DIY project; it’s a transformation. With patience, the right tools, and attention to detail, you can turn a forgotten piece into a functional work of art. The most critical steps are proper stripping, thorough drying, and using pre-stain conditioner on softwoods. Whether you’re restoring history, saving money, or expressing creativity, test every step and respect drying times. Embrace imperfections because they’re part of the story. Now, roll up your sleeves and make that desk shine.


