
You’re rearranging your office, moving furniture, or trying to retrieve a dropped pen that slipped behind the desk. Suddenly, you’re faced with a stubborn drawer that won’t come off, no visible levers, and no idea what kind of slide it uses. You’re not alone. Millions of desks use different drawer slide mechanisms, many of which are poorly labeled or completely hidden. The good news? Every drawer can be removed—you just need to know the right method for your specific slide type.
The key to success lies in identifying the slide mechanism first. Most modern desks use side-mounted ball-bearing glides with release levers, but undermount, push-in, roller, and even permanent slides are common. Some, like AICO or industrial-grade rails, don’t detach at all—you must unscrew them. Others, like Hekman or Pottery Barn models, require precise lever combinations. Attempting the wrong method can damage the slide or injure your fingers.
In this complete guide, you’ll learn exactly how to remove desk drawers safely and efficiently, no matter the brand or slide type. We’ll walk you through identification, step-by-step removal procedures, troubleshooting stuck drawers, and pro tips from real users.
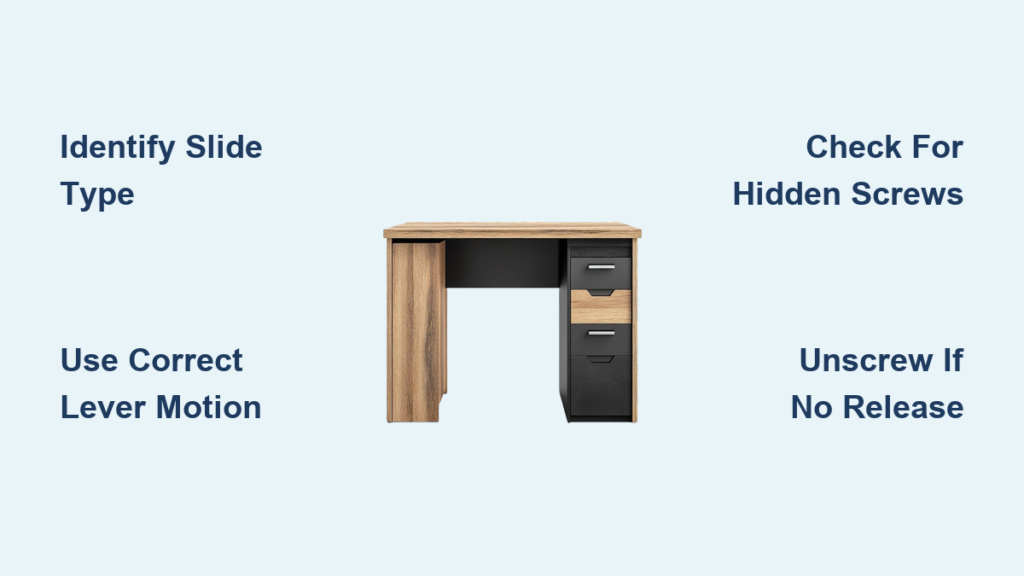
Identify Your Drawer Slide Type Before Removal
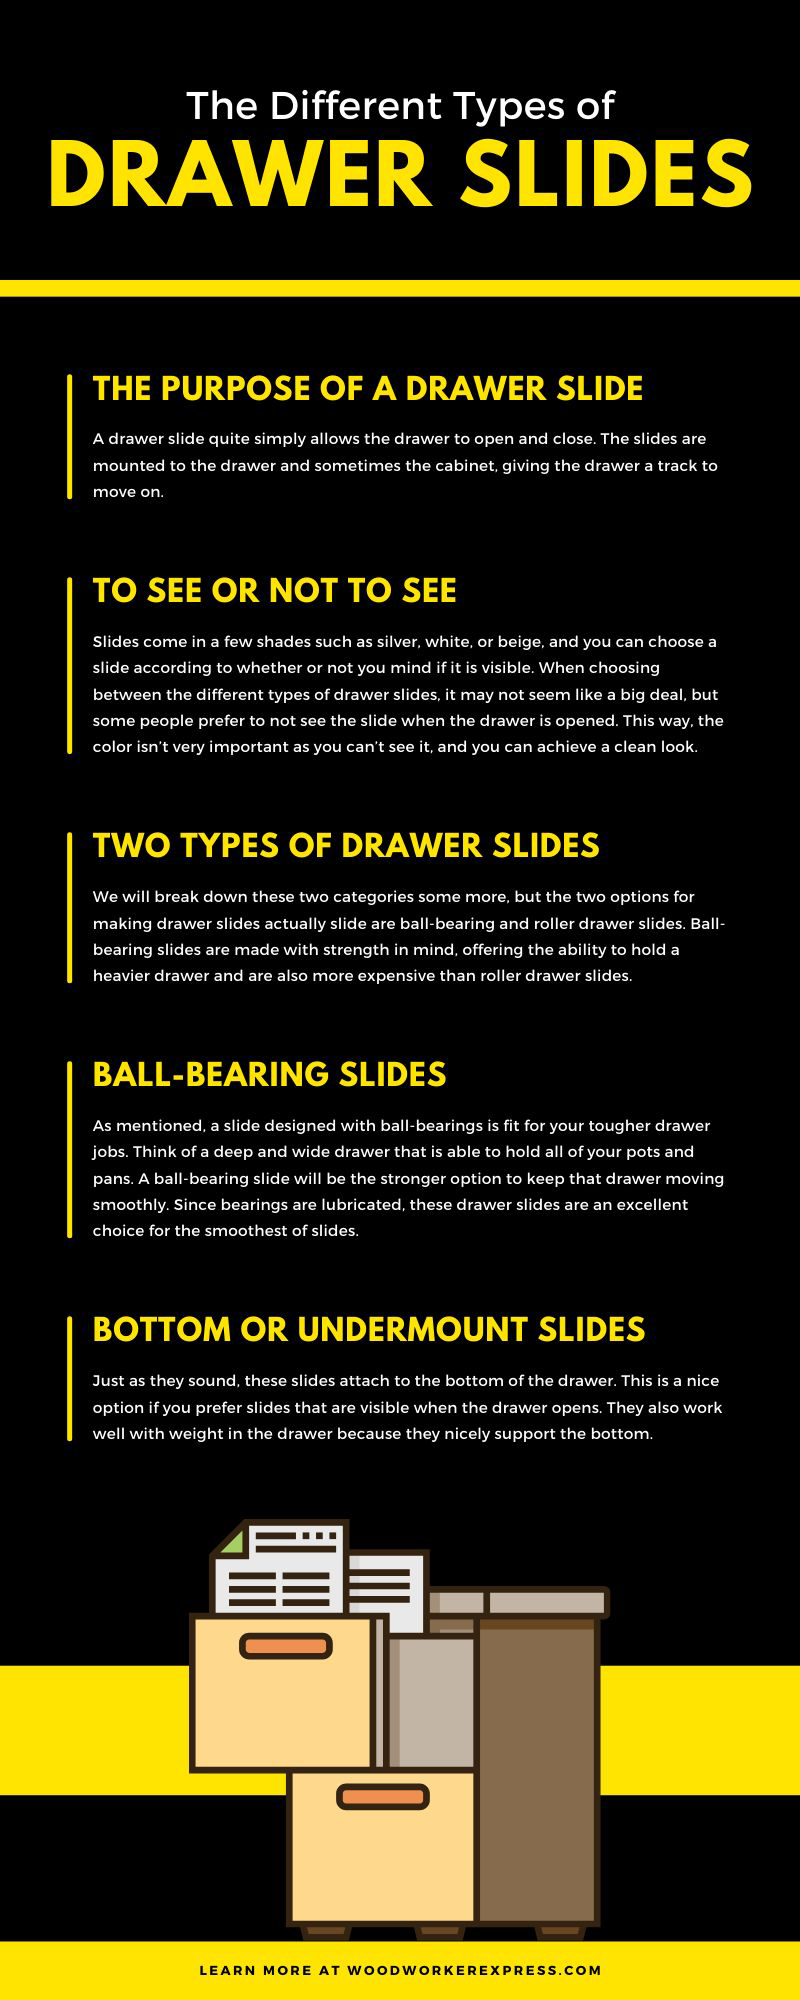
Before touching any levers or tools, determine what kind of slide your desk uses. The removal method depends entirely on the mechanism. Most desks fall into one of eight common categories.
Metal Glides with Levers
These are the most common in modern desks. They feature steel tracks with ball bearings and a central release lever on each side. When extended, you’ll see a small metal tab, often curved, on the middle or rear of the track attached to the drawer. One side typically releases upward, the other downward due to non-handed design. Found on Hekman, Pottery Barn, and many office desks.
Visual cue: Visible levers on the drawer’s side when pulled out.
Undermount Slides
Hidden beneath the drawer, these provide a clean look and full extension. No side tracks are visible. The release is usually a plastic clip or metal tab accessible only from below. You must press or lift both sides simultaneously, then lift the drawer up to disengage. Common in high-end or custom desks.
Visual cue: No side hardware; mechanism under the drawer.
Heavy Duty Slides
Used in filing cabinets or industrial desks, these are built for strength, not easy removal. They lack release mechanisms entirely. To remove the drawer, you must unscrew it from the slide. These often support 500+ lbs and use dual ball-bearing races.
Visual cue: Thick steel construction, no levers or tabs.
Push-In Release Slides
Instead of levers, these use inward-pressing tabs. Found on Fulterer FR 5609 and similar 200 lb. rated slides. Requires firm, simultaneous pressure on both sides. Tabs may be recessed, so use a flashlight to locate.
Visual cue: Smooth center track with no moving levers.
Wood Glides
Common in vintage or budget furniture. No metal hardware, just wooden runners. The drawer is removed by pulling straight out with strong, even force. May include wooden stops or twist retainers.
Visual cue: Wooden tracks, no metal parts.
Roller Slides
Small plastic or metal wheels on the drawer sides run in metal or wooden channels. To remove, lift the front and swing outward. Often misassembled, rollers on the wrong side cause binding.
Visual cue: Small wheels visible at drawer base.
Anti-Tip Systems
Safety feature in freestanding desks. A cable or bracket prevents multiple drawers from opening at once. Must be disconnected first—it blocks full extension. Screws are usually Phillips-head at the rear.
Visual cue: Thin metal cable at the back of the drawer.
AICO Branded Slides
Low-cost, mass-market rails with no functional release. Components are permanently assembled. Attempting to force them apart risks losing ball bearings. Only removal method: unscrew the slide from drawer or cabinet.
Visual cue: No levers, tabs, or visible separation points.
Metal Glide Drawer Removal for Hekman and Pottery Barn Desks
This is the most common removal scenario for modern office desks. Follow these steps carefully, timing and direction matter.
Locate the Release Levers
Pull the drawer fully open. Look at the side of the drawer box. On the metal track, you’ll see a small lever near the center or rear. It may be straight or curved. This lever connects to the drawer; the other half of the track is fixed to the cabinet.
Pro tip: Use a flashlight. Some levers are recessed or dark-colored.
Apply Opposite Pressure to Release
Due to non-handed design, the left and right levers require opposite movements. Use both hands simultaneously:
• Left side: press lever down
• Right side: pull lever up
Do not alternate—both must move at the same time. One slide is installed upside down, so the release mechanism responds in reverse.
Pull the Drawer Forward
While holding the levers in position, pull the drawer straight out. It should disengage smoothly. If it sticks, recheck lever direction. Reversed input is the most common mistake.
Time estimate: 10 to 20 seconds once you know the method.
Reinstalling the Drawer
Extend the cabinet-side tracks fully. Align the drawer and slide it in. The first two-thirds go smoothly. The final section may feel stiff due to the bearing slide. Push until it clicks. The lever snaps back automatically.
Warning: Do not force it. If resistance is high, check alignment.
Undermount Slide Removal: Lift and Release Method

These sleek, hidden slides require a different technique. You lift instead of slide.
Extend and Inspect Underneath
Pull the drawer open completely. Get down and look beneath. You’ll see plastic clips or metal levers on both sides of the track. These are the release points.
Visual clue: Some have arrows or colored tabs indicating direction.
Activate Both Sides Simultaneously
Press or lift both release mechanisms at the same time. Direction varies by brand. Some require upward lift. Others need inward press. If one side resists, the drawer won’t release. Use both hands or ask for help.
Remove the Drawer Upward
Once released, pull the drawer forward slightly, then lift upward. It should come free from the tracks. The slides remain mounted under the cabinet.
Caution: Support the drawer’s weight. Sudden drops can damage flooring or fingers.
Reinstalling Undermount Slides
Place the drawer onto the extended slides. Slide it in fully. You’ll hear a click or double-click when engaged. Some models require slight downward pressure during insertion.
Pro tip: Take a photo before removal. Alignment matters.
Heavy Duty and AICO Slide Removal: Unscrew Instead of Release

Not all slides come apart. Some are designed to stay together. Removal means disassembly.
Check for Screws Connecting Drawer to Slide
If no levers or tabs exist, look for screws along the side of the drawer. These attach the drawer to the slide. Use a Phillips screwdriver or Allen wrench to remove them.
Remove Drawer After Unscrewing
Once screws are out, pull the drawer straight out. It may still feel stuck. Check for:
• Anti-tip cables (disconnect first)
• Deformation or warping (common in AICO rails)
• Over-tightened screws (can pinch the track)
User report: Even after screw removal, some AICO drawers remain trapped due to permanent bonding or rail deformation.
Reassembly Tips for Screw-Type Slides
Reattach the drawer to the slide before reinstalling. Align holes carefully. Hand-tighten first, then secure.
Warning: Do not force separation of the slide itself. Ball bearings may spill out, rendering it useless.
Wood and Roller Slide Removal for Older Furniture
Older or budget desks often use simple mechanical systems with no releases.
Wood Glides: Pull Straight Out
Fully extend the drawer. Grip both sides firmly. Apply strong, even pressure straight outward. The drawer will pop out once past the wooden stops.
Dual-track systems are easier than single-center ones. If stuck, check for twist-type retainers or pins at the back.
Never jerk or twist. You risk breaking the wood.
Roller Slides: Lift and Swing
Pull the drawer as far as it goes. Lift the front end upward while supporting the back. Swing slightly outward to disengage rollers from the track.
Binding? Check roller orientation. Some are installed on the wrong side during assembly. Reverse them if needed.
Maintenance tip: Clean tracks with a dry brush. Lubricate with paraffin wax, not WD-40. It attracts dust.
Anti-Tip Mechanism: Disconnect Before Removal
Safety first. Many desks have anti-tip cables that prevent removal if ignored.
Locate the Anti-Tip Cable
At the rear of the drawer, you’ll see a thin metal cable or bracket. It’s attached with Phillips-head screws. This prevents more than one drawer from opening at once.
Unscrew the Cable First
Remove the screws on both sides. Set the cable aside. Do not skip this step. It physically blocks full extension.
Release the Drawer Afterward
Now proceed with the slide’s normal method. For levers, press left down, right up. For undermount, press clips and lift. For push-in, press tabs inward. Pull forward while tilting slightly upward if needed.
Pro tip: Drawers may be numbered (1 = top). Record the order for reinstallation.
Troubleshooting Stuck Desk Drawers
Even with the right method, drawers can resist. Here’s how to fix common issues.
No Visible Release? Check the Back
Use a flashlight to inspect the last 2 inches of the track when fully extended. Look for recessed plastic tabs, spring-loaded levers, or colored indicators. Feel with your fingers. Some mechanisms are tactile, not visible.
Drawer Won’t Budge? Check for Hidden Screws
The most common reason: screws still attached. Inspect the slide-to-drawer connection. Some users over-tighten screws through the track into the drawer, locking it in place.
Remove all visible screws before attempting release.
Stuck Due to Reversed Rails?
A surprising issue: rails installed backward. The cabinet rail is on the drawer, and vice versa. This makes release impossible.
Check orientation. The shorter track with lever should be on the drawer. The longer, fixed track should be on the cabinet.
Ball Bearings Fell Out?
If you forced apart a non-serviceable slide (AICO, heavy-duty), the bearing system is likely destroyed. These are not repairable.
Solution: Replace the entire slide.
Drawer Won’t Extend Fully?
Causes include debris (paper clips, screws), misalignment, or over-tightened screws.
Fix: Gently wiggle side-to-side while pulling. Clean and lubricate with silicone spray.
Avoid oil-based lubes. They attract dust and gunk.
Pro Tips From Real Users Who Removed Drawers
Community insights reveal what manuals don’t tell you.
Just Unscrew the Drawer From the Rail
If no release works, remove all screws connecting the slide to the drawer. This bypasses the mechanism entirely.
Applies to: AICO, budget furniture, older units.
Check for Reversed Rails
Rails installed backward prevent release. One user spent hours trying to disengage levers, only to find the tracks were swapped.
Fix: Swap the rails during reassembly.
Use a Flathead Screwdriver for Recessed Tabs
For recessed tabs, a small flathead can help depress hidden buttons. Works on push-in and undermount slides.
Take Photos Before Removal
A close-up of the extended slide can save hours. Capture overlapping track sections, levers, and cable connections.
When Reassembly Fails: Fix Assembly Errors
Sometimes the drawer won’t go back in because it was assembled wrong.
Bottom Panel Installed Upside Down
Symptom: Drawer sits too high or binds.
Diagnosis: The bottom panel was attached to what should be the top of the drawer, inverting the structure.
Fix: Disassemble completely. Reattach the bottom to the correct (underside) position.
Key insight: “If you assembled it, you can take it apart.” — Adele Walker
Maintenance and Reinstallation Best Practices
Keep your drawers running smoothly with these habits.
Clean Tracks Before Reinstalling
Wipe tracks with a dry cloth or soft brush. Remove paper dust, crumbs, or debris.
Lubricate With the Right Products
Use silicone spray or paraffin wax. Avoid WD-40. It attracts dirt and degrades over time.
Align Perfectly Every Time
Misalignment causes binding. Ensure tracks are parallel and drawer is level.
Test Empty Before Loading
Slide the drawer in and out several times before loading. It should move smoothly.
Label Drawers and Tracks
For multi-drawer units, label each drawer and track position. Prevents mix-ups during reassembly.
Quick Decision Guide: What to Do When Stuck
Follow this quick flow:
- Empty the drawer
- Pull it fully open
- Look for levers, tabs, or clips
• Yes → Use correct method (lever, push, lift)
• No → Go to 4 - Check for anti-tip cable → Unscrew if present
- Still no release? → Unscrew the slide from the drawer
- Still stuck? → Rails may be reversed, deformed, or permanently bonded
Golden rule: Never force it. High resistance means wrong method or assembly error.
Frequently Asked Questions About Removing Desk Drawers
How do I know what type of drawer slide my desk has?
Examine the drawer when fully extended. Metal glides show levers on the side. Undermount slides hide beneath the drawer. Wood glides have no metal parts. If you see no release mechanism and no screws, it’s likely a budget slide like AICO that requires unscrewing.
Why won’t my desk drawer release even after pressing the levers?
The most common cause is pressing both levers in the same direction. On non-handed slides, you must press one up and the other down. Another possibility is that screws still attach the drawer to the slide. Check for hidden screws along the track.
Can I remove a drawer without emptying it first?
You can, but it’s not recommended. Empty drawers are lighter and easier to control. Full drawers add weight that can cause the drawer to drop suddenly or damage the slides during removal.
What tools do I need to remove desk drawers?
Most removals require only your hands and a flashlight. For screw-type slides, you’ll need a Phillips screwdriver or Allen wrench. A flathead screwdriver helps with recessed tabs. Keep gloves handy for grip and protection.
My drawer has no visible release mechanism. What now?
If you see no levers, tabs, or clips, check the back of the slide with a flashlight. Look for recessed mechanisms. If nothing is visible, the slide is likely a budget type (AICO) or heavy-duty. Your only option is to unscrew the drawer from the slide.
How do I reinstall a desk drawer correctly?
Extend the cabinet tracks fully. Align the drawer tracks with the cabinet tracks. Slide the drawer in until it clicks into place. For lever-type slides, the lever snaps back automatically. Test the drawer by sliding it in and out several times before loading it.
Final Thoughts on Removing Desk Drawers Successfully
Not all drawer slides are meant to be removed easily. Budget hardware like AICO rails lacks serviceable features. Heavy-duty slides prioritize strength over accessibility. When in doubt, disassemble via screws—it’s safer than forcing a release mechanism.
The most important step is identifying your slide type first. Attempting the wrong method wastes time and risks damage. Once you know whether you have levers, clips, push-tabs, or nothing at all, the removal process becomes straightforward.
Remember: “You didn’t do something correctly. Simply start over.” With the right approach, every drawer comes off. Take photos before disassembly, work methodically, and your desk drawers will separate cleanly every time.


