
You’re short on space but need a functional workspace. A pull-out desk solves that. Whether tucked under a countertop, inside a cabinet, or mounted on a wall, this space-saving solution delivers full utility without clutter. In this guide, you’ll learn how to make a pull out desk that’s sturdy, smooth-gliding, and custom-fit to your room.
From selecting materials to installing slides and adding stabilizing braces, every step is covered. You’ll build a desk that extends effortlessly, supports your laptop and notebook, and disappears when not in use.
Choose Your Pull-Out Desk Type
Before cutting wood, decide on the design that fits your space and needs.
Slide-Out Under Countertop
This style works best in kitchens or built-in cabinetry. The desk nests beneath a quartz or wood countertop and pulls forward on drawer slides. You need at least 3 inches of vertical clearance above the desk to avoid hitting the overhang when extended.
Wall-Mounted Folding Desk
This design hinges down from the wall like a Murphy bed. It uses a support brace and wood peg lock to hold it steady. This option works best for tight spaces where floor clearance matters.
Drawer-Integrated Work Surface
This converts a deep drawer into a writing surface. The drawer extends fully, and the flat top becomes your desk. This works great for nightstands or office furniture upgrades.
Drop-Down Desk Under Window
Installed beneath a windowsill, this style folds down vertically. Anchored into wall studs, it’s invisible when closed and doubles as a hidden home office.
Select Materials and Tools
Lumber Options for Your Build
Choose wood based on your budget and finish preference.
• Pine works well for painted finishes and is budget-friendly
• Poplar is stable and smooth, ideal for frames and braces
• Baltic birch plywood offers void-free layers for drawer boxes
• Walnut provides a premium look with rich grain for visible desktops
Use 1×2 or 2×2 poplar for frames, and a 24×30-inch solid board for the desktop.
Essential Tools Required
• Miter saw for precise cuts
• Drill and driver for screws and assembly
• Kreg jig for pocket holes
• Biscuit joiner for seamless walnut joints
• Jigsaw to round corners
• Stud finder for wall mounting
• Speed square and right-angle clamp for square assembly
Label all cut pieces such as “Front Frame” or “Left Support” to avoid confusion during build.
Build a Strong Desk Frame
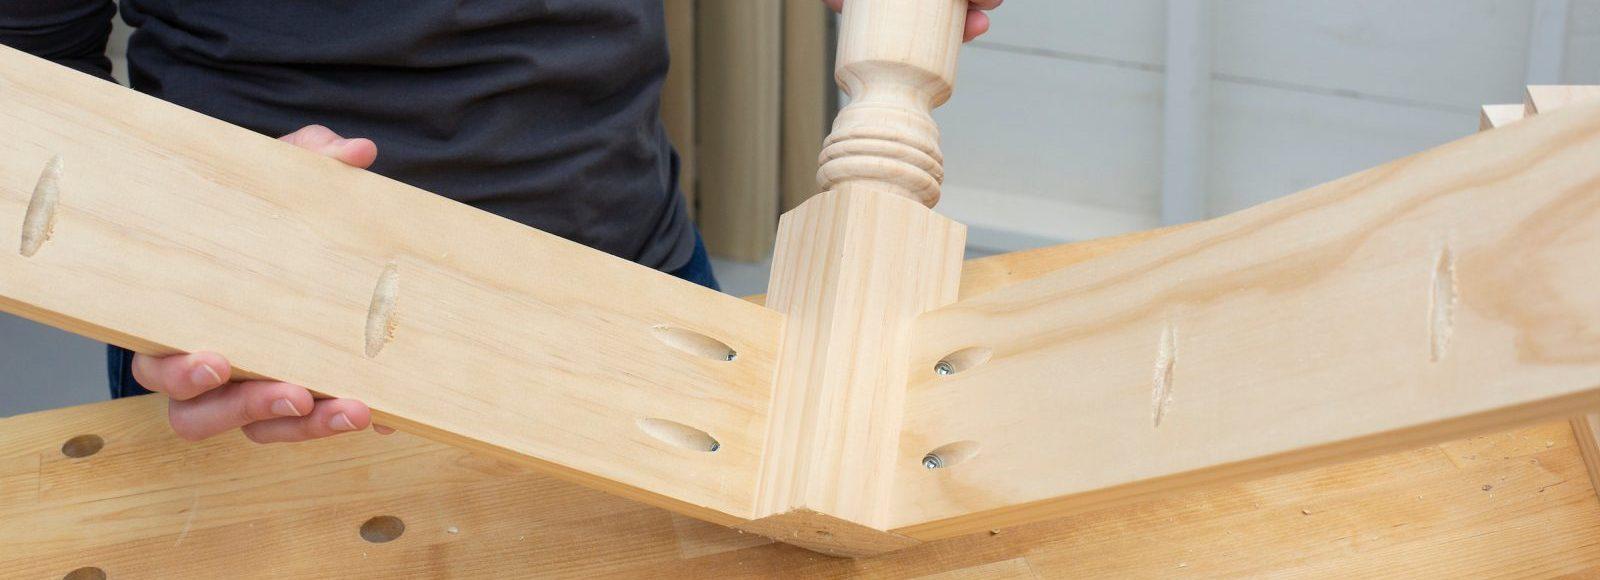
A strong frame ensures the desk won’t wobble when extended.
Pocket Hole Joinery Method
This method works perfectly for painted desks with no visible hardware.
- Cut four frame pieces: two sides at 18 inches, top and bottom at 24 inches. Adjust to fit your specific space.
- Set Kreg jig for 1.5-inch-thick material.
- Drill pocket holes on the ends of the top and bottom pieces.
- Clamp frame with speed square for 90-degree angles.
- Secure with 2.5-inch pocket screws and wood glue.
Biscuit Joinery Method
This creates nearly invisible joints and superior alignment, ideal for high-end finishes like walnut.
- Use a biscuit joiner with No. 20 biscuits.
- Cut slots in mating edges of frame pieces.
- Apply glue, insert biscuits, and clamp until dry.
- Sand flush after curing.
Install Smooth-Gliding Slide Mechanism
The right hardware makes the desk glide smoothly and last for years.
Use Full-Extension Drawer Slides
Choose ball-bearing, full-extension slides rated for at least 75 pounds. Mount them on the bottom of the pull-out desk frame. Attach the cabinet side to the underside of the countertop or cabinet rail.
Mounting Tips for Success
- Extend slides fully and clamp in place.
- Check alignment with a level. Misaligned slides will bind.
- Pre-drill holes to prevent splitting.
- Secure with screws through the cabinet bracket and desk bracket.
Test the motion before final assembly. It should glide silently and stay in place when pulled out.
Alternative: Keyboard Tray Hardware
If drawer slides won’t fit your space, use heavy-duty under-desk keyboard slide hardware. Designed for daily use, it supports up to 50 pounds and retracts smoothly.
Add Support and Stability Features

Extended desks can sag or tip without proper bracing.
For Slide-Out Desk Support
Add a wooden leg on one side that drops down when extended. Alternatively, install a center support rail underneath, anchored to the cabinet back. Use dual slide pairs for desks wider than 24 inches.
For Folding Wall Desks
Install Horizontal Wall Brace
- Locate wall studs with a stud finder.
- Cut a 1×4 poplar board to span at least two studs.
- Screw through the brace into each stud with 3-inch deck screws.
This brace takes the full load when the desk is down.
Attach Lip and L-Bracket
Nail a 1×2 lip on top of the horizontal brace. Add an L-bracket where the lip meets the brace for extra strength. The desktop will hinge to this lip.
Build Triangle Support Brace
This brace prevents the desk from collapsing under pressure.
Construct the Right Triangle
- Cut three pieces: vertical leg, horizontal leg, and diagonal brace.
- Assemble into a triangle using hinges.
- Top hinge attaches to vertical support mounted on wall.
- Bottom hinge connects to the underside of the desktop.
- Leave space so the brace folds flat when not in use.
Add Wood Peg Lock System
- Drill a hole in the top end of the triangle brace.
- Insert a wood peg halfway, glue in place.
- Drill a matching hole in the brace under the desktop.
- When lowered, the peg drops into the lower hole, locking the desk in place.
This simple system eliminates wobble and avoids metal latches that wear out.
Finish the Desktop Surface
A smooth, durable surface protects against wear and enhances looks.
Sand Thoroughly
Start with 80-grit to remove marks. Progress to 120, then 220-grit for a silky finish. Sand before and after assembly for best results.
Round the Corners
- Trace a curve using a metal coffee can as a template.
- Cut with a jigsaw.
- Sand edges smooth with 120 then 220-grit paper.
Rounded corners prevent injuries and give a modern look.
Stain and Seal Properly
- Wipe on wood conditioner, especially for pine.
- Apply oil-based stain with a cloth, then wipe off excess.
- Let dry 24 hours.
- Seal with polyurethane, using 3 coats with light sanding between.
For visual flair, try a dual-stain finish with dark stain on top and a lighter or contrasting color underneath.
Integrate Into Existing Furniture
Custom-fit your desk into cabinetry or countertops.
Replace Countertop Section
- Cut a section of quartz to make room for the desk.
- Install a piano hinge along the back edge.
- Attach a wooden desktop that folds down.
- Use a support brace and peg lock as described earlier.
Now you have a hidden desk that blends with your kitchen or bathroom counter.
Convert Top Drawer Into Desk
- Remove drawer from cabinet.
- Attach a 1×2 lip to the front edge.
- Extend drawer depth if needed, up to 22 inches.
- Reinstall with full-extension slides.
- When pulled out, the flat top becomes your work surface.
Ensure chair height matches the drawer’s height. Thirty to 34 inches is ideal.
Mount and Test Your Build
Final installation determines safety and function.
Anchor Securely Into Studs
Use a stud finder to locate framing. For wall-mounted desks, all load-bearing screws must hit studs. Use 3-inch screws for braces and hinges. Drywall anchors won’t hold long-term.
Test Before Finishing
- Extend and retract the desk 10 times.
- Check for binding, misalignment, or wobble.
- Adjust slide position or brace angle if needed.
Fix issues now because finishing hides nothing.
Customize and Enhance Your Desk
Make your pull-out desk both useful and beautiful.
Paint Hardware for Style
Clean old slides with vinegar to remove rust. Prime and paint copper or black to match your decor. Paint metal braces the same color as the wall to hide them.
Add Hidden Features
Mount a small mirror, chalkboard, or artwork on the underside. Install a USB charging port in the desktop. Use bright navy blue paint on the bottom for a surprise pop of color.
Coordinate Finishes
Match stain to existing furniture. Use the same paint on slides, braces, and pegs for cohesion.
Maintain for Long Life
A pull-out desk lasts decades with minimal care.
Annual Maintenance Tasks
Spray slides with silicone lubricant once a year. Tighten all screws and check glue joints. Reapply polyurethane if finish wears.
Know Your Load Limits
Drawer slides support a maximum of 75 to 100 pounds. Wall-mounted desks support up to 150 pounds if properly braced and anchored. Avoid placing heavy printers or multiple monitors unless reinforced.
Pro Tips From Experienced Builders
Learn from DIYers who’ve built dozens of pull-out desks.
Measure Ten Times, Cut Once
Especially with expensive walnut. One wrong cut ruins the piece.
Plan for Clearance
Ensure the desk clears windows, handles, and furniture when open. Leave at least 18 inches in front for legroom.
Use Numbered Labels
Number each part so assembly is foolproof.
Test Mechanism Early
Verify slide or hinge action before staining. Fix alignment issues while it’s easy.
Embrace New Techniques
Try biscuit joinery or dual staining. Each project builds skill.
Frequently Asked Questions About Pull-Out Desks
How much clearance do I need for a pull-out desk?
You need at least 18 inches of clearance in front of the desk for comfortable legroom. For slide-out under countertop models, allow 2 to 3 inches of vertical clearance above the desk to prevent hitting the overhang.
What is the best wood for a pull-out desk?
Pine works well for painted finishes and budget builds. Poplar is stable and takes paint or stain. Walnut offers premium looks for visible surfaces but costs more. Baltic birch plywood is ideal for drawer boxes and understructures.
How much weight can a pull-out desk support?
Full-extension drawer slides typically support 75 to 100 pounds. Properly braced and anchored wall-mounted folding desks can support up to 150 pounds. Avoid heavy printers or multiple monitors unless reinforced.
Do I need to anchor into wall studs?
Yes. For wall-mounted folding desks, all load-bearing screws must hit wall studs for safety. Drywall anchors won’t hold long-term under load.
Can I convert a drawer into a pull-out desk?
Yes. Remove the drawer, attach a 1×2 lip to the front edge, extend the depth if needed, and reinstall with full-extension slides. The flat top becomes your work surface.
Key Takeaways for Building Your Pull-Out Desk
Building a pull-out desk requires careful planning and the right materials. Choose between slide-out under countertop, wall-mounted folding, drawer-integrated, or drop-down window styles based on your space constraints. Use quality full-extension drawer slides or keyboard tray hardware for smooth operation. Strengthen your build with proper framing using pocket hole or biscuit joinery, and add triangle support braces with wood peg locks for wall-mounted designs. Always anchor wall-mounted versions into studs, test the mechanism before applying finish, and maintain slides with annual silicone lubrication. With strong joinery, smooth slides, and smart bracing, your pull-out desk will be a durable, space-saving addition to any room. Now go build it.


