
Creating a desk calendar stand transforms ordinary calendar pages into a functional workspace accessory that stays visible all year. Whether you need a practical organizational tool, a thoughtful handmade gift, or a potential product for your craft business, how to make a desk calendar stand is a skill that combines creativity with practical construction. This guide covers every method from simple cardboard folding to advanced chipboard wrapping, helping you choose the approach that matches your tools, skill level, and goals.
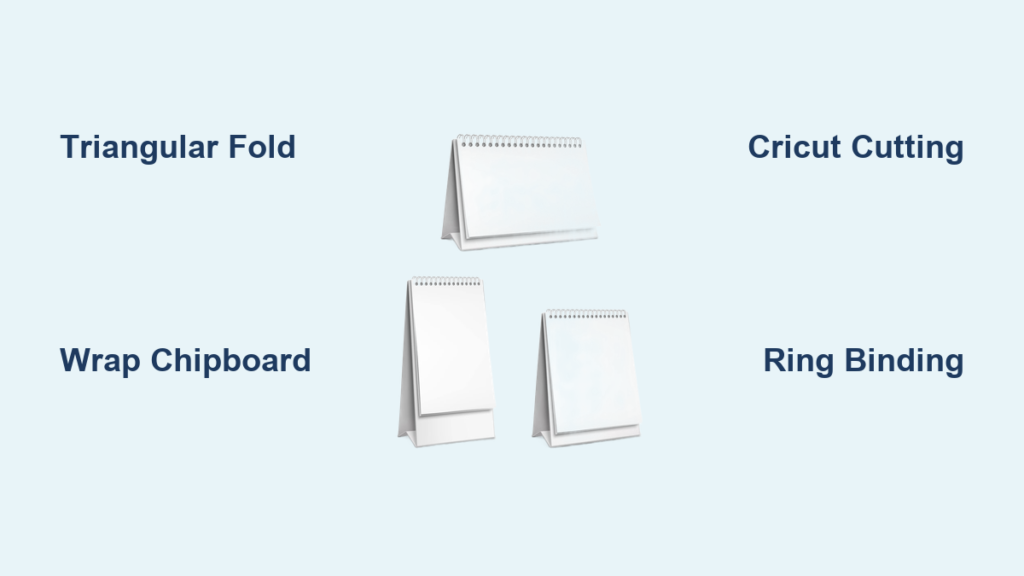
Choose Your Desk Calendar Stand Design Type
Pick Your Stand Style
The design you choose determines complexity, durability, and final appearance. Consider these main options:
- Triangular Fold Stand: Self-supporting three-panel structure that forms a stable prism base
- L-Shaped Base: Two-part system with horizontal foot and vertical back panel
- Chipboard Hardcover: Rigid wraparound cover with spine binding for notebook-style calendars
- Eyelet-and-Ring System: Modular binding allowing monthly page swaps
- Shadow-Box Frame: Layered display creating depth and artistic dimension
The triangular fold remains most popular for DIY projects because it lies flat for storage, requires no adhesive, and supports stacked monthly cards securely.
Match Size to Your Calendar Pages
Your stand must fit your printed calendar sheets. Common sizes include A6 at 4.1 × 5.8 inches, the half-letter 4.25 × 5.5 inches perfect for home printers, 4 × 7 inches used in Cricut designs, 8 × 8 inches for square formats with eyelet binding, and A5 at 5.8 × 8.3 inches best for hardcover covers. Four A6 or 4.25 × 5.5 pages fit on a single letter or A4 sheet, maximizing printing efficiency.
Select Durable Materials for Your Calendar Stand
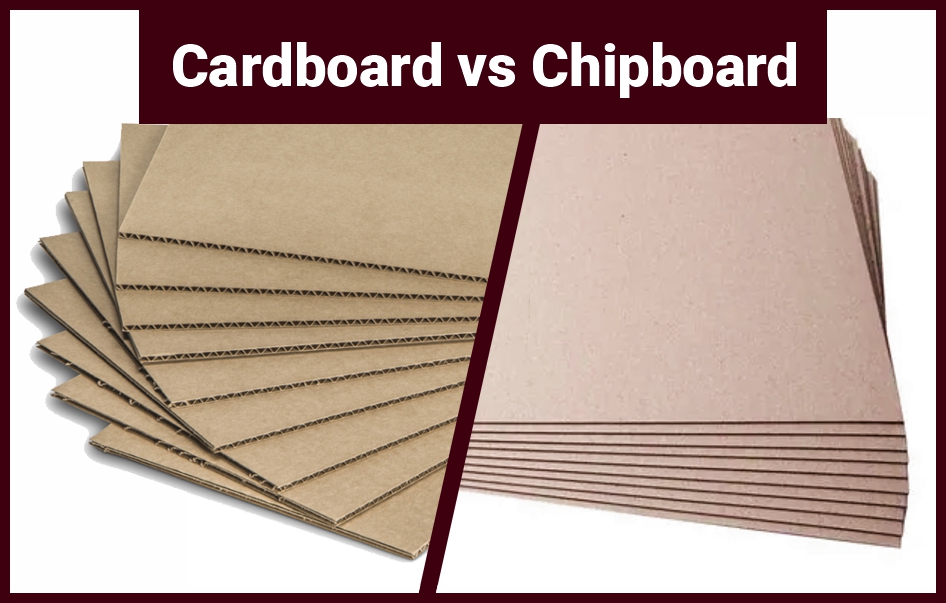
Use Strong Base Materials
Your stand longevity depends on choosing the right core material:
| Material | Best For | Notes |
|---|---|---|
| Corrugated Cardboard | Beginners, kids, low-cost crafts | Cut 11 × 5.5 inches; fold along ridges |
| Chipboard (1.5–2mm) | Professional results | Wrap with paper for polished finish |
| 110 lb. Cardstock (300 gsm) | Cricut cutting projects | Sturdy enough for self-folding stands |
Always align corrugation ridges perpendicular to the fold line for maximum strength. For wrapped chipboard stands, use 12 × 12 inch patterned paper cut into 12 × 6 inch strips.
Gather Essential Supplies
You will need these items regardless of method:
- Bone folder for sharp creases
- PVA glue or double-sided tape
- Ruler and pencil for marking
- Scissors or craft knife
- Brayer for smooth adhesion
Trim corners diagonally before folding paper over edges to reduce bulk and prevent puckering.
Build a Triangular Fold Stand (Beginner Method)
Cut and Fold Cardboard
This no-tools method uses recycled materials and takes about five minutes:
- Cut corrugated cardboard to 11 × 5.5 inches
- Mark fold lines at 4⅓ inches from each end
- Fold along natural ridges to form a triangle
- Tuck ends together without glue
- Decorate with paint, washi tape, or stickers
The triangular prism shape provides inherent stability without adhesive. This method works well for classrooms, practice projects, or quick prototypes.
Upgrade With Wrapped Chipboard
For a polished, gift-ready finish:
- Score chipboard at the same 4⅓ inch marks
- Glue center of a 12 × 6 inch paper strip to chipboard
- Wrap sides over edges, trim corners diagonally, and fold neatly
- Apply a second strip if needed to cover exposed backing
- Let dry completely before folding
Press firmly with a bone folder during application. Listen for a smooth scraping sound indicating full adhesion.
Assemble a Professional Chipboard Base (Advanced)

Create Flat-Pack Design
This precision method produces a stand that lies completely flat and resists shipping damage:
- Cut two large panels at 4⅓ × 5.5 inches each
- Cut two spacers at 1 × 5.5 inches each
- Place large panels with ¼ inch gap between them
- Center spacer pieces in the gap
- Glue all four pieces onto a 12 × 6 inch paper strip
- Fold paper over edges and glue into grooves
- Add second paper strip for full coverage
- Allow to dry completely before folding
The gap creates natural fold points without scoring, and the stand collapses flat for easy shipping.
Avoid Common Mistakes
These errors compromise results:
- Bending before glue dries, causing tears
- Uneven glue application leading to warping
- Using thick adhesives that add bulk and delay drying
Use thin layers of PVA glue and clamp between books while drying for best results.
Use a Cricut Machine for Custom Stands
Prepare Digital Files
Cricut owners can access Design #793 from Jennifer Maker with these file types:
- SVG files for customization (dates, fonts, layouts)
- PNG files with 12 monthly AI-generated art pieces
- PDFs for hand-cutting
- DXF format for non-Cricut machines
Upload to Cricut Design Space, resize to 4 inches width, and center elements horizontally with month labels aligned to bottom and date grids aligned to top.
Execute Print Then Cut Workflow
- Send design to printer using 61 lb. matte photo paper
- Place printed paper on StandardGrip mat with protective copy paper
- Cut with Premium Fine-Point Blade using More pressure
- Run second pass if cuts are incomplete
- Fold along pre-scored lines and apply craft glue to the tab
- Form triangle and attach tab inside final panel
Set canvas background to light gray in Design Space to make white PNGs easier to see during alignment.
Bind Calendar Pages With Rings or Coils
Punch Holes Accurately
Consistent hole placement ensures smooth page turning:
- ¼ inch from top edge
- ½ inch from left and right edges
- Two additional holes ½ inch apart along spine
Create a paper template to mark hole positions consistently across all months.
Choose Your Binding Method
Binder Rings (1.5 inches / 38mm): Open the ring, insert pages, and close. This method allows easy replacement or reordering of months, making it ideal for modular calendars.
Double-Wire Coils: Requires ½ inch pitch coils (2 rings per inch). Slide through 6 holes (3 per side) and close gently with pliers. This provides notebook-style permanence.
Wire Segments: Cut wire to the height of your page stack and twist ends closed with pliers for a custom handmade look.
Reinforce holes with 4mm white eyelets to prevent tearing, especially with frequent flipping.
Print and Prepare Your Calendar Pages
Set Printer Correctly
| Setting | Recommendation |
|---|---|
| Paper Type | 61 lb. matte photo paper |
| Media Type | Photo Matte Paper |
| Print Quality | Best |
| Bleed | Off |
| Use System Dialog | On |
Allow prints to dry 10-15 minutes before cutting to prevent smudging. For double-sided printing, pair January with February, March with April, and so on.
Optimize Layout
Align tops of pages with sheet edges during printing. Test one sheet first since printer settings vary. Four A6 or 4.25 × 5.5 pages fit on one letter-size sheet, making this the most economical approach.
Customize Your Stand for Visual Impact
Design Layered Visuals
Use AI-generated art where each month reveals part of a larger image. When stacked, the full picture forms progressively. Even with only one page visible, the frame remains balanced and artistic.
Select Fonts and Colors
Jennifer Maker designs use JM Sweet for headers and JM Cursive for labels. Recommended color codes include dark blue (#003366) for outlines, light blue (#66B2FF) for headers, and light gray (#CCCCCC) for lines.
Make Your Stand Reusable for Multiple Years
Use Perpetual Calendar Grids
Replace only the printed pages each year while keeping the stand intact. This approach reduces waste, increases value, and works especially well with ring binding systems that allow easy page removal.
Package Flat for Mailing
L-shaped and multi-piece stands ship completely flat. Include simple assembly instructions for recipients. This makes them ideal for Etsy shops, holiday gifts, and craft fair sales.
Final Checklist Before Using Your Calendar
Before displaying your stand, verify these elements:
- Digital design complete with grids and images
- Printed on appropriate paper (300 gsm cardstock or photo paper)
- Cut precisely using Cricut or hand methods
- Stand scored and folded cleanly
- Holes punched and eyelets installed
- Pages bound with rings or coils
- Decorative elements added
- Stability tested on desk surface
Flip through all months to ensure pages turn smoothly without wobbling.
Choose the Best Method for Your Skill Level
Beginner: Cardboard Fold Stand: No tools required, takes five minutes, safe for children. Best for practice, classrooms, and low-cost batches.
Intermediate: Wrapped Chipboard: Polished finish great for gifts. Best for craft fairs and personalized presents.
Advanced: Multi-Piece Flat Base: Shipping-safe and professional. Best for retail and bulk orders.
Cricut User: SVG Design #793: Full customization with Print Then Cut. Best for artists and digital crafters.
Maintain and Store Your Calendar Stand
Extend Its Life
Keep your stand away from humidity to prevent warping. Wipe with a dry microfiber cloth. Store flat when not in use. A 300 gsm cardstock stand lasts 12+ months with proper care.
Repurpose After the Year Ends
Save the stand for next year’s pages, use as a photo display or recipe holder, or gift as a refillable planner base.
Turn Your Calendar Stand Into a Business
Pricing and Profit
Material costs total approximately $3-6 per unit: 300 gsm cardstock costs about $0.30 per sheet, chipboard $0.20 per unit, binder rings $0.30 each, and sticker paper $0.25 per sheet. Suggested retail price ranges from $15-30, positioning the product as a premium handmade gift.
Licensing and Sales
Free design files allow personal use and selling physical handmade versions. Check specific licenses for commercial restrictions. Mass-producing under original designer without permission is prohibited.
Frequently Asked Questions About Making a Desk Calendar Stand
What materials work best for a beginner desk calendar stand?
Corrugated cardboard is the best beginner material because it uses recycled materials, requires no tools, and folds along natural ridges for clean bends. Cut an 11 × 5.5 inch piece and fold at 4⅓ inch marks from each end to form a triangular prism.
How do I make my calendar stand reusable?
Use perpetual calendar grids without fixed dates and bind pages with removable binder rings or coils. Replace only the printed pages each year while keeping the stand structure intact. This approach works for 2-3 years or longer with proper care.
Can I use a Cricut machine to make a calendar stand?
Yes, Cricut machines (Maker, Explore, Venture, Joy Xtra) can cut precision stands from 110 lb. cardstock. Design #793 from Jennifer Maker includes SVG files for customization, PNGs for printing, and PDFs for hand-cutting. Use Print Then Cut with 61 lb. matte photo paper.
What size calendar pages fit standard desk stands?
The most common sizes are A6 (4.1 × 5.8 inches), half-letter (4.25 × 5.5 inches), and 4 × 7 inches. Four A6 or half-letter pages fit on one 8.5 × 11 inch sheet, making this the most economical printing option.
How do I bind calendar pages to my stand?
Punch holes ¼ inch from the top edge and ½ inch from sides, then reinforce with 4mm eyelets. Use 1.5 inch binder rings for easy page replacement, double-wire coils for permanent binding, or wire segments for custom handmade appeal.
Key Takeaways for Making Your Desk Calendar Stand
Creating a desk calendar stand combines practical construction with creative expression. Start with the cardboard triangular fold method if you are a beginner, then progress to wrapped chipboard for professional-looking gifts. Cricut owners can achieve fully customized results with precision-cut designs and AI-generated monthly art. Regardless of method, prioritize durable materials like 300 gsm cardstock, ensure precise hole alignment for smooth page flipping, and choose binding methods that allow yearly page replacement. With attention to detail and quality materials, your handmade calendar stand will serve as both a functional organizer and a beautiful desktop accent for years to come.


