
Is your office chair looking worn, stained, or simply outdated? Instead of spending hundreds on a replacement, you can make a custom desk chair cover in just a few hours. This budget-friendly DIY project protects your existing chair, lets you personalize your workspace with any fabric choice, and creates a removable, washable cover perfect for homes with kids or pets. Whether you prefer a sleek professional look or a playful ruffled design, this guide covers sewn and no-sew methods so you can choose what works best for your skill level and chair type.
You’ll learn how to select durable materials, create a custom pattern that fits perfectly, and finish with professional details like piping or elastic casings. Each section includes step-by-step instructions, troubleshooting tips, and pro tricks to help you achieve a polished result without expensive equipment.
Why Make a Chair Cover
A handmade desk chair cover transforms your workspace with minimal effort and maximum savings. Store-bought chair covers often fit poorly and cost twice what you’ll spend on fabric and supplies. A DIY cover lets you choose any fabric pattern, color, or texture to match your exact decor, whether that’s a bold geometric print or a classic neutral tone.
Beyond aesthetics, these covers protect your investment. Office chairs with worn seats cost far more to replace than a simple fabric cover costs to make. Removable covers also mean easy cleaning when spills happen or during seasonal deep cleaning. For pet owners and parents, this washability factor alone makes the project worthwhile.
The environmental benefits matter too. Giving an old chair new life keeps furniture out of landfills and reduces demand for new manufacturing. Many crafters report completing this project for under $15, with some using fabric they already owned to bring the cost to under $8.
Choose the Right Cover Type
Selecting the right cover style depends on your chair design, skill level, and how permanent you want the result.
Sewn Slipcover with Elastic
This method creates a fully removable cover that stretches over the seat using an elastic band. The elastic threads through a casing sewn along the bottom edge, creating a snug grip that holds the cover in place without slipping. This style works best on flat or lightly padded seats and takes under two hours to complete. The cover comes off entirely for machine washing, making it ideal for high-traffic use.
Stapled Seat Cover (No Sew)
For a more permanent upholstery-style finish, use a staple gun to stretch and secure fabric directly to the seat underside. This approach requires removing the seat from the chair, which gives you a flat surface to work on and cleaner results underneath. The staple method works well if you lack sewing equipment and want a tailored look that stays in place permanently.
Backrest and Armrest Solutions
Most seat-only covers won’t fit over armrests, so focus on the seat unless your chair allows easy backrest removal. Plastic-backed chairs like many IKEA models offer two options: tucking fabric between the shell and foam for a quick update, or fully disassembling the backrest to re-cover the padded portion. Either method lets you match the backrest fabric to your new seat cover for a cohesive look.
Pick Durable Fabric and Supplies
Choosing the right materials ensures your cover withstands daily use and looks professional.
Best Fabrics for Chair Covers
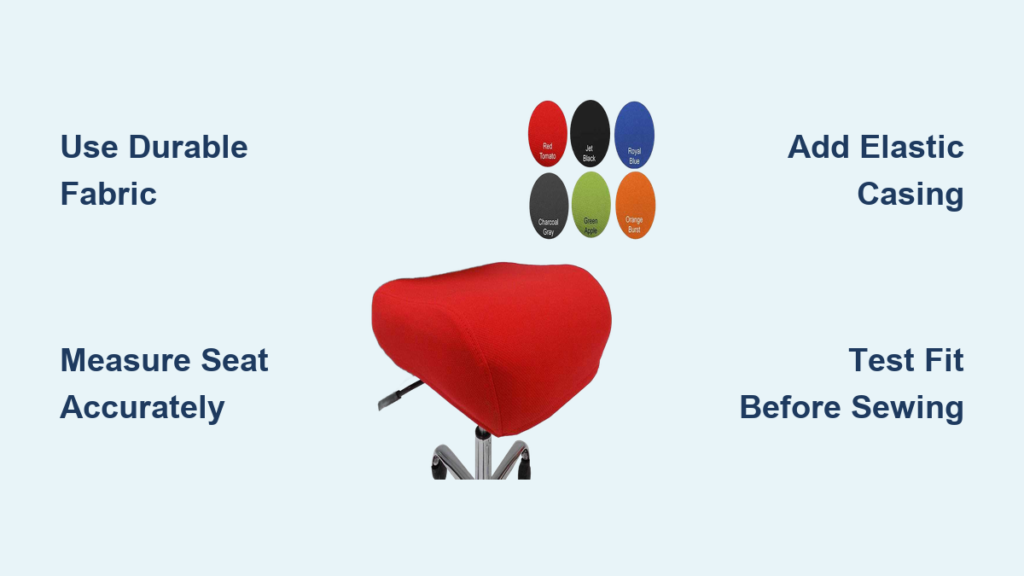
Your fabric choice makes or breaks the final result. Look for tightly woven materials with minimal stretch, since stretchy fabrics complicate fitting and can sag over time.
Cotton duck cloth offers heavy-duty durability and stands up to years of use. Denim and cotton canvas provide similar strength with a more casual look. Cotton blends give you the best of both worlds: comfortable feel with enough structure to hold their shape. Muslin works as a budget-friendly option when doubled for added strength. Avoid slippery fabrics like silk or stretchy knits unless you plan to use them purely for decorative overlays.
Always pre-wash your fabric before cutting. This removes sizing and prevents shrinkage later, so your cover maintains its precise fit after the first wash.
Essential Tools and Materials
Gather these supplies before starting:
- Sewing machine with all-purpose thread
- Sharp scissors or rotary cutter with cutting mat
- Measuring tape and ruler
- Pins or fabric clips
- Iron and ironing board
- Flat elastic (¼ inch or ½ inch width)
- Safety pin or bodkin for threading elastic
- Staple gun with staples (for no-sew method)
- Newspaper or kraft paper for pattern-making
Create a Custom Pattern
A well-fitted cover starts with an accurate pattern. This step prevents the common problems of covers that are too loose, too tight, or oddly shaped.
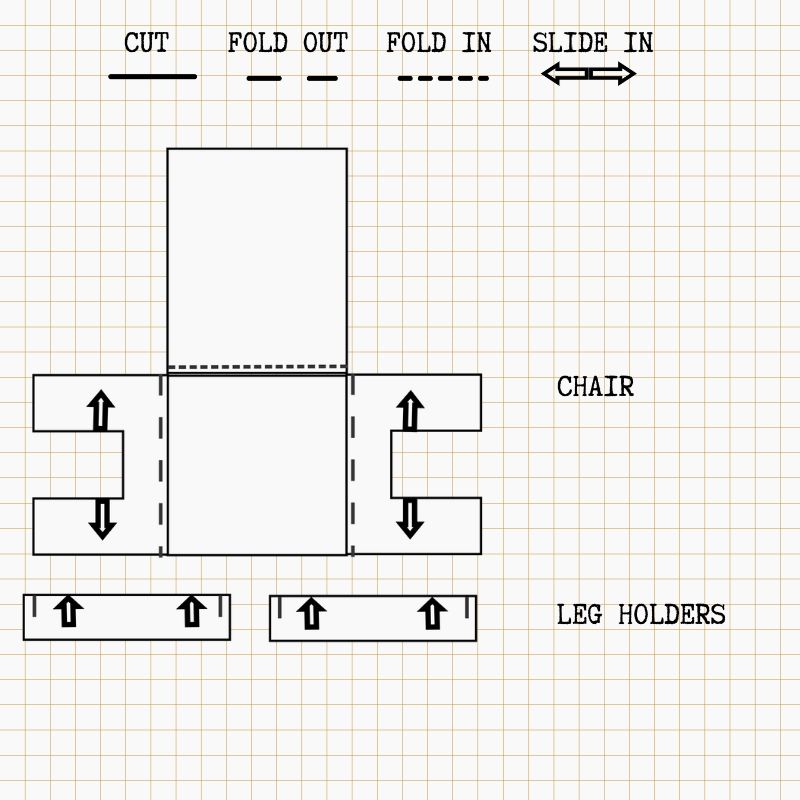
Trace the Seat Accurately
Place a sheet of newspaper or kraft paper over your chair seat. Sit down lightly to hold the paper in place, then trace around the outer edge with a pencil. Remove the paper and check symmetry by folding it in half. Adjust any uneven sides until you have a balanced shape.
Add Seam and Drop Measurements
Measure your seat padding thickness (typically 1 to 3 inches). Decide how far down the sides you want the cover to hang (around 1.5 inches works well for most chairs). Add these measurements together plus ½ inch for seam allowance.
For example: 2 inches (pad height) + 1.5 inches (desired drop) + 0.5 inch (seam allowance) = 4 inches to add around the entire traced shape. Redraw your pattern larger by this total amount to create your cutting template.
Cut and Sew the Cover
With your pattern ready, you’re prepared to cut and assemble the cover pieces.
Cut Two Fabric Pieces
Place your expanded pattern on the fabric. Cut one piece from your main (visible) fabric and one piece from lining fabric. Both pieces should include the extra width for the sides and seam allowance you calculated earlier.
Sew With Right Sides Together
Layer the two pieces with right sides facing each other. Pin around the edges to hold them in place. Sew all around the perimeter using a ½-inch seam allowance, leaving a 4 to 6 inch gap open (typically at the back center) for turning the cover right side out.
Trim the corners and excess seam allowance to ¼ inch to reduce bulk. Turn the cover right side out through the gap, using a pencil or chopstick to push out the corners sharply. Press all edges with an iron for a clean, professional appearance.
Add Elastic for a Snug Fit

The elastic casing transforms your cover from a loose drape into a secure, stay-put solution.
Sew the Casing
Fold the raw edge of the turning gap inward and topstitch it closed. Then fold up the bottom edge (the side that will sit under the seat) by ½ inch and sew all the way around, creating a continuous casing. Leave a 1-inch section unsewn so you can insert the elastic.
Thread and Secure the Elastic
Attach a safety pin to one end of your elastic. Feed it through the casing, guiding it around the entire perimeter. Once both ends emerge, overlap them by 1 inch and sew them together securely using a zigzag stitch.
Optional: Add a cord lock before closing the casing if you want the ability to adjust tightness later. Sew the final 1-inch section of the casing shut to complete the elastic installation.
Pro Tip: Cover the elastic ends with a small fabric scrap before sewing to prevent fraying and create a neat finish.
Install and Test the Fit
Slide the completed cover onto your chair seat, pulling evenly from all sides. The elastic should grip the underside tightly, holding the cover in place without slipping or bunching.
If the cover feels too loose, remove the elastic, cut it shorter, and reinsert. If it fits too tightly, you may need to recut the pattern slightly larger. Check the fit frequently during construction, especially after turning and before final stitching, to catch adjustment needs early.
Upgrade With Ruffles or Trim
Once you master the basic cover, add decorative elements for a custom look.
Add Decorative Ruffles
For a playful gathered effect, cut the side drop wider (3 to 5 inches instead of 1.5 inches). When you sew the elastic only at the very edge where it fits the seat, the extra fabric between the seat and elastic will naturally ruffle and gather. Stiffer fabrics like cotton duck create more defined ruffles.
Insert Piping or Trim
For a polished upholstered look, add contrasting piping along the top edge. Insert pre-made piping between your main and lining fabric before sewing the perimeter seam. You can also create custom piping by sewing bias tape around cording.
Try the No-Sew Stapled Method
This approach works well for permanent updates or when sewing equipment isn’t available.
Remove and Prepare the Seat
Unscrew the seat from the chair base so you can work on a flat surface. This gives you better access and a cleaner result underneath.
Cut and Position Fabric
Lay your fabric face down. Place the seat upside-down in the center. Allow 3 to 4 inches of excess fabric on all sides for wrapping around the edges.
Pull the fabric taut and staple it to the underside, starting with opposite sides (left and right) to keep tension even, then moving to front and back.
Fold Corners Neatly
Treat corners like gift wrapping: fold side flaps inward to create a clean triangle, then pull the top flap down and staple. This technique hides raw edges and prevents bulky folds.
Reattach the seat to the base once covered.
Cover a Plastic-Backed Chair
Many modern office chairs feature a plastic shell over the backrest foam. Two approaches work for these models.
Option 1: Tuck Fabric Behind the Shell
Use a flathead screwdriver to gently pry the plastic backrest away from the frame. Slide fabric into the gap between the plastic and foam front. Tuck and smooth until fully hidden. This method works best for thin fabrics and minor updates.
Option 2: Disassemble and Re-cover
Unscrew the backrest and carefully pop off the plastic shell from the fabric-covered foam. Wrap the foam with new fabric and staple or glue it in place. Then snap the shell back on, aligning the four snaps and pressing firmly on a hard surface until all clicks engage.
Design Ideas and Customization
Your cover reflects your personal style. Use these ideas to make it unique.
Mix and Match Fabrics
Combine different prints or textures for visual interest. A polka dot seat with a checkered back creates playful contrast. Solid colors on top with patterned lining (visible when you lift the seat) add surprise detail. Use leftover scraps from other projects to reduce waste and cost.
Create Themed or Seasonal Covers
Make multiple covers for different times of year. Floral prints work well for spring, plaids for fall and winter, and bright solids for a minimalist year-round look. Store extras and swap them seasonally like pillowcases.
Upcycle Unusual Materials
Repurpose unexpected items for unique results. Small area rugs create textured, durable seats. Old denim jeans offer rugged style. Vintage scarves or tablecloths add decorative flair. Just reinforce thin materials with a lining for durability.
Avoid Common Mistakes
Learn from typical errors to ensure your first cover succeeds.
Don’t Use Stretchy or Slippery Fabric
Fabrics that stretch or slide make achieving a tight fit difficult. Stick to low-stretch cottons and canvas for best results. Test your fabric stretch by pulling it in both directions before committing.
Skip the Raw Edges
Exposed cuts look messy and fray quickly. Always fold under edges when stapling, use lining fabric in sewn covers, and hem or bind visible seams. A little extra time here creates a much more professional finish.
Test Fit Before Final Stitching
Try the cover on (inside out works fine) before turning and closing the gap. Adjust if it pulls too tight or sags. It’s far easier to fix problems during construction than after finishing.
Prevent Elastic Twisting
Flat elastic rolls less than round cord. If using round elastic, sew it in place at 2 to 3 inch intervals inside the casing to keep it flat and prevent twisting.
Maintain and Refresh Your Cover
Proper care extends the life of your handcrafted cover.
Cleaning Tips
Removable elastic covers machine wash beautifully on cold, gentle cycle. Air dry or tumble dry low to prevent shrinkage. Stapled covers require spot cleaning with mild soap and a damp cloth. Avoid soaking these since the padding underneath can’t be washed. Ruffled or piped covers benefit from hand washing to preserve decorative elements.
Extend Lifespan
Rotate between two covers to reduce wear on any single piece. Darker or patterned fabrics hide stains better than light solids. Store off-season covers flat or rolled, never folded for long periods, to prevent creases from setting.
Save Money and Reduce Waste
Making a chair cover costs a fraction of buying new. A yard of quality cotton blend runs under $15, while a yard of muslin costs under $8. Using fabric you already have drops the cost to nearly nothing. This approach keeps functional furniture out of landfills and reduces your environmental footprint.
Key Takeaways for Making Your Desk Chair Cover
Creating a custom desk chair cover requires only basic materials and a few hours of your time. Choose durable, low-stretch fabrics like cotton duck, canvas, or denim for lasting results. Use a custom pattern traced from your specific chair shape, adding measurements for padding thickness and desired drop length. Test the fit frequently during construction to ensure proper sizing.
Whether you sew an elastic-cased removable cover or staple a permanent seat update, the process remains beginner-friendly. Add ruffles, piping, or contrasting fabrics to personalize the look. With proper care, your handcrafted cover will protect and beautify your chair for years to come.
Frequently Asked Questions About Making a Desk Chair Cover
How much fabric do I need for a desk chair cover?
One yard of 45-inch wide fabric typically covers most standard office chair seats. If you want ruffles or plan to cover the backrest as well, purchase 1.5 to 2 yards to allow for extra material.
Can I make a chair cover without a sewing machine?
Yes. The stapled method uses a staple gun instead of sewing. You can also use fabric glue for temporary covers or create no-sew versions using Velcro strips and pre-made elastic bands.
What type of elastic works best for chair covers?
Flat elastic (¼ inch to ½ inch width) works better than round cord because it resists twisting and rolling. Thread it through a casing sewn along the bottom edge for a secure, adjustable fit.
How do I clean a stapled chair cover?
Stapled covers cannot be removed, so spot clean using mild soap and a damp cloth. Blot spills immediately and avoid soaking the fabric, since the padding underneath cannot be machine washed.
Will this work on a chair with arms?
Seat-only covers work on chairs with arms since the cover fits around the seat cushion itself. Full slipcovers that wrap the back and arms require more complex pattern-making and disassembly.
How long does it take to make a desk chair cover?
A basic elastic-band cover takes 1 to 2 hours for beginners. Stapled versions take similar time. Adding decorative elements like ruffles or piping adds another 30 minutes to an hour.


