
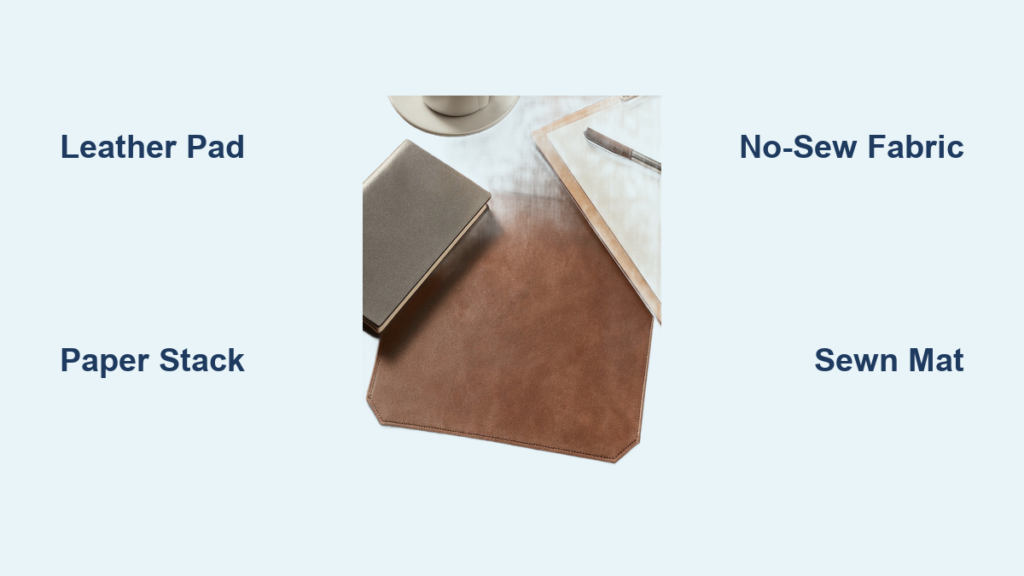
If you’ve ever smudged ink while writing, spilled embossing powder, or just wanted a personalized workspace upgrade, learning how to make a desk blotter is the answer. A custom desk blotter protects your surface, enhances comfort, and adds style, all while being fully tailored to your size, material preference, and use case. Whether you’re an executive, artist, crafter, or student, there’s a DIY method that fits your needs. From luxury leather pads to no-sew fabric covers and absorbent paper stacks, this guide walks you through every practical, durable, and creative approach.
Choose Your Blotter Type Based on How You’ll Use It
Before starting construction, identify what you need your blotter to do. Each type serves a different purpose and requires distinct materials.
Writing and Ink Protection
For fountain pen users or calligraphers, a writing desk pad prevents ink transfer and scratches. It doesn’t need to absorb ink like old-school blotting paper but should offer a smooth, cleanable surface. Leather or stitched fabric mats work best for this purpose.
Stamping and Craft Absorption
Crafters using wet inks, sprays, or embossing powders need a highly absorbent blotter. A thick stack of paper acts as a disposable mat. Tear off stained layers to reveal a fresh surface underneath.
Aesthetic Desk Enhancement
Want a beautiful, custom look? Use decoupage or fabric wrapping to create a decorative desk mat. These are ideal for matching room décor or showcasing artwork, though they aren’t absorbent.
Multi-Functional Workspace Mat
If you use a mouse and write regularly, opt for a cushioned sewn desk mat. With padding and a smooth top layer, it doubles as a mouse pad and writing surface.
Build a Leather Desk Pad for a Luxury Finish
For professionals who value durability and elegance, a handmade leather desk pad delivers a premium feel and long-term protection.
Cut Top and Backing Layers
Use water-buffalo leather as the top layer and pigskin suede for the non-slip underside. Trace your desired size onto both materials using a template, then cut precisely with a sharp blade. Keep edges aligned for a clean bond.
Bond Layers with Contact Cement
Apply Barge contact cement to both the leather and suede, slightly beyond the edges to prevent gaps. Let dry until tacky, usually 10-15 minutes. Lay the suede flat first, then carefully place the leather on top. Roll with a bone folder to remove air bubbles and ensure full adhesion.
Round and Bevel the Edges
Use a corner knife to round all four corners to prevent wear and fraying. On the suede side, lightly bevel the edge at a 45-degree angle for a refined look. Strop your blade on a strap board before cutting to maintain sharpness.
Color and Polish the Edges
Run a Weaver marker filled with Fiebing’s Pro chocolate dye along the beveled edge. Wipe away excess immediately. Then apply beeswax to bind fibers and burnish with a slicker tool until you hear a click, indicating a glass-smooth finish. Finish with token oil to deepen the color and seal the edge.
Add Saddle Stitching for a Handcrafted Touch
Mark a quarter-inch stitching line using wing dividers. Punch holes with a stitching chisel, then saddle-stitch with Ritza Tiger thread. Flatten stitches with a leather hammer. For a cleaner look, use a stitching groover to recess the thread into the edge.
Create a Decoupage Fabric Desk Mat
Transform a plain rubber pad into a custom art piece using decoupage, perfect for crafters and designers who want a personalized aesthetic.
Prep the Surface
Start with a rubber-backed pad, often sold as an oversized mouse pad. Lightly mist the fabric surface with water to help paint and paper adhere. Apply a white chalk paint base coat to block underlying colors from showing through.
Sand for Smoothness
Once dry, use a 240-grit sanding sponge to gently remove raised fibers. This creates a smooth canvas for paper application. Wipe away dust with a dry cloth.
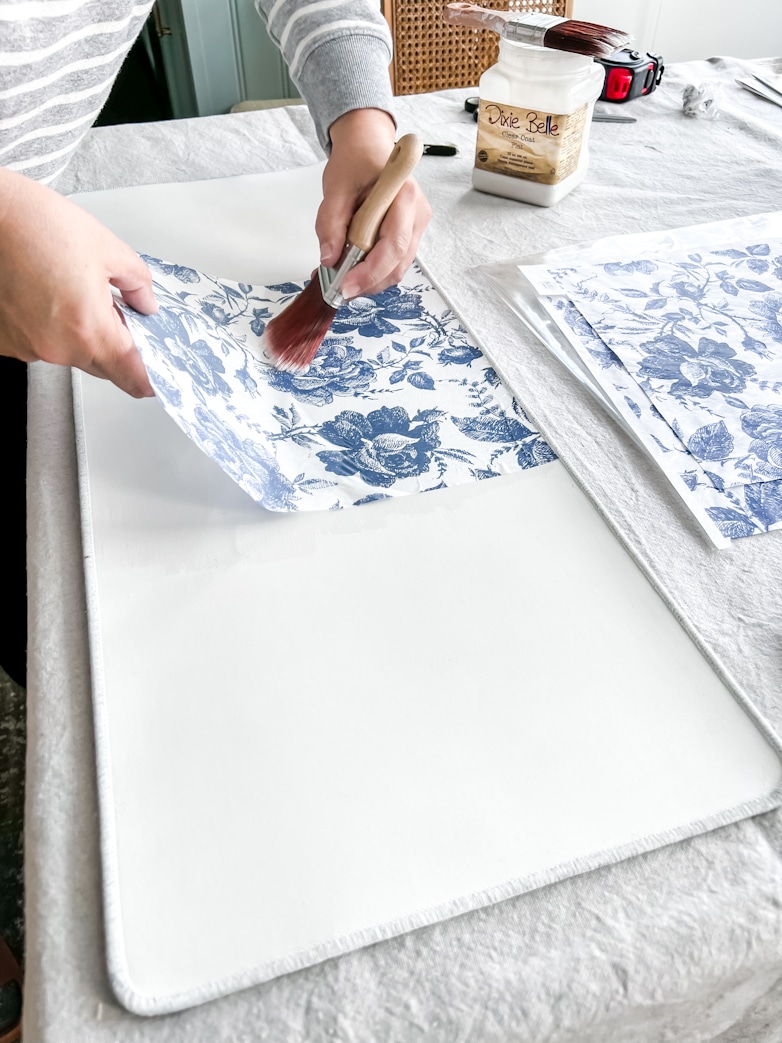
Apply Rice Paper Design
Cut unprinted edges off rice paper sheets to allow seamless pattern matching. Paint a section of the pad with Dixie Belle Clear Coat, then place the first sheet, smoothing from the center outward with a clean brush. Align subsequent sheets like wallpaper. Let dry before trimming excess.
Seal with Protective Coats
Apply three thick layers of Clear Coat, allowing full drying between coats. The final layer should be generous to resist wear and moisture. Avoid cheap sealers that may yellow over time.
Paint the Edges
Use nautical blue acrylic paint or a contrasting color to paint the stitched edges. This gives a finished, custom look and hides any paper overhang.
Make a No-Sew Fabric Desk Blotter Quickly
No sewing? No problem. This method uses spray adhesive and rigid board for a quick, stylish desk cover.
Cut and Prepare the Base
Use illustration board for the firmest, flattest results. Avoid foam core, which is too soft, or flimsy posterboard. Cut two identical pieces to your desired size. Clean surfaces thoroughly before applying adhesive.
Wrap with Decorative Fabric
Iron your cotton fabric smooth. Lay it right-side down, then center the board on top. Spray adhesive on one short edge of the board, fold the fabric over, and press firmly. Repeat on the opposite side, pulling taut but not stretched. Do the same for top and bottom edges.
Trim Corners to Reduce Bulk
Before folding, cut diagonally across each corner to prevent bunching. Fold and press neatly, like wrapping a gift.
Add Functional Embellishments
Cut fabric strips double the desired width and 5 inches longer than the board. Iron each long edge toward the center to create no-sew bands. Position them on the back, spray with adhesive, and press into place to hold pens or notes.
Reinforce the Back
Cut the second board a quarter-inch smaller on the top and one side. Spray adhesive on the entire back of the wrapped board, then press the smaller board on top. This creates a clean, non-lumpy underside.
Sew a Cushioned Desk Mat for Computer Use
For computer users, a sewn desk mat offers padding, durability, and a professional finish.
Cut All Layers to Size
You’ll need top fabric, backing fabric, two pieces of woven interfacing, and one piece of fusible fleece. Cut all to your final desired size.
Bond Padding to Backing
Place fusible fleece on the wrong side of the backing fabric. Add one interfacing piece on top. Press with a medium-heat iron to bond layers. This creates a stable, cushioned base.
Round the Corners
Use a 6-inch embroidery hoop as a guide. Align the inner edge with each corner and trace a smooth curve. Cut with a rotary cutter or pinking shears to prevent fraying.
Assemble and Sew
Place top and backing fabrics right sides together. Pin or clip edges, leaving a 3-4 inch gap for turning. Sew with a 3/8-inch seam allowance, backstitching at start and end.
Trim and Turn
Trim corners with pinking shears, just outside the stitching line, to reduce bulk. Turn right side out through the gap. Use a chopstick or creaser to push out corners. Press flat with an iron, rolling the seam inward slightly.
Topstitch for Durability
Fold the raw edges of the gap inward and pin shut. Topstitch a quarter-inch from the edge around the entire mat. Use a 3.5 mm stitch length. When returning to the opening, reverse two stitches, then stop to avoid thread buildup.
Build a Paper Craft Blotter Stack for Stamping
For stampers and mixed-media artists, a simple paper stack is the most functional blotter.
Choose Absorbent Paper
Use black construction paper for video work, white drawing paper for reusable backing, backs of scrapbook paper for acid-free protection, newsprint pads for high absorption, or old phone book pages for a free, effective option.
Stack to Desired Thickness
Build a half to one inch thick stack. Place on your desk. When the top sheet gets stained, tear it off and reveal a fresh layer underneath.
Why This Method Works
Instant cleanup requires no wiping or washing. Reusable waste paper can be repurposed. Acid-free options protect delicate projects. Zero construction time means it’s ready to use immediately.
Compare Materials Before You Start

| Material | Best For | Durability | Water Resistance | Ease | Cost |
|---|---|---|---|---|---|
| Water-buffalo leather | Executive desks | Very High | High | Moderate | High |
| Fusible fleece | Cushioned mats | High | Medium | Easy | Low |
| Rice paper | Artistic decoupage | Medium | Low (sealed) | Moderate | Low |
| Illustration board | No-sew base | High | Medium | Easy | Low |
| Spray adhesive | Quick fabric bonding | Medium | Low | Easy | Low |
Match Your Method to Your Needs
Executive or Professional
Choose the leather desk pad. It offers a sleek, water-resistant surface that lasts 5-10 years with minimal care and makes a statement in boardrooms or home offices.
Crafter or Stamper
Choose the paper blotter stack. It absorbs ink, spray, and glue instantly, and the tear-off design keeps your workspace clean and organized.
Artist or Designer
Choose the decoupage fabric mat. It turns any rubber pad into a custom art surface that’s flexible, durable, and visually striking.
Student or Home Office
Choose the no-sew fabric blotter. No tools are needed, and you can use favorite fabrics to personalize your space quickly and affordably.
Computer User or Gamer
Choose the sewn desk mat. It provides smooth mouse glide, padded comfort, and is machine-washable if needed.
Eco-Conscious Maker
Choose repurposed materials. Use old phone books, scrap fabric, or cardboard for a zero-waste, functional, and creative solution.
Maintain Your Blotter for Long Life
| Type | Cleaning Method | Lifespan | Care Tips |
|---|---|---|---|
| Leather | Wipe with dry cloth | 5-10 years | Condition yearly; re-burnish edges if peeling |
| Sewn fabric | Spot clean or machine wash | 2-5 years | Air dry flat; avoid heat |
| No-sew fabric | Damp wipe only | 1-3 years | Re-adhere peeling edges with spray glue |
| Decoupage | Damp cloth | 2-4 years | Avoid abrasive cleaners |
| Paper stack | Replace top sheet | Ongoing | Store in dry place to prevent warping |
Pro Tips for Better Results
Measure your desk space first before cutting any materials. Common sizes include 12×18 inches, 20×30 inches, or full desk coverage. Coordinate your blotter with stationery, furniture, or wall colors for a cohesive look. Add elastic bands to hold pens or create pockets for sticky notes and scissors. Test sealers on a scrap first since some may yellow or wrinkle over time. Burnish leather edges fully since incomplete burnishing leads to peeling.
Frequently Asked Questions About Making a Desk Blotter
What is the best material for a desk blotter?
The best material depends on your use case. Water-buffalo leather offers the most durability and luxury for professionals. Fusible fleece provides cushioning for computer users. Construction paper works best for crafters who need absorbency.
Can I make a desk blotter without sewing?
Yes. The no-sew fabric method uses spray adhesive and illustration board to create a decorative desk pad. This approach requires no sewing skills and uses basic tools.
How thick should a paper blotter stack be?
Build your paper stack between half an inch and one inch thick. This provides enough absorption for ink, embossing powder, and spray mists while remaining manageable.
Is a desk blotter the same as a mouse pad?
Not exactly. A desk blotter is larger and protects the entire writing or working area. A mouse pad is typically smaller and designed specifically for mouse tracking. Some sewn desk mats function as both.
How do I clean a leather desk blotter?
Wipe a leather desk blotter with a dry cloth regularly. Apply leather conditioner yearly to prevent cracking. Re-burnish edges if they start peeling.
Final Thoughts on Making Your Own Desk Blotter
Making a desk blotter isn’t just about function, it’s about personalizing your workspace. Whether you choose a hand-stitched leather pad or a quick no-sew fabric wrap, each method gives you control over size, style, and performance. With the right materials and a few simple tools, you can create a durable, beautiful desk protector that reflects your taste and meets your daily needs. Start small, experiment with textures, and upgrade your desk one custom blotter at a time.


