
You’re staring at a blank wall, dreaming of a sleek, space-saving workspace. A floating desk offers clean lines, open floor space, and a custom-built look without the clutter of legs or bulky frames. Whether you’re outfitting a small apartment, creating a homework station for kids, or building a high-end home office, how to build a floating desk comes down to smart planning, solid materials, and precise installation.
This guide gives you a complete, step-by-step roadmap. You’ll learn how to size your desk for ergonomics, choose the right wood and hardware, build a rigid frame, mount it securely into wall studs, and finish with professional results. We cover beginner-friendly plywood builds, mid-tier butcher block options, and advanced solid-wood glue-ups.
Choose Your Desk Dimensions
Getting the right dimensions ensures comfort and usability. A poorly sized desk leads to back pain and poor posture.
Set the Right Height
Desk height determines comfort and usability. For adults, aim for 29–30 inches from the floor to the top surface. If using a 1.5″ thick desktop, mount the support frame at 27.5–28.5″. For toddlers or kids, set the top at 24 inches, which translates to a frame height of about 22.5″ with standard lumber.
Measure your chair or seating first. The desk should allow elbows to rest at 90° when typing.
Pick Width and Depth
Width typically ranges from 68.5 to 80 inches. For wall-to-wall installations, go up to 100 inches but add extra supports. Depth of 18–24 inches works for adult use. Shallow desks at 15″ suit kids or tight spaces. Deeper tops at 21–24″ fit dual monitors and large keyboards.
Stand against the wall and extend your arms. Mark where your wrists land. That’s your ideal depth.
Match Materials to Your Skill Level
Choosing the right materials determines both the build difficulty and the final look. Here’s a breakdown of desktop options.
Desktop Options by Budget and Look
• 1/4″ Birch Plywood: Best for beginners, lightweight and affordable. Edge banding recommended for clean edges.
• Butcher Block Countertop: Pre-sanded 1.5″ thick options offer fast setup and warm aesthetics. Sand and seal before use.
• Solid Hardwood Slabs: Premium choice for custom desks. Requires planing, jointing, and glue-up for best results.
• Reclaimed 2×4s: Budget-friendly rustic option. Rip edges flat and glue planks together.
Plywood is light and affordable. Solid wood lasts decades and looks stunning.
Frame Lumber: Strength vs. Visibility
Use 2×3 or 2×4 lumber for the back support. This runs the full desk width and attaches to wall studs. For a cleaner look, plane 2×4s down to 3″ thick. Side and interior braces can be 2×3, 2×4, or 2×2, cut to match desk depth minus material thickness.
For a 24″ deep desk using 1.5″ thick wood, cut side braces to 22.5″.
Gather Essential Tools
Having the right tools makes or breaks a floating desk project. Here’s what you need.
Must-Have Tools for Any Build
• Stud finder: Non-negotiable for safe mounting into wall studs.
• Level: Laser level preferred for long spans over 6 feet.
• Drill/driver: For screws, pilot holes, and hole saws.
• Miter saw or circular saw: For precise cuts.
• Clamps: Bar or pipe clamps hold glue-ups tight.
• Random-orbit sander: Smooth surfaces before finishing.
Advanced Tools for Solid Wood Builds
• Kreg Jig: Creates pocket holes for hidden screws.
• Table saw: Flattens rounded 2×4 edges.
• Biscuit joiner: Aligns planks during glue-up.
• Thickness planer: Evens out rough lumber.
• Router with chamfer bit: Bevels edges for modern finish.
Wear eye and ear protection. Secure all workpieces before cutting or routing.
Build the Support Frame
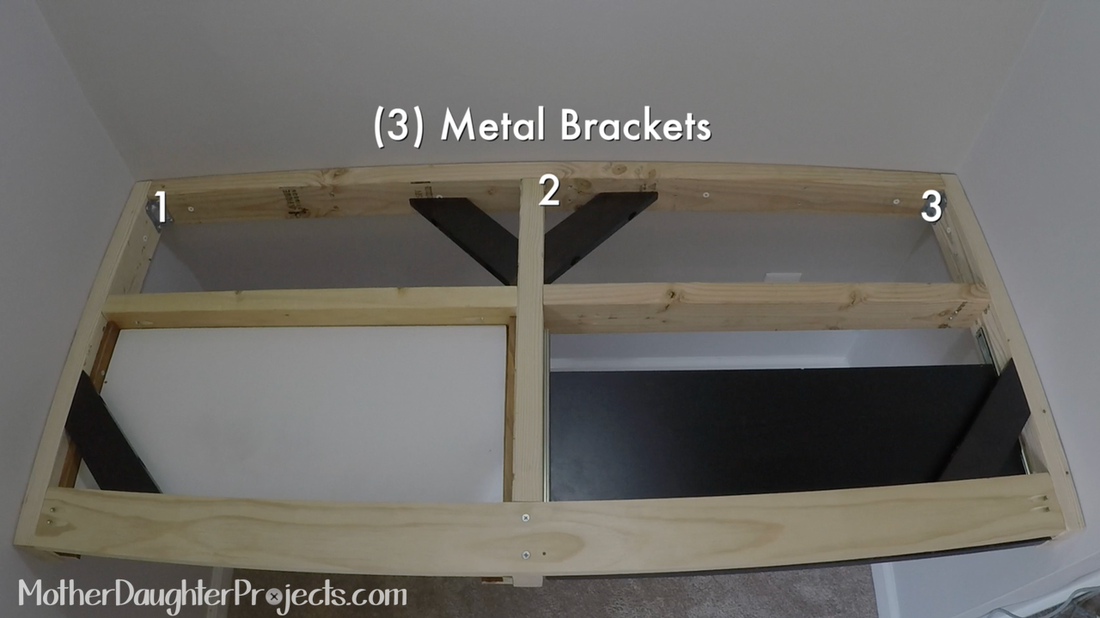
The support frame is the backbone of your floating desk. It must be rigid and well-constructed.
Cut and Label All Pieces
- Back support: Cut to desk width.
- Side braces: Cut to desk depth minus wood thickness.
- Interior supports: Same length as side braces. Space every 12–16 inches.
Label each piece to avoid confusion during assembly.
Assemble with Glue and Screws
- Apply wood glue to all joints.
- Attach side braces to the back support using 2″ wood screws driven from the back.
- Add interior supports with 2.5″ screws. Use pocket holes on the back side or direct screws through the front.
- Reinforce corners with angle brackets if desired.
Screws alone can loosen over time. Glue prevents racking and increases rigidity.
Mount the Frame to Wall Studs
Wall mounting is the most critical step. Never rely on drywall anchors.
Locate and Mark Studs
Use a stud finder to detect studs at 16″ centers. Verify with a small test hole if unsure. Mark stud locations clearly with an X or vertical line.
Never use drywall anchors. All load-bearing screws must hit wall studs.
Level and Secure the Frame
- Determine mounting height. For adult desks, this is typically 27.5″ to the top of the back support.
- Hold the back support in place and check for level. Use a laser level for spans over 6 feet.
- Drive 3-inch deck screws through the back support into each stud.
- Re-check level after each screw.
Have a helper hold the frame while you drill. Even slight misalignment affects the final look.
Create the Desktop
The desktop is what people see. Take your time here for best results.
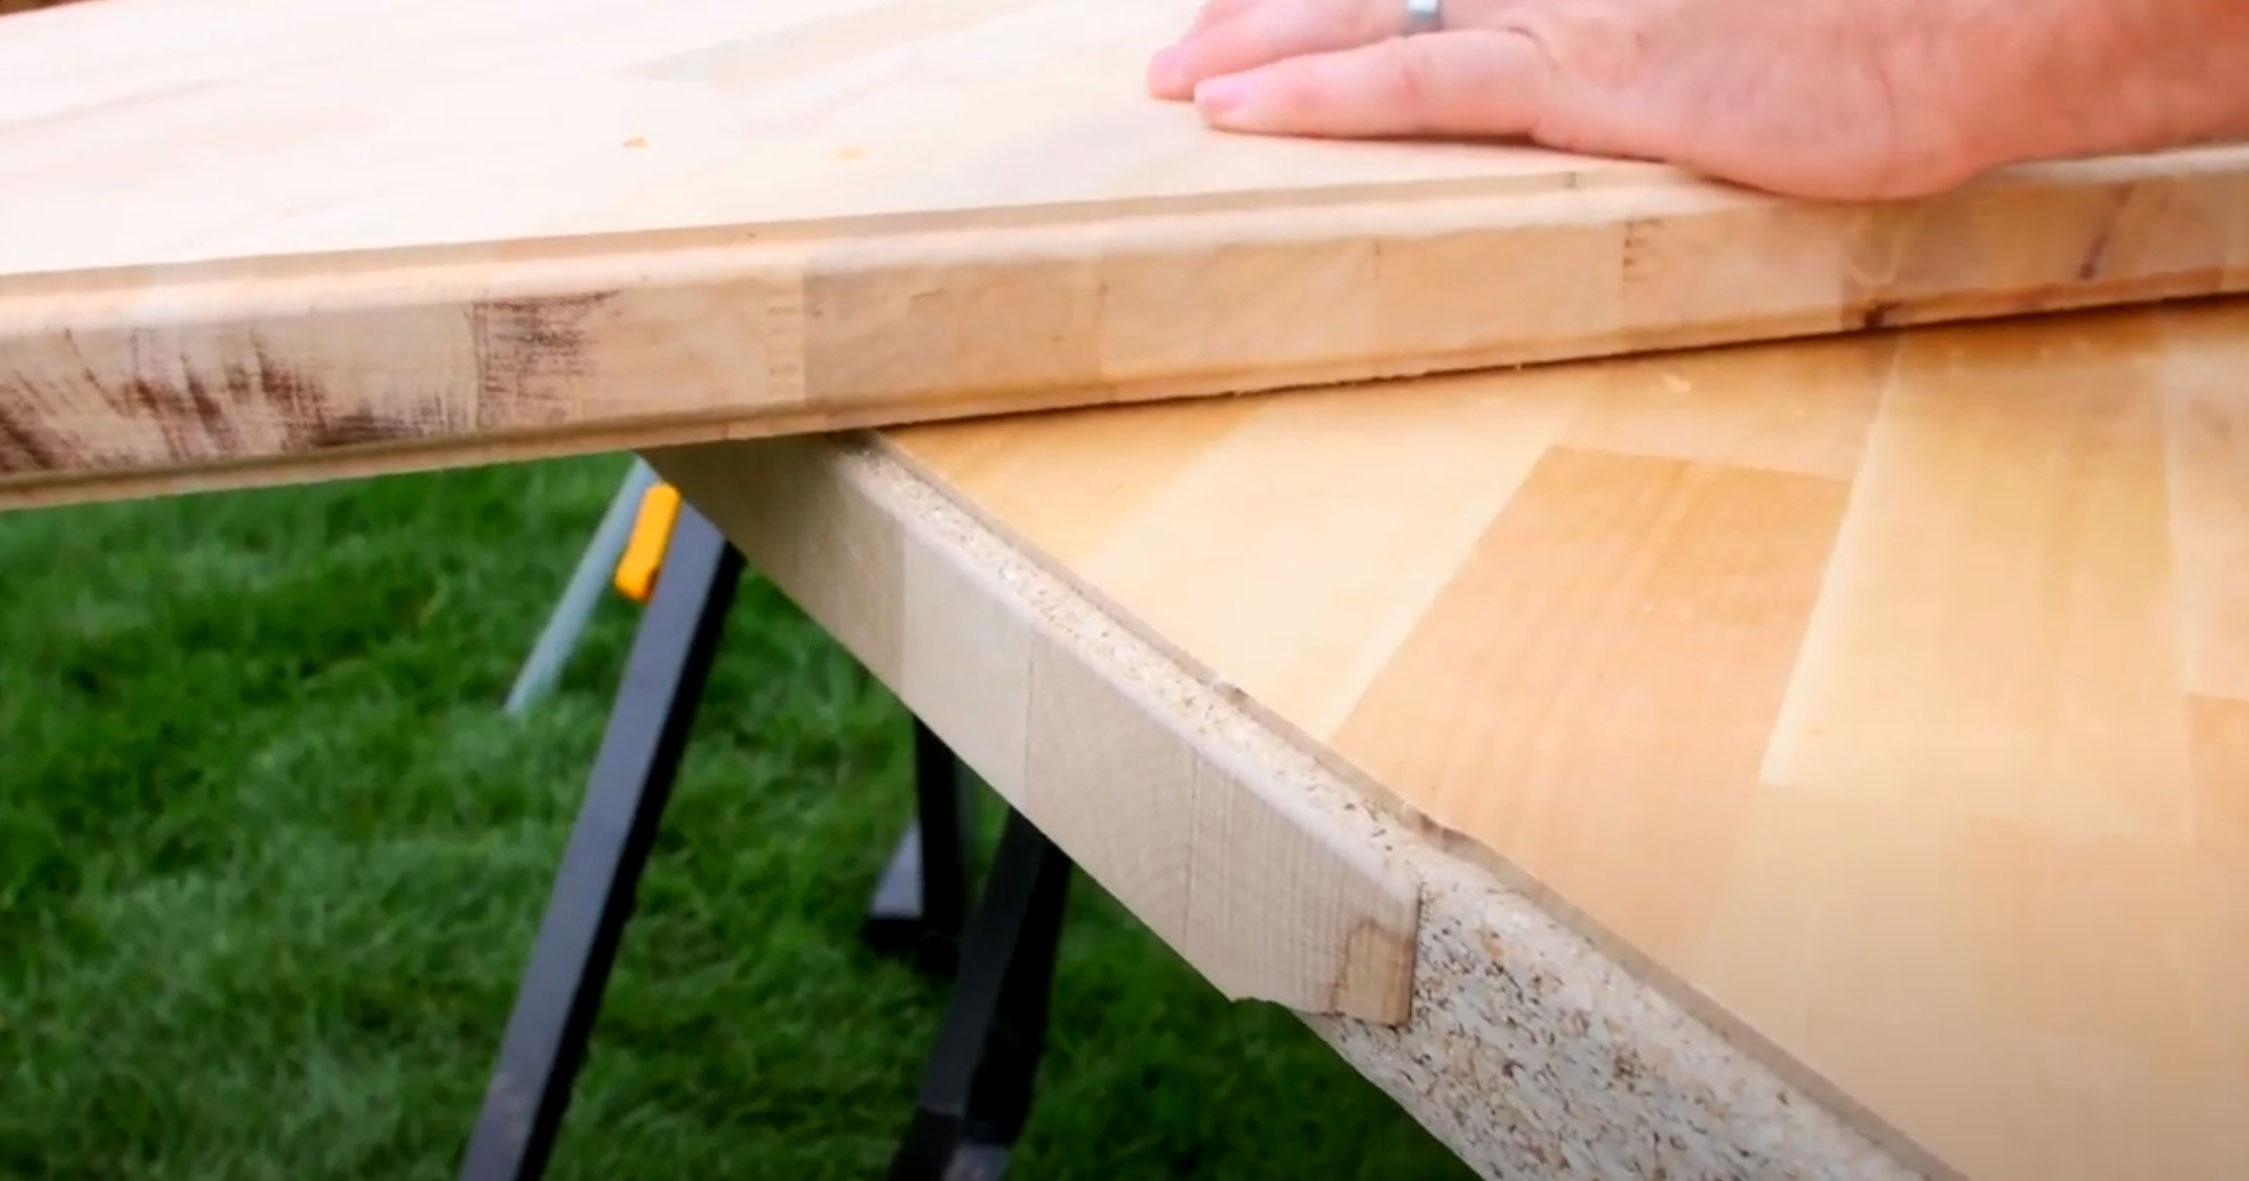
Prepare Planks for Glue-Up
- Flatten edges: Use a table saw or planer to remove rounded edges from 2×4s.
- Arrange planks: Lay them out with grain alternating in an S-pattern to prevent warping.
- Number planks to keep order during assembly.
Join Planks with Biscuits or Glue
Biscuit Joinery Method: Cut slots with a biscuit joiner. Apply glue to slots and edges. Insert biscuits and clamp.
Glue-Only Method: Apply wood glue to edges. Clamp with cauls (straight boards) to distribute pressure. Use packing tape on cauls to prevent glue bonding.
Do a dry run first. Clamp without glue to check alignment and gaps.
Trim, Drill, and Shape the Top
After glue cures, finalize the desktop dimensions and add functional features.
Cut to Final Size
After 24 hours of curing, trim the desktop. Cut one short end first, then the long side. Use a track saw or circular saw with straightedge guide for clean, square cuts.
Add Cable Pass-Throughs
Mark hole locations near monitor or power outlet areas. Drill a pilot hole first, then use a hole saw. 20 mm holes fit monitor arms or thin cables. 70 mm holes fit power strips or grommets.
Use a fully charged drill to avoid stalling mid-cut.
Bevel the Edges
Use a router with 45° chamfer bit on all exposed edges. This creates a sleek, modern look and removes sharp corners. Avoid round-over profiles. Chamfer edges look more contemporary and highlight wood grain.
Attach the Desktop Securely
How you attach the desktop affects both appearance and disassembly options.
Method 1: Glue for Plywood or Light Tops
Apply wood glue to the top of the frame. Place the desktop on top. Clamp or use temporary 2×3s along edges. Let set for 30 minutes before removing clamps.
Method 2: Hidden Pocket Screws for Solid Wood
Use a Kreg Jig to drill pocket holes in the frame. Drive 2.5″ screws up into the underside of the desktop. No visible hardware, easy to disassemble.
Method 3: Stretcher Plates for Wood Movement
Install one half on the back of the desktop, the other on the front of the wall frame. Screws slide into slots, allowing wood movement with humidity. Ideal for solid wood to prevent cracking.
If you plan to adjust height later, don’t glue the bottom panel. Use construction screws instead.
Sand and Finish Like a Pro
Finishing determines how your desk looks and how long it lasts.
Sand in Progressive Grits
- Start with 80-grit to remove tool marks.
- Move to 120, then 180 for smoothness.
- Finish with 240–400-grit for glass-like feel.
- Wipe with tack cloth before applying finish.
Blow off dust with an air compressor for flawless results.
Choose the Right Finish
• Matte Polycrylic: Best for plywood and painted desks. Water-based, non-yellowing. Apply 2 coats.
• Danish Oil: Best for solid wood with natural look. Wipe on, wipe off. Re-coat as needed.
• Tinted Hard Wax Oil: Adds warm tone without yellowing. Easy touch-ups.
• Wipe-On Polyurethane: Durable, glossy finish. Sand lightly between coats with 2000-grit.
Seal all six sides of the desktop. Top, bottom, edges, and ends all need protection to prevent warping.
Add Aesthetic and Functional Upgrades
Take your desk from functional to fantastic with these additions.
Install a Fascia Board
Use ½″ shiplap or pine board to hide the frame. Rip to width if needed. Nail in place, fill holes, and paint.
This creates a seamless, built-in look that hides screws and supports.
Integrate Cable Management
Route cables behind the fascia board. Drill 20 mm or 70 mm holes for grommets. Place power strips under the desk, secured with clips. Leave access near outlets or under the front edge.
Plan cable paths during framing. Don’t retrofit later.
Ensure Maximum Strength and Safety
A floating desk must support weight and resist dynamic loads.
Support Every Stud
Place interior braces every 12–16 inches. Use at least one screw per stud (3″ minimum). For heavy loads, upgrade to lag bolts.
Test Load Capacity
Standard builds support 50–100 lbs. Reinforced frames with 7+ braces and solid wood hold over 200 lbs. This handles leaning, climbing, or dual-monitor setups.
Never install on drywall alone. Always anchor into wood or metal studs.
Customize for Long-Term Use
Think ahead when building. Your needs will change.
Build for Height Adjustability
Use removable bottom panels fastened with construction screws. This allows repositioning the desk later without rebuilding.
Plan for Future Upgrades
Leave space for under-desk lighting, drawers, or monitor arms. Consider epoxy-coated surfaces for chemical resistance in craft rooms.
Match Your Build to Your Skill Level
Choose a build method that matches your experience.
Beginner: Plywood Plus 2×3 Frame
Use 1/4″ birch plywood and pre-cut lumber. Assemble with glue and screws. Finish with polycrylic. Total time: 4–6 hours.
Intermediate: Butcher Block Top
Buy a pre-sanded 1.5″ butcher block. Mount on 2×4 and 2×2 frame. Add angle brackets for extra security. Stain and seal with wipe-on poly.
Advanced: Solid Wood Glue-Up
Mill your own slabs or buy local wood. Use biscuits or cauls for perfect joints. Finish with Danish oil for handcrafted look. Include stretcher plates for wood movement.
Final Touches and Maintenance
Complete your project with these finishing steps.
Inspect for Level and Stability
Re-check level after installation. Tighten any loose screws. Ensure no wobble when pressed at corners.
Maintain Your Desk
Butcher block needs oiling every 3–6 months. Plywood edges need re-sealing if chipped. Solid wood responds to light sanding and re-oiling for damaged spots.
Danish oil and wipe-on poly allow easy touch-ups. No full refinishing needed.
Frequently Asked Questions About Building a Floating Desk
How much weight can a floating desk hold?
A standard floating desk with proper stud mounting supports 50–100 lbs. Reinforced frames with additional braces and solid wood tops can hold over 200 lbs.
Can I install a floating desk without finding studs?
No. Drywall anchors are insufficient for floating desks. You must anchor into wall studs for safety. Use a stud finder to locate them.
What is the best wood for a beginner floating desk build?
1/4″ birch plywood is best for beginners. It’s lightweight, affordable, and forgiving. Pair with a 2×3 frame and simple glue-and-screw assembly.
How do I prevent my solid wood desktop from cracking?
Use stretcher plates (Z-clips) that allow horizontal wood movement. Seal all six sides with finish. Maintain consistent humidity levels in the room.
Can I make my floating desk height-adjustable?
Yes. Build with removable bottom panels fastened with construction screws (not glue). This allows repositioning the desk height later without rebuilding.
How long does it take to build a floating desk?
Beginner builds take 4–6 hours. Intermediate projects take 6–10 hours. Advanced solid-wood glue-ups take 10–15 hours plus 24 hours for glue curing.
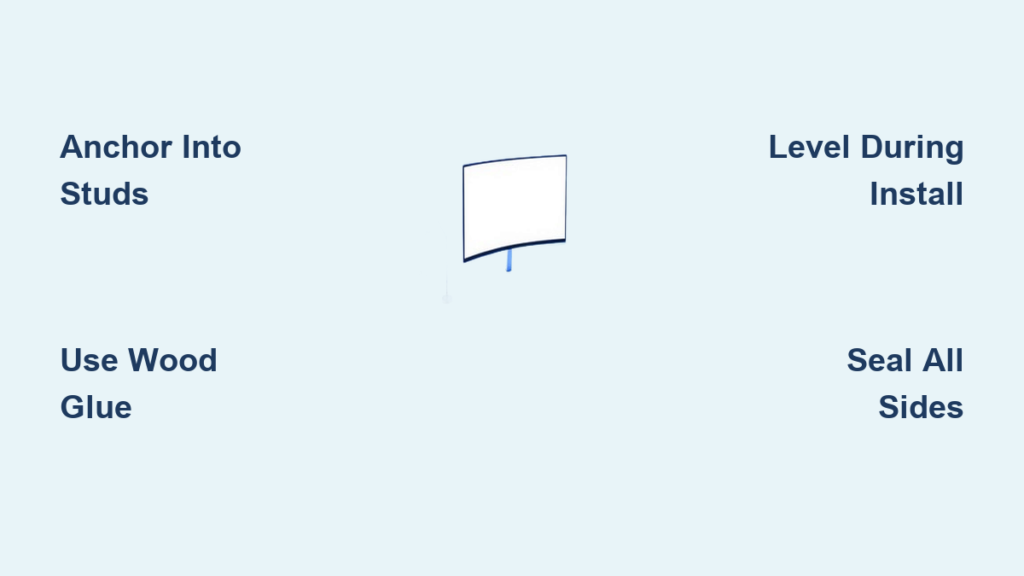
Key Takeaways for Building a Floating Desk
Building a floating desk rewards you with a sturdy, beautiful workspace that maximizes floor space. The key steps are anchoring into wall studs, using wood glue on all structural joints, and leveling at every stage. Choose your material based on skill level: plywood for beginners, butcher block for intermediate builds, and solid wood glue-ups for advanced craftsmen. Seal all surfaces to prevent warping, and plan cable management during framing rather than retrofitting later. With proper planning and execution, your floating desk will support monitors, laptops, and years of daily use.


