
You’ve got an empty corner gathering dust, and a standard desk simply won’t fit. Building your own corner desk gives you complete control over size, style, and functionality without paying premium prices for store-bought furniture. This guide walks you through how to build a corner desk that maximizes your space, supports your workflow, and fits your exact specifications.
Whether you want a sleek floating design or a sturdy L-shaped workstation with built-in storage, you’ll learn to measure accurately, select the right materials, cut and join panels, install supports, and apply a professional finish. Let’s get building.
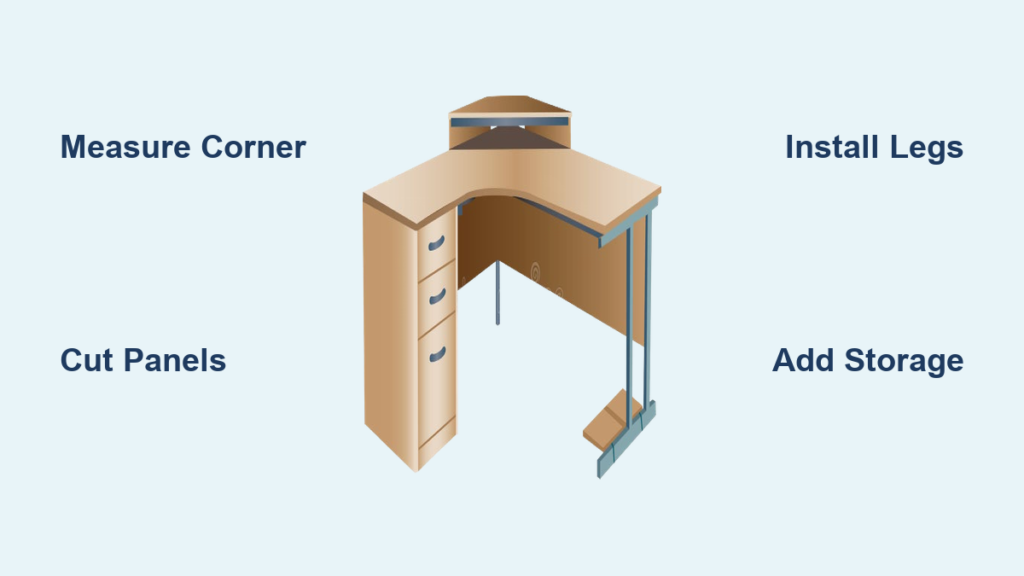
Design Your Corner Desk Layout
Before purchasing materials or making any cuts, you need a clear plan. A well-designed corner desk maximizes your available space while supporting comfortable, productive work sessions.
Measure the Corner Space Precisely
Start by measuring both walls forming your corner. Record the following dimensions using a tape measure:
- Wall lengths from corner to corner
- Distance from corner to windows, baseboards, and outlets
- Ceiling height and floor flatness
- Electrical outlet locations for cord routing
Use a speed square or the 3-4-5 triangle method to check whether your corner is square. If it’s not exactly 90 degrees, adjust your design to account for the angle.
Choose the Right Desk Height
Standard seated desk height ranges from 29 to 30 inches. Customize based on your chair and posture needs:
- Elbows should rest at 90 degrees when typing
- Monitor top should sit at or slightly below eye level
- For sit-stand flexibility, consider 35 to 40 inches especially for floating desk designs
Mark your preferred height on the wall if planning a wall-mounted build.
Select Your Desk Shape and Configuration
Most corner desks are L-shaped, but consider which configuration suits your needs:
- Symmetrical L with equal-length arms
- Asymmetrical L with one longer arm for dual monitors
- Curved front edge for a smoother aesthetic
- Floating design mounted to the wall
- Floor-standing with legs, cabinets, or aprons
Sketch your design on graph paper or use free CAD tools like SketchUp Free to visualize proportions and clearances before building.
Choose Materials for Durability and Style
Selecting the right materials ensures your desk lasts for years while matching your home decor perfectly.
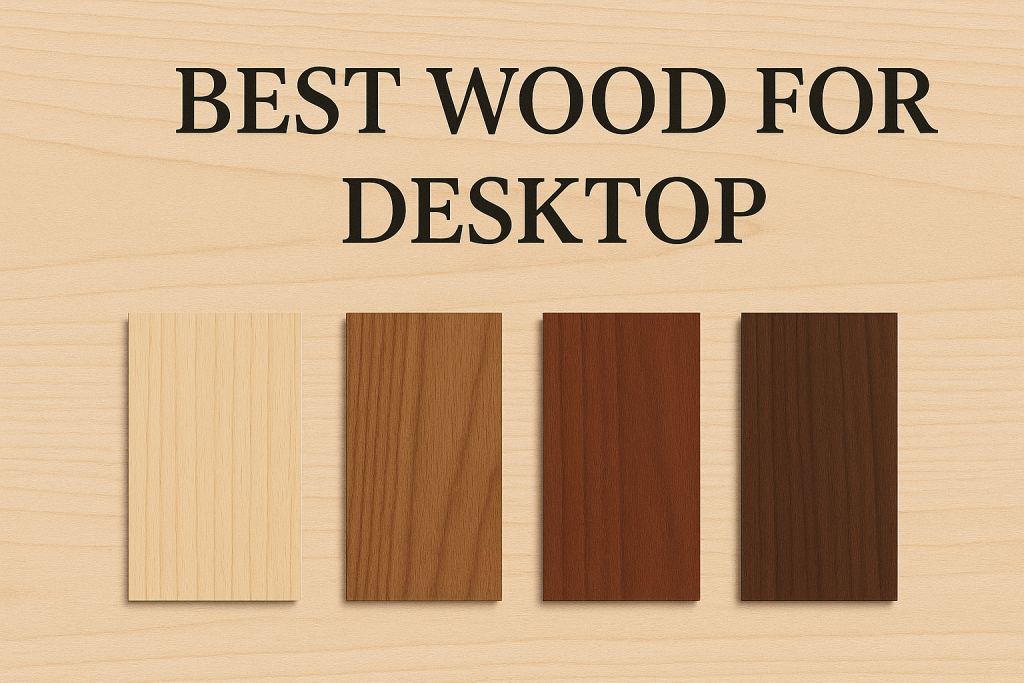
Pick the Best Desktop Material
The desktop is your primary work surface, so choose wisely based on your aesthetic preferences and budget:
Birch plywood offers affordability and works well with paint finishes. Apply iron-on edge banding for a solid wood appearance. Butcher block provides a warm, natural look but requires oiling every three to six months. MDF with laminate gives a modern, smooth surface but avoids moisture exposure. Solid pine boards are DIY-friendly and budget-conscious but need sealing to prevent dents. Live edge slabs make stunning statement pieces but come with a higher price tag and may require stabilization.
For large tops, glue up multiple boards or use a modular panel system for easier transport through doorways.
Select Frame and Support Materials
Your frame and support materials determine stability and load capacity:
Pine boards in 1×4 and 1×8 sizes work well for back supports, aprons, and drawer fronts. Three-quarter-inch plywood suits drawer boxes, cabinet sides, and partitions. Eight-quarter hardwood like walnut or oak creates custom thick legs or trim. Metal hairpin legs offer a mid-century modern look without requiring woodwork.
Always use kiln-dried lumber to minimize warping after assembly.
Use the Right Fasteners and Joinery
Strong joints prevent wobble and extend your desk’s lifespan significantly:
Wood glue combined with clamps provides the primary bond for all joints. Pocket screws using a Kreg Jig offer fast, strong, hidden connections. Biscuit or Domino joinery aligns panels with precision. Threaded inserts allow for removable legs and hardware. Hanger bolts connect legs to the top securely.
Always drill pilot holes to prevent splitting, especially near edges.
Cut and Join the Desktop Panels
Your desktop is the centerpiece of the build. Make it seamless and sturdy using proper cutting and joining techniques.
Cut Panels for a 90-Degree Corner Fit
For a standard L-shaped corner desk, cut two rectangular panels to your desired dimensions. Join them at a 90-degree angle using one of these methods:
The mitered edge method works well for floating desk styles. Mark 8.5 inches from opposite corners on a single plywood sheet. Draw a diagonal line between the points. Cut with a circular saw using a straight edge or track saw. This creates an angled front that tucks neatly into the corner with no visible seam.
Join Panels Securely
Choose a joining method based on your tools and strength requirements:
Glue plus clamps provides medium strength with no visible seams. Biscuit joinery offers high strength with invisible joints. Festool Domino creates very high strength with precision alignment. Pocket screws deliver high strength with visibility only on the underside. L-brackets provide lower strength and remain visible.
For heavy daily use, combine wood glue with Dominoes or pocket screws for maximum durability.
Reinforce for Transport in Modular Designs
If you need to move the desk through tight spaces, use threaded inserts or a Domino Connect system. This allows the desk to disassemble into two pieces for transport and reassemble on-site with bolts. This approach maintains strength while enabling portability.
Build and Install Legs or Supports
Stability starts from the ground up. Choose your leg system based on style, load requirements, and floor conditions.
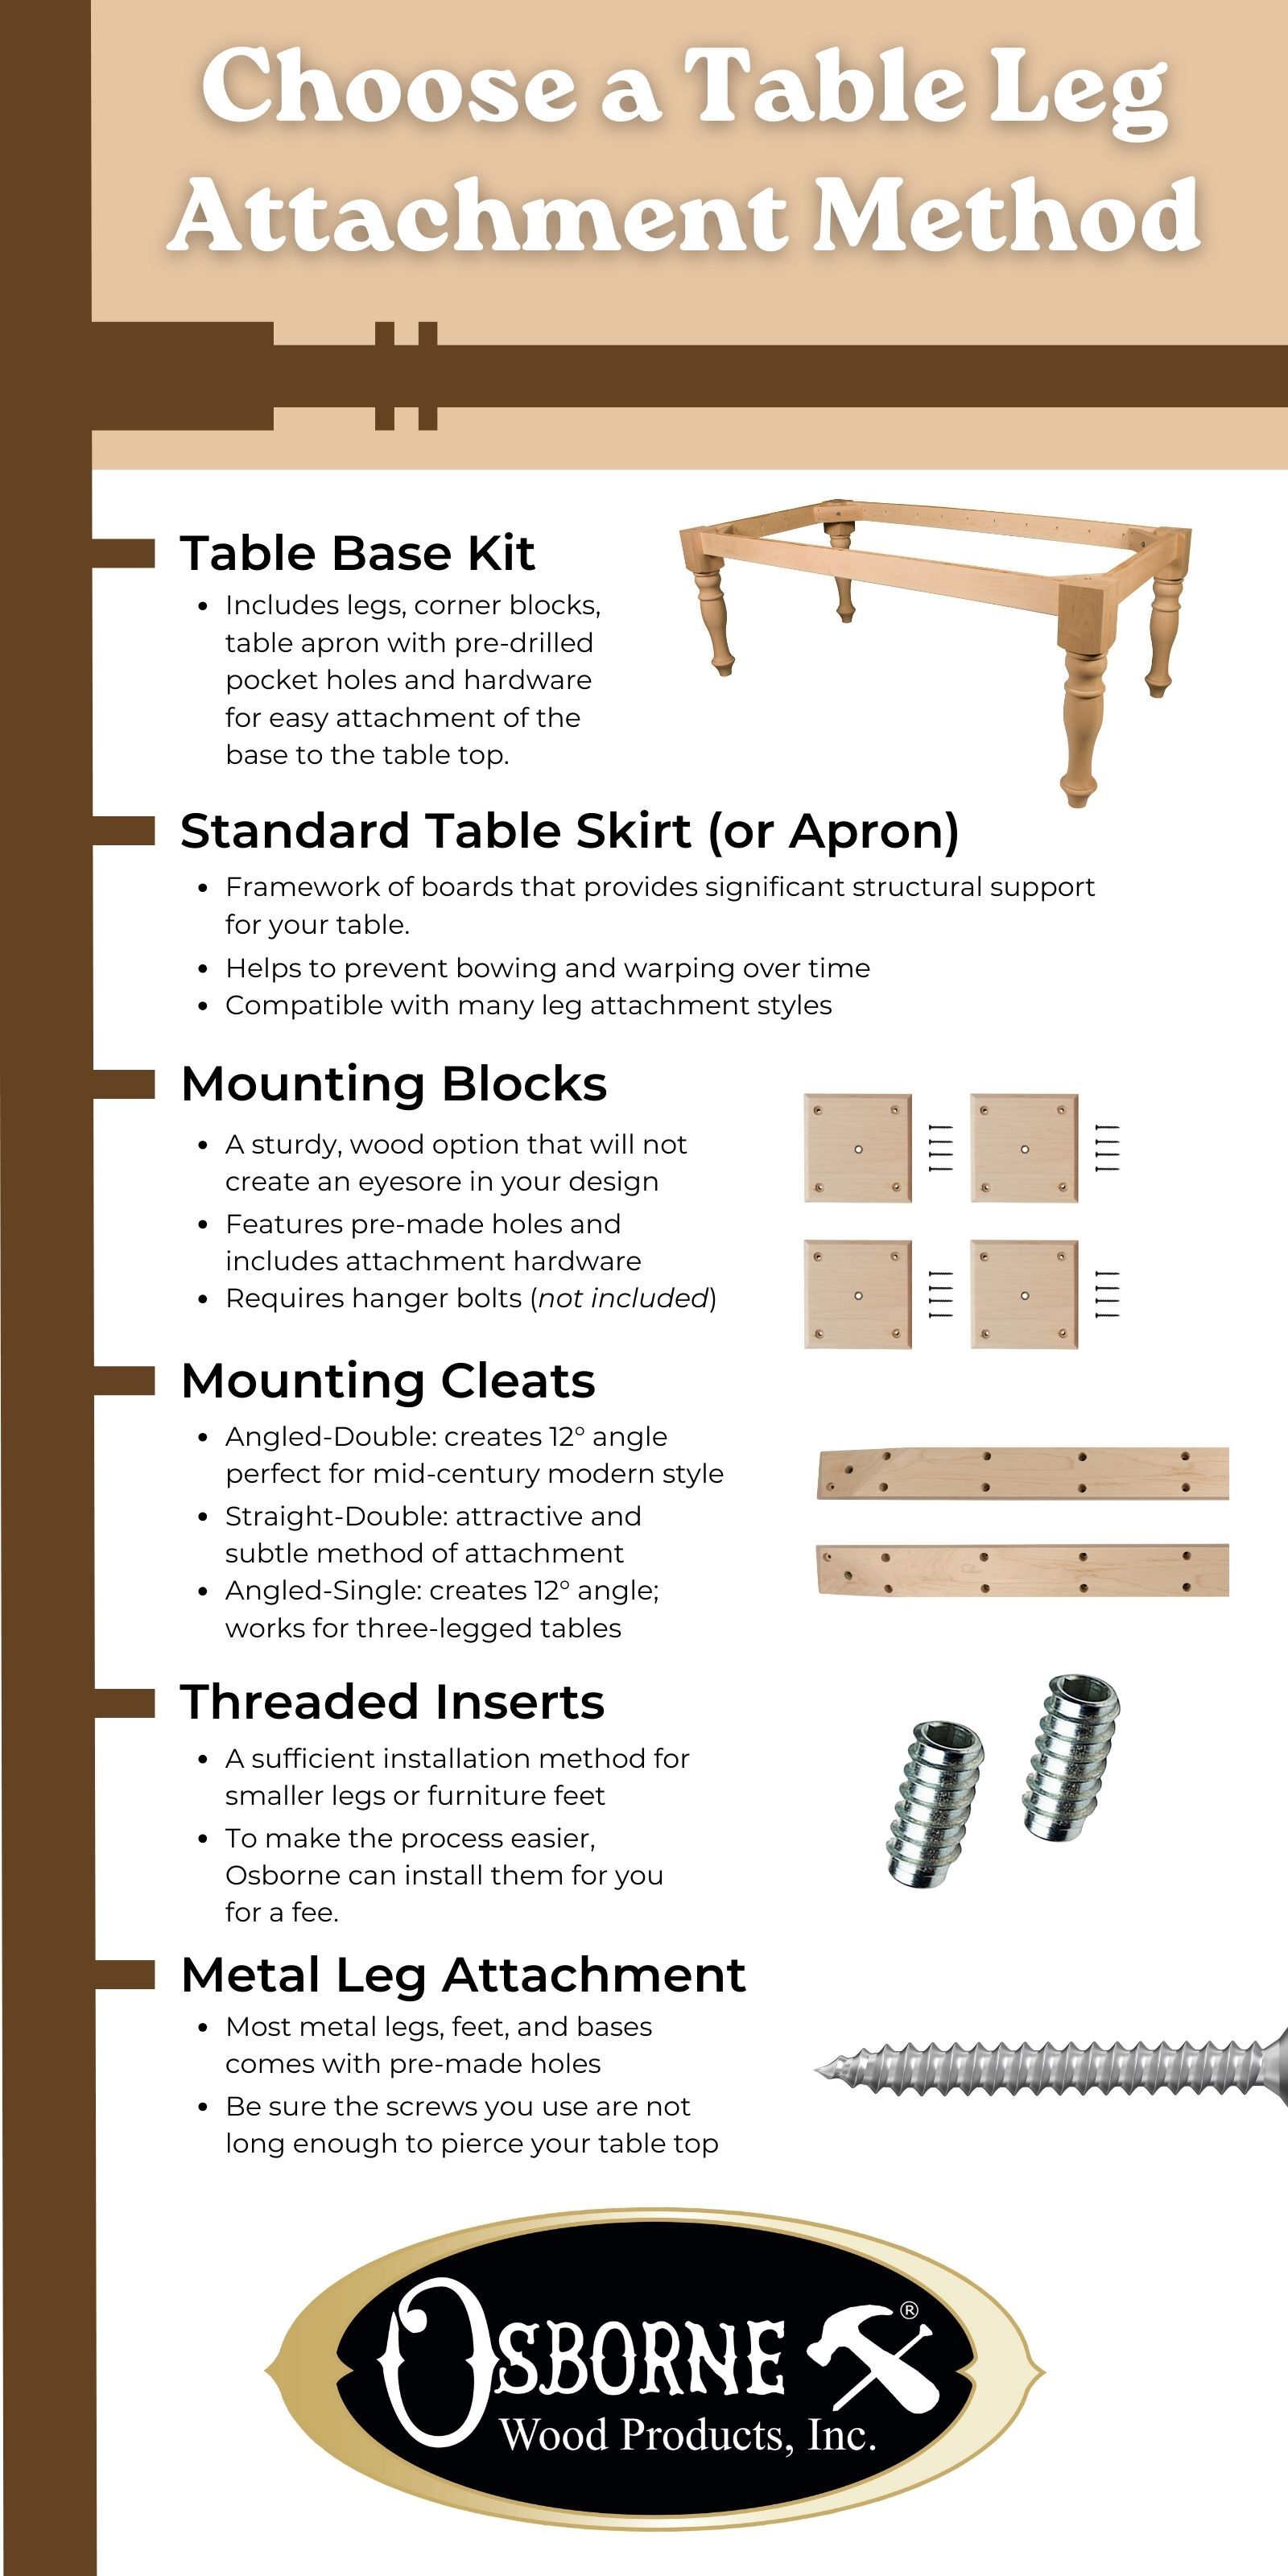
Choose Your Leg Type
Different leg options suit different needs and aesthetics:
Hairpin legs provide a stylish, lightweight option perfect for floating or light-duty desks. Adjustable legs like those from IKEA level easily on uneven floors, making them ideal for rentals and basements. Custom wood legs offer high-end durability for solid wood builds. Trestle bases provide industrial strength for heavy equipment. Wall brackets create a space-saving modern look for small rooms.
Make Custom Tapered Legs for a High-End Look
Advanced builders can create custom tapered legs from hardwood. Cut eight-quarter hardwood blanks to rough size. Use a printed or CNC template with a 10-degree taper. Bandsaw the profile, preserving transition zones. Glue two halves together using Dominoes for alignment. Flush-trim using a template and bearing-guided router bit. Add a thumbnail edge on the front and chamfer on the sides for comfort.
Use a plywood sled on your table saw to trim all legs to exact height after assembly.
Install Wall Supports for Floating Desks
For a wall-mounted desk, mark your mounting height. Use a stud finder to locate wall studs. Install wooden cleats or metal brackets into at least two studs. Secure with three-inch screws at the top and bottom of each cleat. Rest the desk on cleats and attach from below with screws.
For masonry walls, use Rawl plugs and masonry screws. For drywall only, use heavy-duty toggle bolts, though this is not recommended for large heavy desks.
Add Storage with Drawers, Cabinets, and Toe Kicks
Maximize utility by integrating storage that matches your workflow and keeps clutter hidden.
Build a Cabinet Base
A cabinet base adds rigidity and provides hidden storage space. Construct it from three-quarter-inch plywood or solid wood. Use dado joints for shelf and side alignment. Install internal partitions using Domino slots for precise alignment. Consider grain direction, placing vertical grain on sides and horizontal grain on top for visual flow.
Install Drawers for Easy Access
Plan your drawer layout before final assembly. A common configuration includes three small drawers plus one door. Use Blum undermount slides for smooth operation. Cut drawer fronts from a single glued-up panel to maintain grain continuity across the entire face. Set fronts three-quarter-inch inset from the front edge for a clean look.
Build drawer boxes using three-quarter-inch plywood for sides at 2.5 inches wide. Use quarter-inch or three-quarter-inch plywood for the bottom. Cut a V-cut profile on the back to save corner space. Assemble with glue and brad nails.
Use a Rockler drawer slide jig for precise installation every time.
Add a Toe Kick for Comfort and Cable Management
A toe kick improves ergonomics and provides a space for hiding cables. Build it four inches shorter and two inches shallower than the cabinet. Construct a shallow box with mitered corners. Reinforce joints with tape and internal blocks. Attach stretchers via pocket holes. Mount under the cabinet for a seamless look.
Finish the Surface for Beauty and Protection
A professional finish makes your desk look stunning and protects it from daily wear.
Sand in Progressive Stages
Start with 80-grit sandpaper to remove saw marks and flatten surfaces. Progress to 120-grit to smooth out scratches. Finish with 220-grit for final prep before applying finish.
Use an orbital sander for flat areas and a detail sander for edges. Wipe surfaces with a damp cloth to remove all dust before finishing.
Apply Edge Banding to Plywood
Cover exposed plywood edges for a solid wood appearance. Cut iron-on edge banding to length. Place on the edge and warm with a clothes iron. Press firmly to activate the adhesive. Trim excess with a utility knife. Sand flush with 120 to 220-grit sandpaper.
Use a banding scraper for the best results.
Stain Softwoods Evenly
Pine and other softwoods blotch easily when stained. Prevent this by sanding to 220-grit first. Apply pre-stain conditioner and let it dry for 15 minutes. Wipe on your chosen stain color. Let it sit for five to ten minutes, then wipe off excess.
Stain all pieces before assembly to avoid missing spots in crevices.
Choose the Right Finish
Select a finish based on durability needs and aesthetic preferences:
Water-based polyurethane offers high durability with reapplication every two to three years. Tung oil plus wax provides a medium durability with natural warmth and reapplication every three to six months. Hardwax oil like Osmo delivers high durability with easy repair every six to twelve months. Lacquer provides very high durability but requires professional application.
Apply two to three coats, sanding lightly with 220-grit between each coat. For butcher block tops, re-oil every three to six months to prevent cracking.
Install and Set Up Your Desk
Now it’s time to bring everything together and finalize your workspace.
Position the Desk Correctly
Lay the desk upside-down on blankets to protect the finish. Mark leg or bracket positions. Use a spirit level to ensure evenness. Adjust IKEA-style legs if your floor is uneven.
For wall-mounted desks, double-check cleat alignment before lifting the desk into place.
Secure Floating Desks to the Wall
Lift the desk onto the cleats carefully. From underneath, drive screws through the desk into the cleats. Confirm all connections are tight. Touch up wall paint if scuffed during installation.
Always anchor floating desks into studs or masonry. Drywall anchors alone won’t support heavy loads.
Manage Cables Like a Pro
Avoid a wire jungle with smart cable routing. Install wood trim along the back edge with a small gap behind the monitor. Drill grommet holes in the desktop for power strips. Route cables through hollow legs or inside cabinets. Use velcro straps or braided sleeves to bundle cords neatly. Mount an under-desk cable tray for easy access and future adjustments.
Add Final Touches
Complete your workspace with functional accessories. Install a desk lamp or wall-mounted light for task illumination. Place a round fabric rug underfoot for comfort and acoustics. Add a shelf above for books or decor. Mount a music stand or instrument hanger if you use your desk for practice. Use rolling storage bins for flexible organization.
Optimize for Ergonomics and Daily Use
A great desk supports your body and enhances your workflow throughout the day.
Set the Correct Working Height
For seated work, aim for 29 to 30-inch desk height with feet flat and elbows at 90 degrees. For standing use, set height at 35 to 40 inches with wrists straight and monitor at eye level. Use an adjustable chair and monitor riser as needed to fine-tune your setup.
Design for Pets and Children
Consider safety if pets or kids share your space. Use rounded corners or thumbnail edges to prevent injuries. Set legs toward the center to leave space for pets underneath. Avoid sharp protrusions in high-traffic areas.
Plan for Multi-Function Use
Your desk can serve multiple purposes beyond computer work. Use an easy-clean surface for crafting. Choose a large smooth area for photography flat lays. Add a bookshelf and lamp for study zones. Install instrument hooks for music practice.
Select finishes and materials that match your primary use while allowing flexibility.
Maintain and Repair Your Desk
Keep your desk looking and working great for years with proper maintenance.
Perform Routine Maintenance
Dust weekly with a microfiber cloth. Clean with wood-safe cleaner, avoiding ammonia. Reapply finish every two to three years in high-use areas. Check screws and connections annually and tighten as needed.
Prevent Warping
Keep your desk away from direct sunlight and humidity changes. Use a dehumidifier in damp spaces. Allow wood to acclimate to your environment before building if purchased from a different climate.
Repair Scratches and Dents
Minor scratches respond well to walnut meat or touch-up markers. Dents can often be raised by dampening the area and applying heat with an iron. Deep gouges require filling with epoxy or wood filler, then sanding and refinishing the affected area.
Frequently Asked Questions About Building a Corner Desk
What is the standard height for a corner desk?
Standard corner desk height is 29 to 30 inches for seated use. For sit-stand desks or floating designs, 35 to 40 inches works better. Adjust based on your chair height and whether you prefer sitting or standing while working.
How much does it cost to build a corner desk yourself?
DIY corner desk material costs typically range from $50 to $150 depending on materials chosen. This compares favorably to store-bought models costing $200 to $600 or more, while offering superior customization and durability.
Can I build a corner desk without special tools?
Yes, beginners can build a corner desk with basic tools including a circular saw, drill, clamps, and measuring tape. More advanced joinery like Dominoes or biscuit joinery requires additional tools but produces stronger results.
How do I handle a non-square corner when building?
Measure the angle of your corner precisely. Adjust your desktop cuts to match the actual angle rather than assuming 90 degrees. Use a protractor or digital angle finder for accuracy. The mitered edge technique works well for accommodating off-angle corners.
Should I choose a floating or floor-standing corner desk?
Floating desks suit small spaces, modern aesthetics, and light to moderate use. Floor-standing desks provide greater stability, support heavier loads, and allow for built-in storage. Choose based on your space, intended use, and whether you can anchor into wall studs.
Key Takeaways for Building Your Corner Desk
Building a corner desk gives you complete control over size, style, and functionality while saving money compared to store-bought options. Focus first on accurate measurements and a clear design plan before purchasing materials. Choose materials that match your aesthetic preferences and durability needs, whether that’s affordable pine plywood or premium walnut slab.
The construction process breaks down into manageable steps: cut and join the desktop panels, install your chosen leg or support system, add storage if desired, apply a professional finish, and complete the setup with cable management and accessories. Take time with surface preparation and finishing for results that look professional and last for years.
Now measure that corner, select your materials, and start building. Your custom workspace is just a few cuts away.


