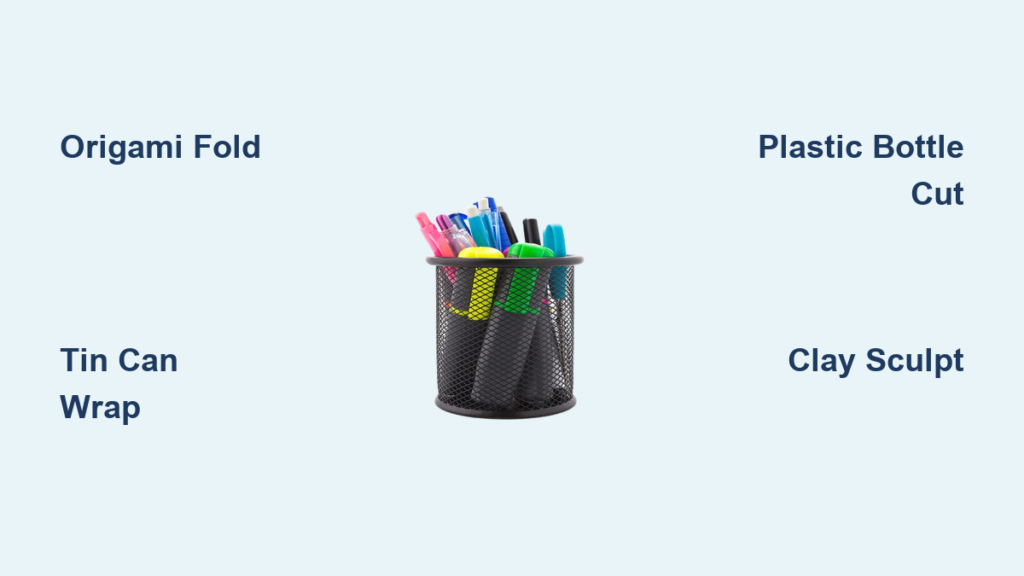
A cluttered desk often starts with pens scattered across every surface. Before buying another plastic organizer, consider this: your next pen holder might already be sitting in your recycling bin. Creative pen holder ideas transform everyday waste into functional art that reflects your personality and saves money. From crisp origami folds to painted tin cans, these projects work for students, teachers, and craft lovers alike.
This guide explores more than 30 innovative designs using materials you likely already own. You’ll learn how to build durable, stylish holders that organize your workspace, match your decor, and reduce waste. Most projects take under an hour and require no advanced tools.
Paper Origami Pen Holders for No-Glue Solutions
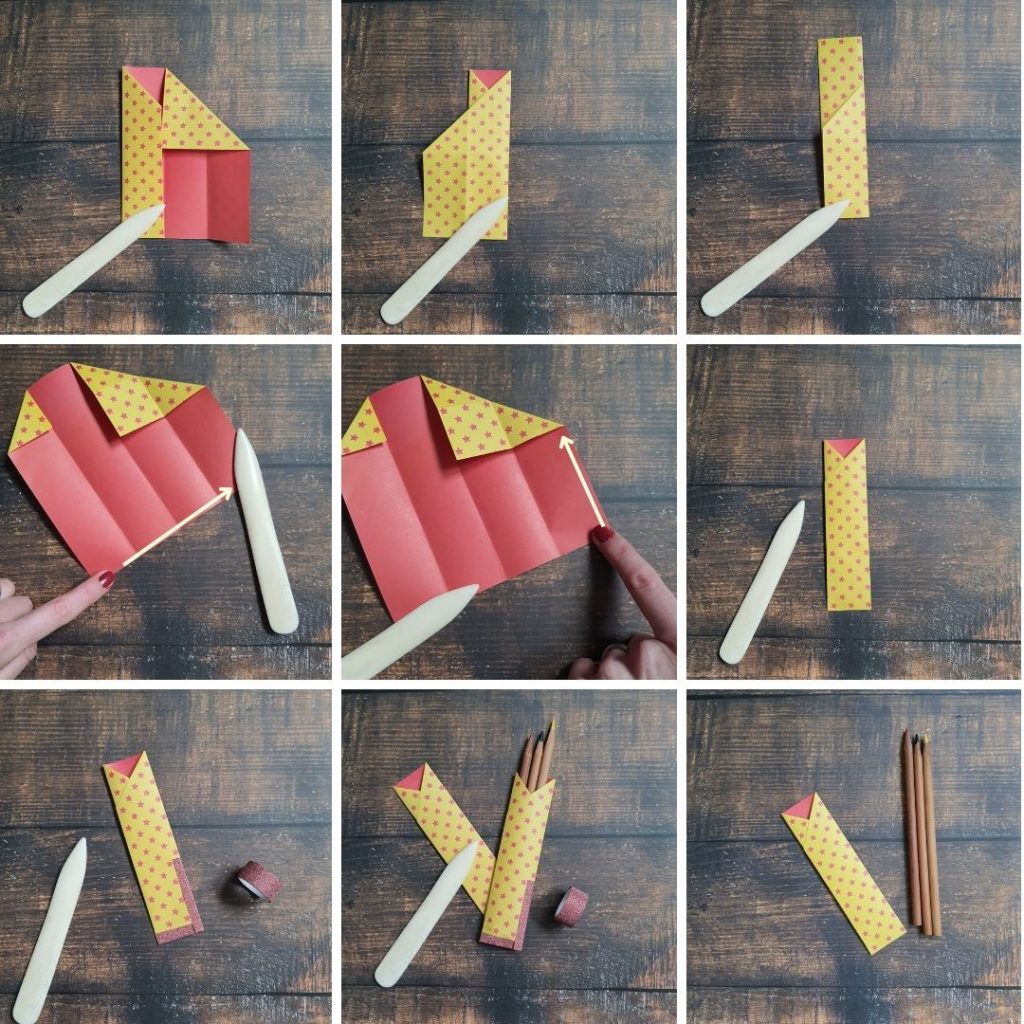
A single sheet of paper can become a sleek, glue-free pen cup. These minimalist designs work perfectly for classrooms, gifts, or temporary desk setups.
Square Sheet Origami Without Glue
This compact holder relies on crisp folding rather than adhesives to create a stable base for pens and pencils.
Build Steps:
1. Start with a square sheet (cut A4 diagonally if needed).
2. Fold diagonally both ways to form an “X” crease.
3. Fold horizontally and vertically to complete a center grid.
4. Bring all four corners to the center, forming a smaller square.
5. Flip and repeat the corner fold on the backside.
6. Fold the bottom flaps upward to meet the top edge on both sides.
7. Tuck top corners inward and secure flaps into pockets.
8. Gently pull the base open to expand into a 3D shape.
Pro Tips:
• Use cardstock for sturdier results.
• Avoid glossy paper, as it resists folding and creases poorly.
• Decorate before folding with washi tape or markers.
Best For: Light-duty use, kids’ crafts, or themed stationery sets.
Rectangular Sheet Pen Stand
A quick A4 fold creates a slotted stand ideal for holding multiple pens at a visible angle.
Assembly:
1. Fold paper in half vertically, then unfold.
2. Fold top corners inward to meet at the center crease, forming a triangle.
3. Fold bottom edges up to create a wide base.
4. Tuck bottom corners into the center to form a square foundation.
5. Flip the model over.
6. Fold the top triangle down to lock the structure.
Why It Works:
• Holds pens at an easy-reach angle.
• Fits perfectly beside notebooks or laptops.
• Zero glue or cutting needed, making it great for classrooms.
Customize It: Add stickers, doodles, or colored washi tape along the edges for a personalized look.
Upcycled Tin Can Holders That Last

Empty food cans make rugged, long-lasting pen holders. With basic prep and decoration, they become vibrant desk organizers built to handle daily use.
Prepare Cans Safely
Before decorating, ensure your can is clean and safe to handle.
Steps:
1. Remove the label by soaking in warm, soapy water.
2. Scrub off adhesive residue with a sponge.
3. Dry completely, especially inside, to prevent rust.
4. Use a smooth-edge can opener if removing lids.
Warning: Never use cans with jagged edges. Sand sharp rims gently with fine-grit sandpaper if needed.
Decorate With Paper Wraps
Cover cans with patterned paper for a polished, custom look.
How-To:
1. Measure the can height.
2. Cut a strip of scrapbook or construction paper to that height.
3. Wrap around the can, aligning edges.
4. Secure with hot glue or tacky glue.
Design Ideas:
• Match your room’s color scheme.
• Use map prints, sheet music, or comic pages for vintage flair.
• Laminate for wipeable, long-term durability.
Wrap With Twine or Raffia
Natural fiber wraps add rustic charm and texture to any desk.
Process:
1. Apply hot glue to the can’s bottom edge.
2. Press twine end onto glue and wrap tightly upward.
3. Add glue every inch to prevent slippage.
4. Trim and secure the end when complete.
Upgrade It: Glue on a felt bottom to protect desks and reduce noise.
Clad With Popsicle Sticks
Create a wooden-look holder using glued popsicle sticks.
Steps:
1. Apply vertical glue lines around the can.
2. Press sticks side-by-side, covering the surface.
3. Check alignment by placing the can on a flat surface mid-project.
4. Let dry fully before use.
Pro Tip: Paint sticks first for a uniform color, or stain for a natural wood effect.
Themed Metal Can Creations
Turn plain cans into character-driven art pieces that spark joy every time you reach for a pen.
Patriotic Painted Cans
Celebrate holidays or national pride with red, white, and blue designs.
Materials:
• Acrylic paint in red, white, and blue
• Paintbrush
• Star stickers or stencils
Method:
1. Paint the can base white or blue.
2. Add red stripes or star patterns.
3. Seal with clear matte spray for durability.
Perfect For: July 4th, Memorial Day, or classroom displays.
Character Cans With Googly Eyes
Transform a can into a playful animal or cartoon figure.
Examples:
• Cat Can: Glue on felt ears, draw a nose, add googly eyes.
• Penguin: Paint black top, white front, orange beak.
• Strawberry: Paint red with a green leafy top and black seeds.
Embellishments:
• Use pom-poms, buttons, or pipe cleaners for 3D details.
• Attach raffia “hair” for a whimsical look.
Kid-Friendly: Ideal for craft time, as these projects are simple, fun, and highly customizable.
Plastic Bottle and Tube Organizers
Lightweight and easy to cut, plastic bottles and cardboard tubes are perfect for quick, creative pen storage.
Cut Plastic Bottle Holders
Repurpose water or soda bottles into modern-looking cups.
Steps:
1. Wash and dry the bottle.
2. Cut off the bottom 3 to 4 inches using scissors or a craft knife.
3. Smooth sharp edges with sandpaper or cover with duct tape.
4. Decorate with paint, washi tape, or stickers.
Bonus Uses:
• Use the top half as a phone stand.
• Turn the base into a mini planter after decorating.
Eco Note: One bottle equals one less item in the landfill.
Pringles Can Pen Storage
The large diameter of Pringles cans holds thick markers, rulers, or scissors.
Customization Options:
• Wrap with fabric or kraft paper.
• Paint with chalkboard paint for a writable label area.
• Add a magnet strip to the back for locker mounting.
Pro Tip: Keep the plastic lid to store erasers or small parts inside.
Toilet Paper Roll Clusters
Group multiple rolls for a multi-compartment organizer.
Build It:
1. Collect 3 to 5 clean toilet paper tubes.
2. Arrange in a bundle and glue together with hot glue.
3. Glue the cluster to a cardboard base for stability.
4. Decorate with paint, washi tape, or quilled paper flowers.
Design Variations:
• Painted Garden: Turn each tube into a flower stem with paper blooms on top.
• Rainbow Set: Paint each tube a different bright color.
Best For: Kids’ desks or craft rooms.
Clay and Ceramic Artistic Holders
For long-lasting, gallery-worthy pen cups, sculpt your own from clay or customize a ceramic mug.
Air Dry Clay Creations
No kiln required. Air dry clay hardens naturally in 24 to 48 hours.
Popular Shapes:
• Strawberry Holder: Sculpt a red base with a green leafy top.
• Animal Cups: Make penguins, ducks, or cats with ears and tails.
• Minimalist Cylinder: Smooth, modern shape in white or neutral tone.
How to Sculpt:
1. Roll clay into a thick base.
2. Build walls upward, smoothing seams.
3. Let dry completely.
4. Paint with acrylics and seal with varnish.
Durability Tip: Apply two coats of sealant to prevent chipping.
Themed Ceramic Cups
Use store-bought ceramic mugs or paint plain ones for a polished look.
Ideas:
• Character Themes: Paint faces or use printed decals of beloved characters.
• Geometric Patterns: Use painter’s tape for clean lines.
• Name Personalization: Write your name in cursive with a paint pen.
Bonus Function: Doubles as a coffee cup holder, with pens on one side and drinks on the other.
Functional Uses and Smart Storage Solutions

Beyond holding pens, these organizers solve real workspace problems.
Multi-Item Desk Organizer
Combine compartments for full stationery control.
Build a Cluster:
• Group toilet paper rolls for pens, pencils, and scissors.
• Use a large jar for rulers and tape.
• Add a Post-it note slot in front.
Label It: Use a small chalkboard tag or sticky note.
Locker-Friendly Magnetic Holders
Keep supplies vertical and within reach on metal surfaces.
How to Make:
1. Decorate a paper cup or plastic bottle base.
2. Glue a strong neodymium magnet to the back.
3. Attach to a locker, filing cabinet, or fridge.
Ideal For: Students, craft rooms, or small apartments.
Rotating and Tiered Holders
Maximize access with multi-level designs.
DIY Option:
• Stack two Pringles cans vertically.
• Glue together and decorate as one unit.
• Store frequently used pens on top and backup supplies below.
Time-Saver: No digging required, since everything stays visible.
Eco-Friendly and Budget Tips
Create amazing holders without spending a dime.
Use Free Recycled Materials
Sources:
• Tin cans from food containers
• Plastic bottles from drinks
• Toilet paper rolls from bathroom waste
• Cardboard boxes from shipping
Prep Right:
• Wash and dry all items.
• Remove sticky labels.
• Sand sharp edges.
Choose Low-Cost Decor
Affordable Upgrades:
• Washi tape offers endless patterns and easy application.
• Acrylic paint covers dark surfaces and dries fast.
• Markers work well for doodling on paper wraps.
Total Cost: Under $5 for most projects.
Maintenance and Longevity
Keep your DIY holder looking fresh and functional for years to come.
Clean Without Damage
By Material:
• Plastic or Metal: Wipe with a damp cloth.
• Paper or Cardboard: Dust only and avoid moisture.
• Clay or Ceramic: Clean with mild soap if sealed.
Seal for Longevity: Spray paper projects with clear acrylic sealant to resist spills and handling.
Prevent Common Failures
Issues and Fixes:
• Rust inside can? Dry thoroughly before sealing.
• Glue not holding? Use tacky glue or hot glue, not school glue.
• Holder tips over? Add weight (coins or stones) to the base or use a wider container.
Storage Tip: Keep paper-based holders in dry areas, away from bathrooms or humid zones.
Frequently Asked Questions About Pen Holder Ideas
What is the easiest pen holder to make for beginners?
The toilet paper roll cluster is the easiest project for beginners. It requires only clean tubes, hot glue, and basic decorations like paint or washi tape. No cutting or special tools are needed, and the project takes about 15 minutes.
How can I make a pen holder without glue?
Origami pen holders use only paper folds and no adhesive. The square sheet technique creates a sturdy, compact holder using just crisp folding. This method works well for classrooms where glue may be restricted.
What materials work best for durable pen holders?
Tin cans and air-dry clay offer the highest durability. Tin cans handle heavy daily use once sealed, while air-dry clay creates permanent, decorative pieces when properly sealed with varnish. Both options last for years with basic care.
How do I prevent tin can pen holders from rusting?
Dry the can completely inside and out before decorating. Apply a coat of acrylic paint or clear sealant to the interior. Avoid placing the holder in humid areas like bathrooms or near windows.
Can kids safely make these pen holders?
Yes, with adult supervision. Paper origami, toilet paper roll clusters, and decorated tin cans (with sanded edges) are kid-friendly projects. Avoid sharp tools, hot glue, and small embellishments that pose choking hazards for young children.
What is the cheapest way to create a pen holder?
Repurpose items already in your home, such as toilet paper rolls, plastic bottles, or food cans. Decorate with washi tape or markers rather than purchasing specialty supplies. Most projects cost under $5 or nothing at all.
Key Takeaways for Your Next Pen Holder Project
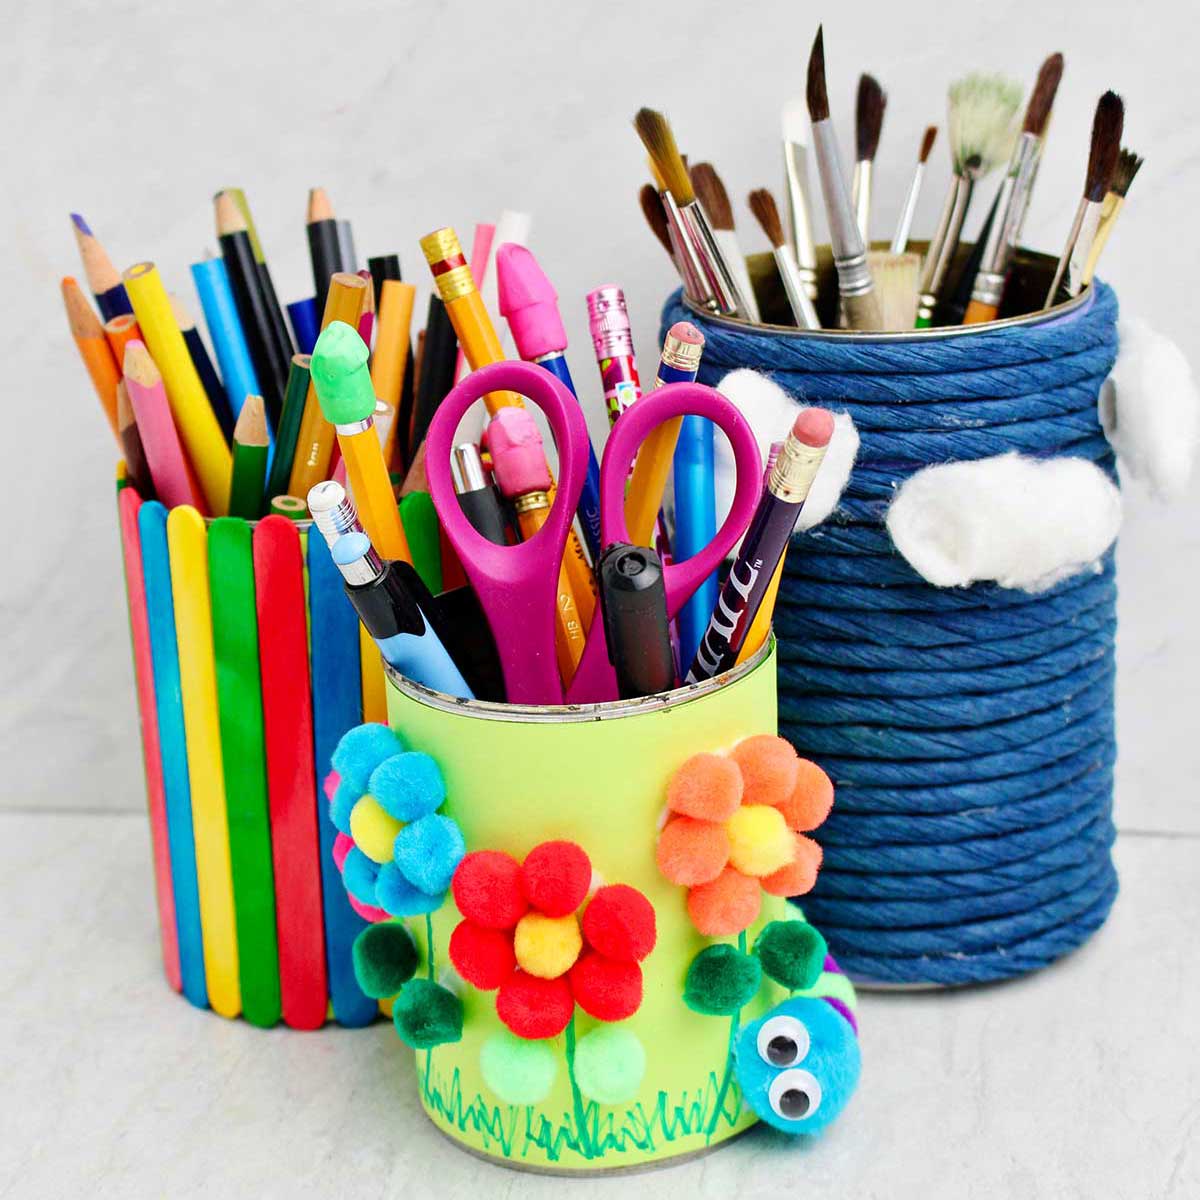
The best pen holder ideas blend function, style, and sustainability in one creative package. Paper origami offers quick, no-mess solutions for classrooms and gifts. Tin cans provide rugged durability for daily office use. Clay and ceramic options deliver long-lasting beauty for permanent desk setups.
Start with one recycled item from your kitchen or bathroom today. A single toilet paper roll, tin can, or sheet of paper can become a personalized organizer that reflects your style. These projects prove that the most useful desk accessories don’t come from stores but from your own creativity and resourcefulness.