
Painting a desk is one of the most rewarding and cost-effective ways to refresh your workspace. Whether you’re revamping an old hand-me-down or giving new life to a thrift store find, a well-painted desk can transform your room’s look while saving hundreds compared to buying new. The key? Proper prep, the right materials, and a clear process. In this guide, you’ll learn how to paint a desk like a pro, from choosing the best surface and fixing damage to selecting durable paints and applying a long-lasting finish.
Choose the Right Desk for Painting
Not every desk is a good candidate for painting. Picking the right one ensures your project lasts and looks great.
Best Materials for Painting
Solid wood is ideal because it sands well, accepts primer, and can be repaired if damaged. MDF and particleboard work too but swell if exposed to moisture, so keep them dry during prep. Veneer desks have a thin wood layer over fiberboard. Sand lightly to avoid sanding through. Laminate surfaces are slick and non-porous, so they need aggressive deglossing or light sanding to help paint stick. Metal legs or frames can be painted, but remove rust first and use metal-specific primer.
Check for Stability and Style
Avoid wobbly or broken desks unless you can fix them. Tighten loose joints and reinforce weak legs before painting. Desks with carvings, moldings, or spindles take more time to prep and paint, but add character. Simple, flat surfaces are easier for beginners. Consider how the desk fits your space. Will it support your monitor, keyboard, and notebooks? Can you personalize it with two-tone paint or new hardware?
Find Affordable, Paintable Desks
Great desks can be found for under $30 at thrift stores, Facebook Marketplace, or Habitat for Humanity ReStores. One user transformed a $20 ReStore desk into a custom workspace. Refinishing old furniture keeps usable pieces out of landfills. Every painted desk is a small win for sustainability.
Prep the Desk for a Smooth Finish
Proper preparation is 80% of a successful paint job. Skipping steps leads to bubbling, peeling, or an uneven surface.
Disassemble and Deep Clean
Remove drawers, knobs, and hardware. Vacuum inside drawers and wipe all surfaces with a degreaser or TSP to remove grime, oils, and wax. Greasy buildup repels paint, so clean thoroughly. Let the desk dry completely. Moisture under paint causes adhesion failure.
Repair Dents, Scratches, and Holes
Fill dents and gaps with wood filler for deep damage or spackle for shallow ones. Use a putty knife slightly wider than the repair to apply smoothly. Let it dry fully, then sand flush with 220-grit paper. Wipe clean with a tack cloth. If replacing hardware, fill old holes and drill new ones after painting.
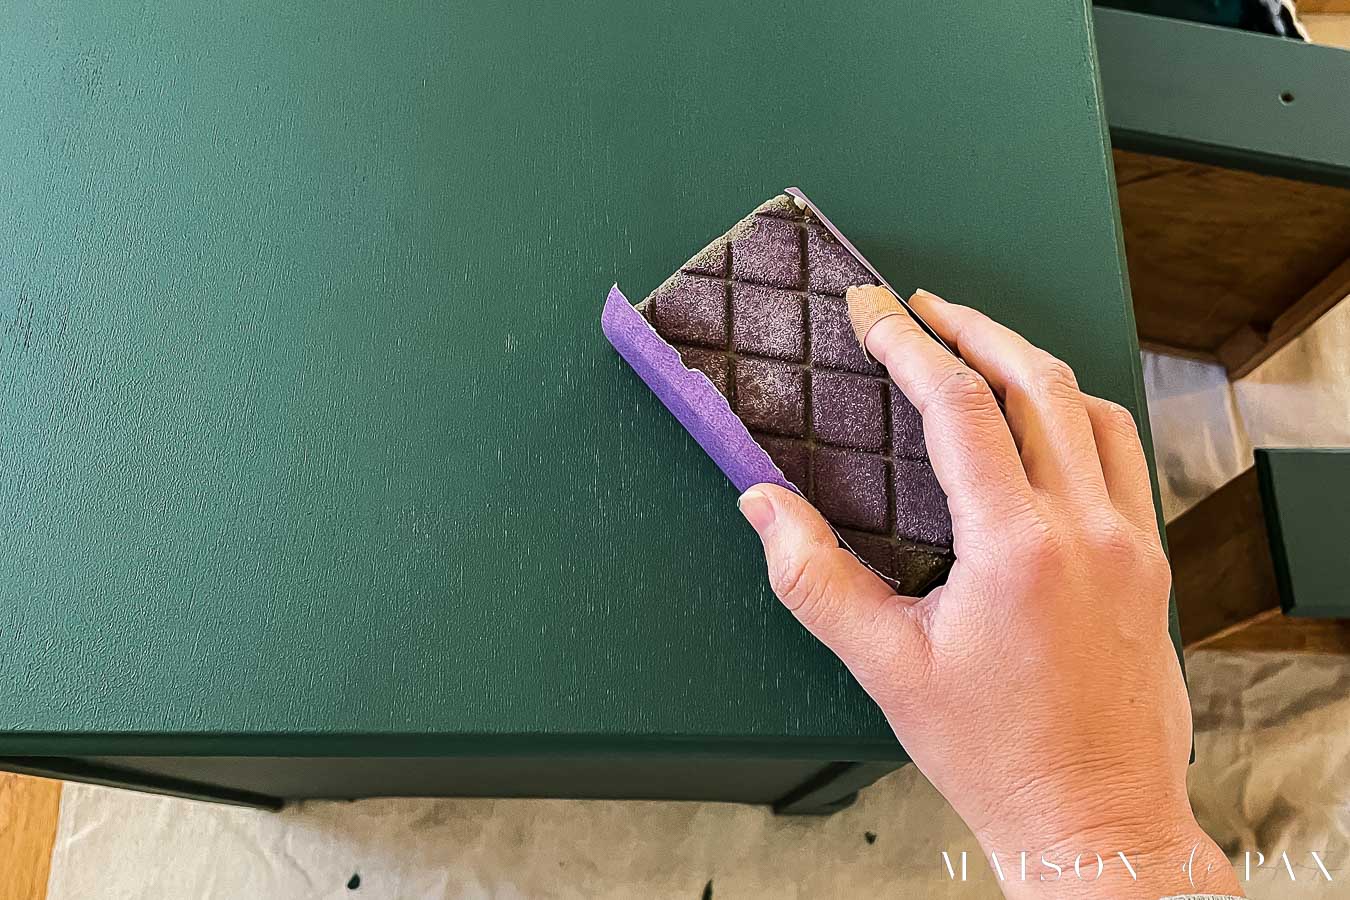
Sand for Maximum Adhesion
Sanding creates a surface paint can grip. Start with 80 to 100 grit to remove gloss and smooth rough areas. Use 120 to 150 grit next, then finish with 220 to 300 grit for a silky-smooth base. Always sand with the grain to avoid scratches. For veneer, use 100 grit lightly, then 220. Do not sand through. Intricate areas like carvings may need a detail sander or hand sanding.
Use Deglosser Instead of Sanding (Optional)
If the finish is intact and not peeling, liquid deglosser strips the shine chemically, saving time. Apply with a cloth, wait 10 to 15 minutes, then wipe off. It prepares the surface without dust or risk to veneer. It is not a substitute for cleaning. Do both.
Prime the Surface When Needed
Primer ensures paint sticks, blocks stains, and evens out absorption, especially on porous or dark surfaces.
Know When to Prime
Prime bare wood, metal, laminate, or when painting over dark colors. It is also essential when switching from oil-based to water-based paint or covering stains. Solid wood and MDF soak up paint unevenly. Primer prevents blotchiness. Skipping primer on these surfaces leads to patchy coverage and poor durability.
Choose the Right Primer Type
Use shellac-based BIN primer for fast drying and excellent stain blocking. It dries in about 45 minutes and is ideal for dark-to-light color changes. All-surface latex primer works for general use. For metal, use a rust-inhibiting metal primer. Apply thin coats with a foam roller for flat areas and a small brush for corners. Two to three coats are recommended for highly porous surfaces like desktops.
Apply and Sand Between Coats
Stir primer. Do not shake to avoid bubbles. Apply in long, even strokes. Let dry completely between coats. Lightly sand with 220-grit paper after each coat to remove dust nibs. Wipe clean with a tack cloth before the next coat or painting.
Pick the Best Paint for Durability

Not all paint holds up to writing, typing, and cleaning. Choose a formula built for furniture.
Enamel Paints for Heavy Use
Sherwin-Williams Emerald Urethane Enamel is top-tier. It is chip-, scratch-, and wear-resistant. It can be brushed or sprayed and rivals professional finishes. Benjamin Moore Advance is a waterborne alkyd enamel that self-levels, reducing brush marks. Both dry hard and last years on high-use desks.
Chalk and Mineral Paints for Easy Application
Fusion Mineral Paint and Annie Sloan Chalk Paint require little prep. No sanding or priming is needed if the surface is clean. They dry to a matte finish and are great for distressing. Real-world tests show Fusion Paint survives six months of daily kid use with no scratches. Marker wipes off easily. However, they are not scratch-proof without a topcoat.
Avoid Standard Wall Paint
Latex wall paint is not durable enough for desks. It chips and wears quickly under pressure. If used, it must be sealed with a strong topcoat. Oil-based paint is durable but has strong fumes and long dry times. It is best for well-ventilated areas.
Apply Paint Like a Pro
How you apply paint determines the final look. Brush marks, drips, and uneven coats ruin an otherwise great project.
Use the Right Tools
Foam roller brushes give the smoothest finish on flat surfaces like desktops. They prevent texture when used with enamel paints. Use a 1-inch bristle brush for trim and edges. For tight spaces like rungs and spindles, use a foam brush. For flawless results, a cordless airless sprayer delivers a factory-smooth finish but requires masking and good ventilation.
Apply Thin, Even Coats
Stir paint gently. Shaking creates bubbles. Apply the first coat thin. Full coverage is not expected. Use long, smooth strokes with the grain. Let dry 4 to 6 hours for water-based or 6 to 24 hours for oil-based. Lightly sand between coats with 150 to 300 grit paper and wipe clean. A second coat usually gives full coverage. Add a third on high-wear areas like the desktop.
Avoid Common Painting Mistakes
Thick coats cause runs and longer dry times. Overworking the paint with the brush leads to streaks. Do not paint in dusty areas. Particles stick to wet paint. Work in a garage or indoor space with closed windows. If using multiple colors, use painter’s tape for clean lines.
Seal with a Protective Topcoat

A topcoat is non-negotiable for desks. It protects against writing pressure, spills, and cleaning.
Water-Based Topcoats for Clarity
Minwax Polycrylic is clear, non-yellowing, and easy to clean. Apply with a foam roller in thin coats. Sand lightly with 220-grit between coats. It is ideal over white or light paint. Fusion Tough Coat is a premium water-based option with superior scratch resistance and no color shift.
Oil-Based and Specialty Finishes
Oil-based polyurethane is more durable but adds a slight amber tint. It is best for dark or warm-toned desks. Jolie Clear Finishing Wax gives a soft sheen and vintage feel but requires reapplication every 6 to 12 months. It is not ideal for heavy-use desktops. Fusion Finishing Oil soaks into wood and seals paint. It increases durability and deepens color, especially on dark shades like “Pressed Fern.”
Apply and Cure the Finish
Wait 24 or more hours after the final paint coat before topcoating. Apply 2 to 3 thin coats of topcoat, sanding lightly between. Full cure takes time. Wax needs 2 to 3 weeks, enamel up to 30 days, and 2-part epoxy follows strict pot-life rules. Avoid heavy use during cure.
Reassemble and Maintain Your Desk
Once dry, reassemble and enjoy your custom workspace.
Reattach Hardware and Drawers
Reinstall drawers and add new knobs or pulls for a fresh look. Turquoise pulls on a white desk, for example, add personality. Use drawer liners to protect contents and improve function.
Allow Full Cure Before Heavy Use
Even if the desk feels dry, wait 1 to 2 weeks before placing heavy items or writing daily. Full chemical cure ensures maximum hardness. Rushing leads to dents and marks.
Clean and Repair Over Time
Wipe with a damp cloth daily. For stains, use mild soap and water. Avoid abrasives. Touch up scratches with matching paint. Reapply topcoat to worn areas as needed. A full refresh every 5 to 10 years keeps it looking new.
Choose the Best Paint System for Your Needs
Match your paint and finish combo to how the desk will be used.
Best for Everyday Home Desks
Fusion Mineral Paint plus Fusion Tough Coat is durable, easy to apply, and water-based for low odor. It survives kids, pets, and daily use.
Best for Executive or Work Desks
BIN Shellac Primer plus Sherwin-Williams Emerald Urethane Enamel provides maximum durability with a smooth, professional finish. It is ideal for home offices.
Best for Light Colors Over Dark
BIN Primer blocks bleed-through. Pair with chalk or acrylic paint, then seal with water-based poly to prevent yellowing.
Best for Maximum Durability
2-part epoxy is used in commercial settings. It requires precise mixing and fast application. Long cure but near-indestructible.
Key Tips for a Flawless Finish
Follow these pro tips to avoid common pitfalls.
Sand with 220 Grit as Final Step
Even if the surface feels smooth, a 220-grit pass removes micro-imperfections and ensures adhesion. Never skip this.
Use Deglosser to Save Time
On intact finishes, deglosser replaces heavy sanding. Just clean first.
Apply Thin Coats Only
Thick paint runs, bubbles, and takes forever to dry. Multiple thin layers always beat one thick one.
Sand Between Paint Coats
A light sand with 220-grit buffs the surface and helps the next coat bond. Wipe clean. Dust ruins smoothness.
Let Paint Fully Cure
Do not rush. Wait 1 to 2 weeks before heavy use. Enamel and epoxy need time to harden chemically.
Work in a Dust-Free Area
Paint attracts dust. Close windows, sweep the floor, and use drop cloths. Paint on calm days if working outdoors.
Test on a Drawer First
Try your paint, topcoat, and technique on one drawer. Adjust if needed before committing to the whole desk.
Final Thoughts on Painting a Desk That Lasts
A painted desk is not just functional. It is a statement piece that transforms your workspace while saving money. The most important factors for success are thorough preparation, choosing durable paint, and applying a protective topcoat. Skipping any of these steps leads to peeling, chipping, or worn surfaces within months. Take time to sand properly, use quality materials like Fusion Mineral Paint or Sherwin-Williams Emerald Enamel, and allow full cure time before heavy use. Your desk will withstand daily writing, spills, and years of use while looking professionally done.
Frequently Asked Questions About Painting a Desk
Can I paint a desk without sanding?
You can skip sanding if you use a liquid deglosser on intact finishes and choose paint designed for no-prep application like Fusion Mineral Paint. However, sanding with 220-grit gives the best adhesion and smoothest finish.
What is the best paint for a desk that gets daily use?
Sherwin-Williams Emerald Urethane Enamel and Benjamin Moore Advance are top choices for heavy-use desks. They form a hard, durable surface that resists chips and scratches. Fusion Mineral Paint also performs well with a topcoat.
How long does it take to paint a desk properly?
Plan for 3 to 5 days total. This includes prep, drying time between coats, and cure time. Rushing the cure leads to damage. Water-based paints dry in 4 to 6 hours between coats. Full cure takes 1 to 2 weeks.
Do I need a topcoat on a painted desk?
Yes. A topcoat is essential for desks. It protects against writing pressure, spills, and cleaning. Wax finishes need reapplication every 6 to 12 months. Polyurethane and polycrylic provide longer-lasting protection.
Can I use chalk paint on a desk?
Yes, chalk paint works well but requires a protective topcoat for durability. Fusion Mineral Paint and Annie Sloan Chalk Paint are popular choices. Without a topcoat, chalk paint scratches easily and does not hold up to daily use.
How do I prevent brush marks when painting a desk?
Use a foam roller for flat surfaces and apply thin, even coats. Sand lightly between coats with 220-grit. For the smoothest finish, use a quality enamel like Benjamin Moore Advance that self-levels, or use a sprayer.


