
Is your workspace cluttered with keyboards, mice, and tablets taking up valuable desk surface? A custom keyboard tray for a desk can transform your setup by freeing up space, improving ergonomics, and preserving your furniture’s look. Whether you’re upgrading a vintage desk or optimizing a small home office, building your own tray is a smart, affordable alternative to commercial models that cost $80 to $150. This guide walks you through every step, from measuring your space to installing a smooth-gliding, durable tray that works for typing, music production, or digital art.
No guesswork. No flimsy parts. Just a clean, functional solution built to last.
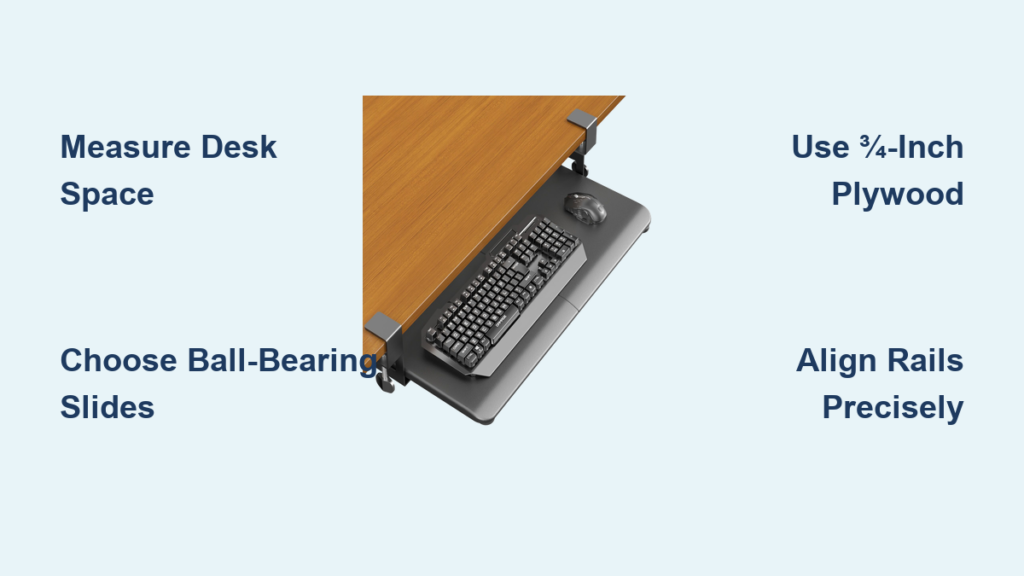
Measure Your Desk Space Before Building
Before cutting wood or buying slides, you need precise measurements to ensure your keyboard tray fits and functions properly. Misjudging space leads to binding rails, limited pull-out, or poor ergonomics.
Check Clearance Under the Desk
Flip your desk upside down or crawl underneath and measure three key dimensions. These measurements determine everything about your build.
Measure the following:
* Width: Available space from left to right under the desktop
* Depth: Front-to-back room for the tray and slides
* Height: Distance between desktop and floor to ensure legroom when typing
If converting a drawer, measure the internal opening, not the drawer front. Account for overlay versus inset styles, as this affects slide placement.
Deduct Rail Space from Width
Slides take up significant space. Side-mount rails require approximately ½ inch per side, while under-mount rails need about ⅜ inch per side. For a 23.5-inch wide opening using side-mount slides, your maximum tray width is 22.5 inches. Always subtract rail width before finalizing your build dimensions.
Determine Slide Length
Choose slide length based on desk depth. Twelve-inch rails provide approximately 10 inches of usable pull-out, while 18-inch rails offer about 16 inches of travel. Even in shallow desks, 18-inch rails can work if mounted slightly forward to maximize travel.
Choose the Right Slides for Smooth Operation
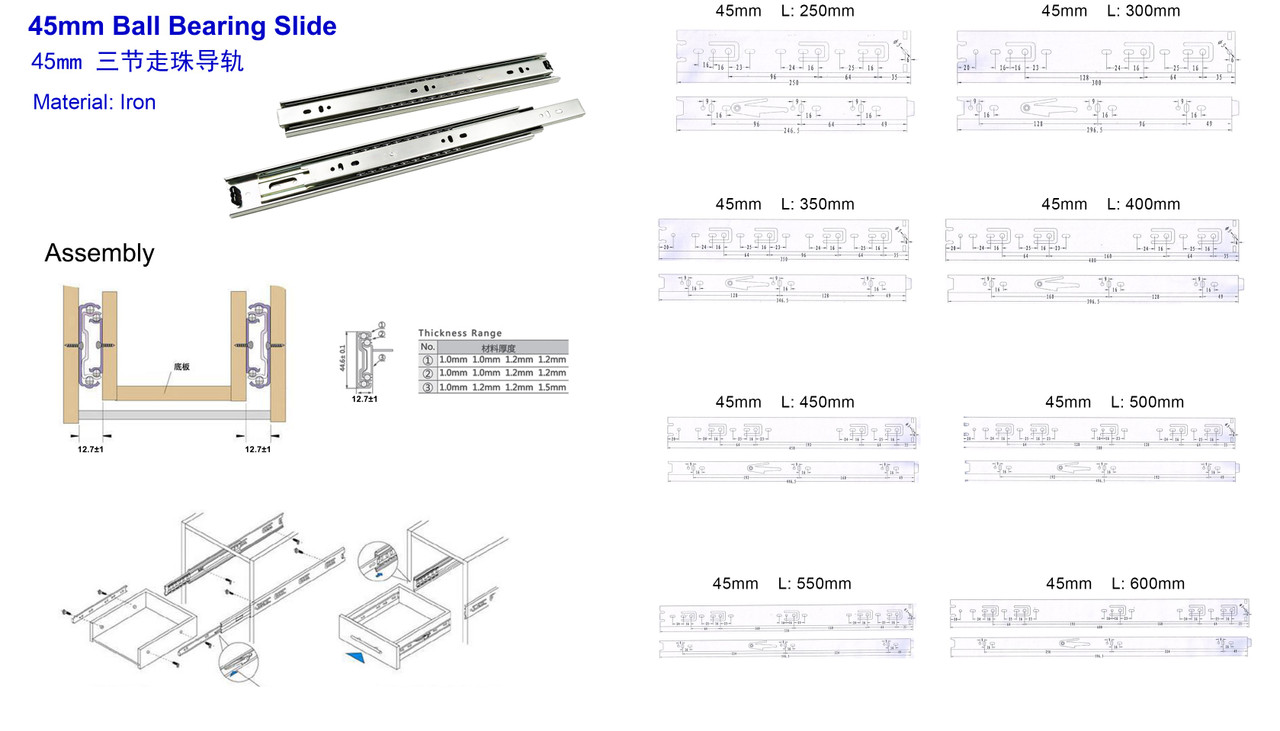
The rail system is the backbone of your keyboard tray. Choose wisely, because cheap slides bind, sag, or fail under daily use.
Use Full-Extension Ball-Bearing Slides
Opt for full-extension, ball-bearing drawer slides. They allow 90 to 100 percent pull-out, giving full access to rear ports on keyboards or MIDI controllers. Avoid basic roller slides, which wear out fast and don’t support heavy loads.
Recommended slide types include:
* Under-mount slides: Hidden beneath the tray, easier to align, cleaner appearance
* Side-mount slides: Visible, budget-friendly, but require precise leveling
* Variable-height platform slides: Allow vertical adjustment after installation, ideal for fine-tuning ergonomics
Match Load Capacity to Your Devices
Ensure slides support at least 15 pounds, which is enough for a mechanical keyboard, mouse, and tablet or MIDI controller. Check specs before buying. Amazon Basics 12-inch full-extension slides cost approximately $20 per pair with 100-pound capacity. Rockler variable-height slides run about $40 per pair and offer adjustability.
Pro Tip: Mount slides upside down so attachment tabs face up, allowing brackets to connect cleanly to the tray.
Build a Sturdy Tray with the Right Materials
A wobbly or thin tray bounces when typing. Build it right the first time with strong, stable materials.
Pick Durable Board Material
Avoid MDF, particle board, or hardboard because they sag under load. Instead, choose from these options.
¾-inch plywood (birch or maple): Strong, stable, resists warping, ideal for heavy use.
Solid wood (oak, pine): Beautiful grain, durable, but heavier and pricier.
½-inch plywood: Acceptable for light-duty use, such as laptop or tablet only.
For MIDI keyboards or daily typing, ¾-inch material is essential.
Size the Tray for Your Devices
Minimum dimensions matter for functionality. Width should equal keyboard width plus 1 inch. Depth should equal device depth plus 1 inch. Clearance height should be at least 3 inches between tray and floor for wrist movement.
Aim for 24 inches or wider if using a mouse beside the keyboard. Narrow trays force awkward hand positions.
User Lesson: One builder reported, “Drawer too narrow—mouse must go behind keyboard.” Design wide enough from the start.
Finish the Board Before Assembly
Sand with 120 to 220 grit paper, then apply stain to match existing furniture, paint for design flair, or polyurethane sealant for durability. Finishing before assembly prevents touch-ups in tight spaces.
Assemble the Tray Using Strong Joinery
How you build the tray affects strength and appearance. Use methods that prevent wobble and hide hardware.
Use Pocket Hole Joinery
A Kreg Jig lets you drill angled pocket holes in the tray bottom, then screw side and back panels into place from below. This method is stronger than edge screws, leaves no visible hardware, and speeds up assembly.
The process involves drilling pocket holes in the underside of the bottom board, applying wood glue to joints, then clamping and screwing side and back panels into place. This takes approximately 1 to 2 hours.
Avoid Edge Screwing When Possible
Screwing through the sides into the bottom leaves exposed heads, which is less attractive and weaker over time. Only use this method if pocket hole tools aren’t available.
Pro Tip: Pre-drill in hardwoods to prevent splitting. Use #8 or #10 wood screws, ¾-inch to 1 inch long.
Attach Brackets to Rails Correctly
Brackets connect the slides to the tray. Install them precisely to avoid misalignment.
Position Brackets on Outside of Rail
With the rail’s tip on the right, place the mounting bracket on the outside of the rail. Holes should face up, with two empty holes remaining at the top. Lower holes snap into rail tabs.
Secure with #8-32, ½-inch machine screws. Repeat for both rails.
Use Nuts for Secure Fastening
Since the tray is thin, use nuts with machine screws to prevent loosening. Drill a 5/32-inch pilot hole first.
Warning: Don’t fully tighten yet. Leave room for final alignment.
Mount the Tray to the Desk Frame

This step determines how smoothly your tray operates. Precision matters.
Flip Desk Upside Down for Easier Access
Many DIYers flip the desk to work from below. It simplifies alignment and makes screwing easier.
Align Rails Flush with Desk Edge
For a clean look, flip the tray assembly upside down. Center the front edge of the tray with the desk opening. Use a speed square to align the rail’s tab flush with the desk front, then mark bracket screw holes on the desk underside.
Slight rear offset increases pull-out, while flush mount looks better.
Secure Brackets with Screws
Drill starter holes, then insert screws by hand to prevent slippage. Use at least one front and one back screw per side. Use longer screws if the desk is particle board, and consider backing plates for extra support in weak materials.
Test and Adjust for Smooth Motion
After initial tightening, pull the tray in and out. If it binds, slightly loosen the screws, reposition, and retighten. Ensure full extension and retraction work smoothly.
Pro Tip: Thicker trays reduce bounce during typing or MIDI use.
Add a Flip-Down Front for Seamless Look
Want your desk to appear untouched when closed? Install a flip-down drawer front.
Use 90-Degree Flip-Down Hinges
These hinges cost approximately $5 per pair, let the front fold down to reveal the tray, and stay out of the wrist way when typing. Avoid piano hinges, which can interfere with hand movement.
Install Hinges for Perfect Coverage
Test hinges on scrap wood first. One side attaches flush to the tray’s front edge. The other side mounts set back on the drawer front so it covers the tray when closed. Use slotted screw holes for fine adjustment, temporarily tighten, test motion, then fully secure.
Warning: Use short screws to avoid piercing the front face.
Optimize for Ergonomics and Stability
A well-built tray should support healthy posture and resist bounce.
Set Tray Height for 90-Degree Elbows
When typing, forearms should be parallel to the floor, elbows bent at 90 degrees, and wrists straight. If the tray is too low, your keyboard dips into your lap. Adjust by raising rail mounting height or using variable-height slides.
Reduce Bounce with Thick Material
Thin trays (¼-inch to ½-inch) vibrate during fast typing or MIDI play. Upgrade to ¾-inch plywood or solid wood to eliminate bounce. Add felt lining or rubber pads under devices to prevent sliding.
Ensure Full Forearm Clearance
When using a laptop on the desk above, make sure there’s room for your elbows and forearms to move freely. Test posture before finalizing.
Adapt for Different Use Cases
Your tray can serve more than just a keyboard.
For Music Production (MIDI Keyboards)
Use 18-inch rails for full access to rear ports. Build the tray at least 11 inches deep for 61- or 88-key controllers. Use ¾-inch material to support heavy instruments. Users report success even in shallow desks.
For Digital Art and Office Work
Store drawing tablets, laptops, or keyboards below. Keep the desk surface clear for packaging, sketching, or writing. Use in dual-tier setups with a laptop on the desk and tablet on the tray.
For IKEA or Particle Board Desks
Reinforce with longer screws and backing plates. Pre-drill to prevent splitting. Consider raising desk height if clearance is tight.
For Antique or Heirloom Desks
Reuse the original drawer front. Install the flip-down mechanism. Use reversible hardware. The goal is that the desk looks unmodified when closed.
Avoid Common Mistakes
Even small errors can ruin function or aesthetics.
Don’t Use Flimsy Materials
Avoid MDF, hardboard, and ¼-inch particle board. Stick to ½-inch or ¾-inch plywood for reliability.
Don’t Skip Pilot Holes
Pre-drill a 5/32-inch hole for #8 machine screws. For wood screws, make a small dent rather than a full hole in softwood, but drill full pilots in hardwoods. This prevents splitting and ensures clean assembly.
Don’t Misalign Rails
Even 1/8-inch off can cause binding. Use clamps to hold parts, a speed square for square alignment, and a tape measure to center the tray.
Maintain and Upgrade Your Tray
A well-made tray lasts years with minimal upkeep.
Check Screws Periodically
Vibration loosens hardware over time. Tighten mounting and bracket screws every few months.
Lubricate Slides if Needed
If rails stiffen, apply silicone spray. Never use oil, which attracts dust.
Add Future Upgrades
Enhance functionality with under-tray cable clips for tidy wires, LED strip lighting for visibility, a locking mechanism to secure devices, or motorized actuators for automatic slide-out.
Final Cost and Time Summary
Building your own keyboard tray for a desk is fast, affordable, and highly effective.
Materials Cost:
* Slides (pair): $15 to $25
* Wood board: $10 to $15
* Fasteners and hinges: $5 to $10
* Total: $20 to $50
Commercial trays cost $80 to $150.
Time required: 2 to 6 hours
Skill level: Beginner to intermediate
Reversibility: High, you can restore the original desk
User Quote: “We paid less than $40, it was completely custom to our needs, and it was Juicy Passionfruit!”
Frequently Asked Questions About Building a Keyboard Tray
What is the best material for a keyboard tray?
The best material is ¾-inch plywood (birch or maple) or solid wood (oak, pine). These materials resist warping and sagging under heavy loads like mechanical keyboards or MIDI controllers. Avoid MDF, particle board, or hardboard, which lack structural integrity.
How much clearance do I need under my desk?
You need at least 3 inches between the tray and floor for wrist movement and legroom. Measure the height from your desktop to the floor, then subtract the tray thickness and slide height to ensure adequate clearance for comfortable typing.
What size slides do I need for a keyboard tray?
Choose slide length based on your desk depth. Twelve-inch rails provide about 10 inches of usable pull-out, while 18-inch rails offer approximately 16 inches. For MIDI keyboards or full access to rear ports, 18-inch slides work even in shallow desks when mounted slightly forward.
Can I install a keyboard tray on an IKEA desk?
Yes, you can install a keyboard tray on IKEA desks. Use longer screws and backing plates for reinforcement since particle board is weaker than solid wood. Pre-drill to prevent splitting, and consider raising the desk height if clearance is tight.
How do I make my keyboard tray ergonomic?
Set tray height so elbows rest at 90 degrees when typing, with forearms parallel to the floor. Use variable-height slides to fine-tune positioning. Choose a tray at least 24 inches wide if using a mouse beside the keyboard to avoid awkward hand positions.
Key Takeaways for Building Your Own Keyboard Tray
A DIY keyboard tray saves $50 to $100 compared to commercial models while providing a custom fit that matches your desk perfectly. The project takes 2 to 6 hours with beginner to intermediate skills, using materials costing $20 to $50 total.
The most critical factors for success are accurate measurements, choosing full-extension ball-bearing slides, and using ¾-inch plywood or solid wood to eliminate bounce during typing. Pay attention to rail alignment during installation, and test motion before fully tightening screws.
Whether you need a tray for a mechanical keyboard, MIDI controller, drawing tablet, or laptop, this build adapts to any use case. The project is reversible, so you can restore your original desk if needed. Start by measuring your desk space, then gather materials and follow the step-by-step process for a smooth-operating, durable solution that transforms your workspace.


