
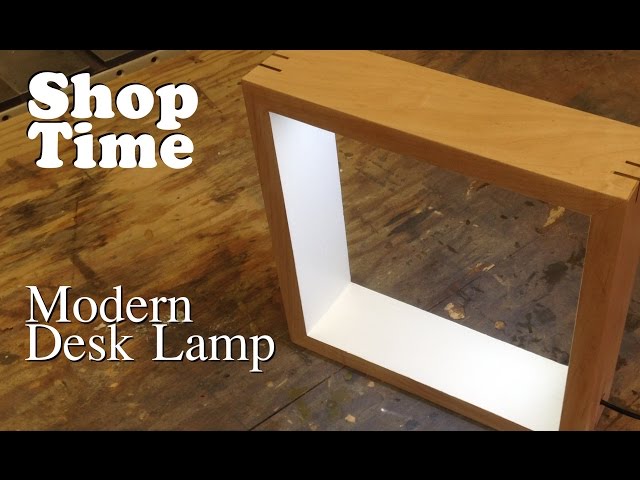
Nothing beats the satisfaction of turning raw materials into a functional, beautiful desk lamp. Whether you’re a woodworker, a tinkerer, or a beginner looking for a rewarding DIY project, learning how to build a desk lamp combines craftsmanship with practicality. From sleek modern designs to smart, color-changing LEDs, a custom lamp gives you control over style, brightness, and even mood lighting all at a fraction of retail cost.
This guide walks you through every step. You will choose materials, wire safely, shape wood, and add smart features. You will also learn how to avoid common mistakes, integrate USB power or dimmers, and finish with professional results.
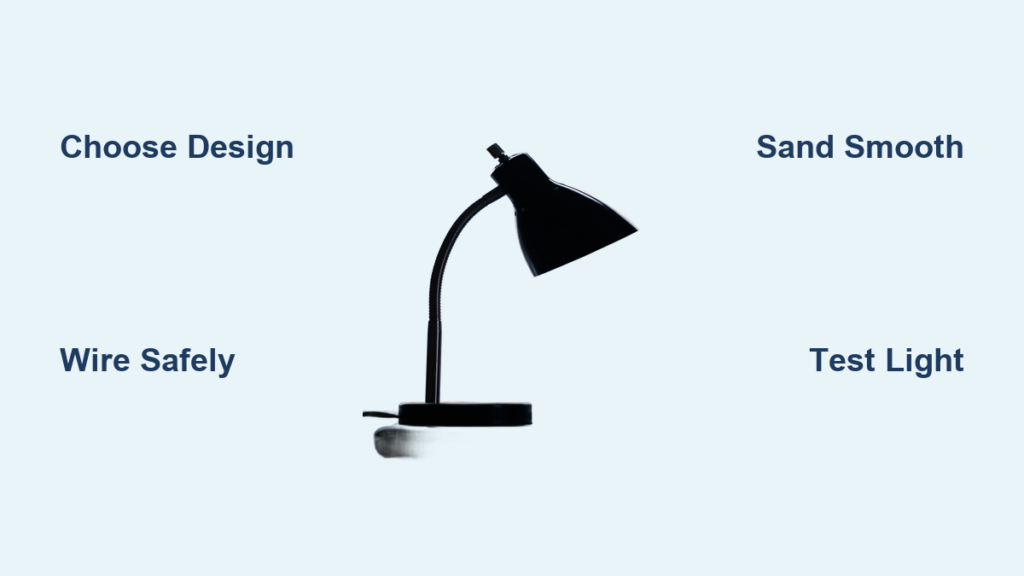
Choose Your Lamp Design
Pick a Style That Fits Your Space
Before cutting wood or wiring a circuit, decide on your lamp is purpose. Is it for task lighting on a desk, ambient glow in a reading nook, or decorative flair on a nightstand? Your answer shapes the design. Popular styles include minimalist wooden arc lamps with clean lines, articulated arms for adjustable direction, mitered frame lamps with geometric elegance, smart color-changing lamps controlled via app, and upcycled builds using tin cans, concrete, or cardboard.
Use sketches or free SketchUp files to visualize dimensions. A typical desk lamp stands 16 to 24 inches tall with a 5 to 7 inch base for stability.
Match Design to Skill Level
Beginners should start with pre-cut lumber and lamp kits that include socket, cord, and harp. Intermediate builders can tackle mitered joints and LED panels. Advanced makers might explore adjustable friction joints, dual-color temperature control, or 3D-printed parts. Most builds take 2 to 3 hours. Complex versions may span weeks.
Plan for Adjustability and Function
Think beyond fixed lighting. Can the head tilt? Does the arm extend? Consider vertical adjustment via locking knob, 360 degree rotation on a central post, magnetic diffuser for easy cleaning, and USB-C power input for laptop or power bank use.
If you read or draw, prioritize bright, flicker-free LEDs and warm-to-cool white tuning from 2200K to 6500K.
Select Materials and Components
Choose the Right Wood Type
Hardwoods offer durability and rich grain. Pick based on look and workability. Walnut provides a premium look and sands smoothly, ideal for mitered frames. Oak is dense and affordable, great for routed channels. Maple offers light contrast for inlays or accents. Ipe is extremely tough but needs pre-drilling. Purple Heart delivers vibrant purple for decorative touches.
Use over 1 inch thick stock for bases and uprights. For templates, foam board combined with 10 mm board creates safe router guides.
Source Key Electrical Parts
Your lamp needs safe, reliable power delivery. Gather LED panel or smart bulb such as Wiz 60W color-changing, 5V USB Type-C or AC plug-in cord, toggle switch on positive wire, dimmer knob with 2-in 2-out for full control, porcelain socket with threaded nipple, and UL-listed lamp cord where ribbed equals neutral and smooth equals hot.
For custom LEDs, wire 6 in parallel for balanced brightness. Use screw terminals with C loops formed by needle-nose pliers.
Add Aesthetic and Functional Upgrades
Elevate your build with brass sleeves between mitered joints, gold pigment epoxy to fill knots which creates a glowing effect, frosted acrylic diffuser with magnetic attachment, rubber feet to protect surfaces, and hidden USB port in base for device charging.
Avoid glue on all parts. Use dowels and mechanical fasteners for future repairs.
Gather Essential Tools
Core Tools for Wood and Wiring
You will need table saw or miter saw for precise cuts, drill press for accurate dowel holes, router to mill LED cavities and wire channels, belt sander and random orbit sander ranging from 80 to 400 grit, Forstner bit sized 1 and one half inches for socket recess, 3/8 inch drill bit for wire passage, and clamps and stop blocks for consistent alignment.
A center finder helps locate base center. Blue tape on bits marks depth.
Specialized Accessories
Faceplate and lathe shape round bases. Soldering iron connects non-pre-wired LEDs. Hot glue gun attaches fabric shades. Magnets secure removable parts. Cotton buds apply oil in tight spots.
Use push sticks and eye protection when operating saws.
Build the Lamp Base and Frame
Cut and Shape the Base
Start with a solid base for stability. For a 5 inch by 5 inch walnut base, glue two boards together. Use a crosscut sled for square, repeatable cuts. Mark center with a center finder. Mount on faceplate if using lathe setup. True surface and shape center with a carbide square tool.
For flat bases, drill a 1 and one half inch hole three quarters inch deep for the socket and a 3/8 inch through-hole for wiring.
Assemble Mitered Frames
For a geometric mitered lamp, rip one half inch strips from over 1 inch walnut. Cut ten 5 inch by 5 inch open mitered frames at 45 degrees using a miter saw with stop block. Re-cut any misaligned ends. Lay painter is tape on table and align corners. Glue with clear-drying thick glue such as Titebond. Let dry fully before handling.
Test-fit before gluing. Misaligned frames ruin symmetry.
Prepare the Upright or Arm
For a solid wood upright, bandsaw just outside traced lines. Belt sand to final shape. Round corners and angle top for head fit.
For an articulated arm, mill joints to allow smooth movement. Use locking knobs for position control.
Wire the Lamp Safely
Install the Socket and Cord
Feed the cord through the 3/8 inch hole in the base. Drill 1 and one half inch recess in center for porcelain socket. Insert socket with threaded nipple, secure with lock washer and nut. Strip wire ends about one half inch. Tie an underwriter is knot inside the base to prevent pull-out. Connect ribbed neutral wire to brass screw and smooth hot wire to nickel screw. Reassemble socket shell.
Always disconnect power during wiring.
Add Switch and Dimmer
Install toggle switch on the positive smooth wire. Use needle-nose pliers to form tight C loops around screw terminals. For brightness control, add a dimmer knob between power source and LEDs. Consider a multi-position switch for OFF, COOL, WARM, and BOTH settings for dual-LED setups.
Test all connections before final assembly.
Power Smart Bulbs and USB LEDs
For Wiz or Hue smart bulbs, no soldering is needed. Plug into standard socket and control color and temperature via smartphone app.
For USB-powered LED panels, use 5V input. Wire in-line switch on positive line. Connect dimmer for manual control. Route cable through upright with router-milled channel.
USB power allows use with power banks, great for portable lighting.
Shape and Finish the Wood
Sand Through Progressive Grits
Smooth finishes start with sanding. Use 80 grit to remove tool marks. Progress through 120 to 180 grit for smooth surface. Finish with 220 to 320 to 400 grit for polished, glass-like feel.
Use random orbit sander for even results. Sand with the grain to avoid scratches.
Fill and Enhance Visual Features
Fill knot holes with gold pigment epoxy resin. Stir well before and after mixing. Tape backside to prevent leaks. Cure for 24 hours. Sand flush with 80 to 400 grit.
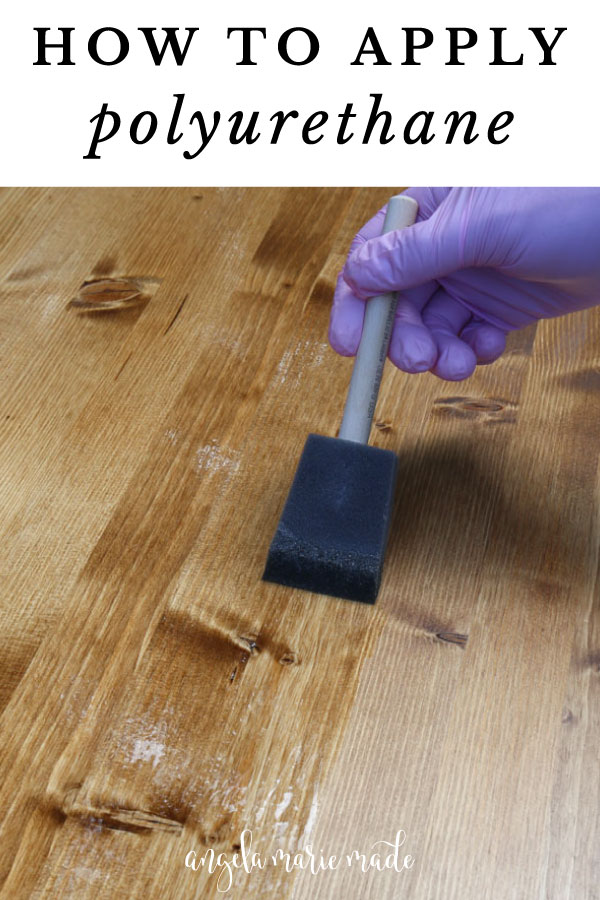
For a modern look, use dark walnut stain. For natural beauty, apply wipe-on oil-based polyurethane.
Apply Final Finish
Use mineral oil for food-safe, warm glow. Wipe on with rags and cotton buds. Let soak 15 minutes, wipe excess. Repeat 2 to 3 times. For durability, use oil-based polyurethane with 3 thin coats.
Avoid thick coats. They trap dust and create drips.
Assemble and Test the Lamp
Join Components with Dowels
For modular, repairable design, build a drill jig with stop blocks. Drill 5/16 inch holes in base, frames, and top. Use blue tape on bit to control depth. Cut 5/16 inch dowels slightly long. Insert into base. Stack frames with brass sleeves between. Add top. Mark protruding dowels, cut flush, round over edges.
This method allows disassembly for transport or repair.
Install Light Source and Diffuser
Screw in smart bulb or attach LED panel. Test power. Light should turn on with switch. Attach custom milled diffuser using magnets. Ensure even light spread with no hot spots.
For fabric shades, measure frame. Cut and sew box-pleated silk with sewing machine. Glue to wire frame with hot glue. Press pleats with iron for crisp look.
Final Quality Check
Ensure base sits flat. Use furniture glides if needed. Verify switch and dimmer work smoothly. Confirm no exposed wires. Check for smooth joint movement if articulated. Clean wood with dry cloth.
Your lamp should feel solid, look professional, and function flawlessly.
Customize for Function and Style
Add Smart Lighting Features
Upgrade with app-controlled color for mood lighting, tunable white spectrum for reading or relaxing, voice control via Alexa or Google Assistant, and scheduling to turn on at dusk.
Smart bulbs plug directly into standard sockets. No rewiring required.
Integrate Task-Oriented Add-Ons
For artists or readers, add magnifying lens arm on secondary joint. Include secondary USB outlet in base. Use high-CRI LEDs for true color rendering. Position head for shadow-free illumination.
Try Alternative Materials
Experiment with tin cans as shades by drilling patterns for light effects, concrete bases for industrial look, cardboard or paper for kid-safe non-electric versions, and 3D-printed joints for complex movements.
Use battery-powered LED strips for non-wood builds.
Maintain and Improve Your Lamp
Clean and Protect Regularly
Wipe wood with dry or slightly damp cloth. Reapply mineral oil every 3 to 6 months. Remove diffuser and clean with lens-safe wipe. Check wiring annually for fraying.
Avoid harsh chemicals. They damage finishes.
Troubleshoot Common Issues
No light? Check plug and outlet. Test bulb. Inspect switch and wire connections.
Flickering? Tighten all terminal screws. Ensure no loose strands in connections.
Wobbly base? Tighten locking knobs. Attach rubber feet. Add weight such as metal washer inside base.
Dim light? Clean diffuser. Upgrade to higher-lumen LED. Check voltage. Should be 5V for USB.
Upgrade Over Time
Swap diffuser for new color or texture. Replace bulb with higher CRI or lumen output. Add touch sensor switch or motion activation. Refinish wood for renewed luster.
Because your lamp uses mechanical fasteners, upgrades are easy.
Frequently Asked Questions About Building a Desk Lamp
What materials do I need to build a desk lamp?
You will need hardwood such as walnut, oak, or maple for the body. Electrical components include LED panel or smart bulb, lamp cord, porcelain socket, toggle switch, and dimmer if desired. For construction, gather dowels, brass sleeves, and your preferred finish such as mineral oil or polyurethane.
How long does it take to build a desk lamp?
Simple builds using pre-cut lumber and lamp kits take 2 to 3 hours. Intermediate builds with mitered frames and custom wiring take 4 to 6 hours. Complex designs with articulated arms, smart lighting, and intricate joinery may take several weekends.
Do I need electrical experience to build a desk lamp?
Basic electrical knowledge is sufficient for most builds. You need to understand wire connections, polarity, and proper grounding. Always disconnect power during wiring. Use UL-listed components and tie underwriter is knots to prevent wire pull-out.
Can I add smart lighting to my DIY desk lamp?
Yes. Smart bulbs like Wiz or Hue plug into standard sockets and connect via Wi-Fi. They offer app-controlled color, tunable white temperature from 2200K to 6500K, and voice control. No additional wiring is required.
How do I make my desk lamp adjustable?
Incorporate locking knobs for vertical adjustment. Use friction joints for articulated arms that tilt and rotate. Add a cylindrical post for 360 degree rotation. Design the head with a tilt mechanism for directional control.
Key Takeaways for Building Your Own Desk Lamp
Building a desk lamp blends art and engineering. With the right tools, materials, and attention to safety, you can create a custom light that is functional, durable, and uniquely yours.
Start with a clear design that matches your skill level. Use templates and jigs to improve accuracy in cutting and drilling. Prioritize safety by disconnecting power during wiring and using UL-listed components.
Invest in finishing. Progressive sanding and quality oil or polyurethane make a dramatic difference. Embrace smart features like color-changing bulbs or dimmers for added functionality.
Because your lamp uses mechanical fasteners rather than permanent glue, repairs and upgrades are easy. Whether you choose walnut and brass elegance or a smart app-controlled design, the process teaches valuable skills in woodworking, wiring, and design thinking.
Now that you know how to build a desk lamp, your workspace and your creativity will never be in the dark again. Start simple, document your build, and let each lamp inspire the next.


