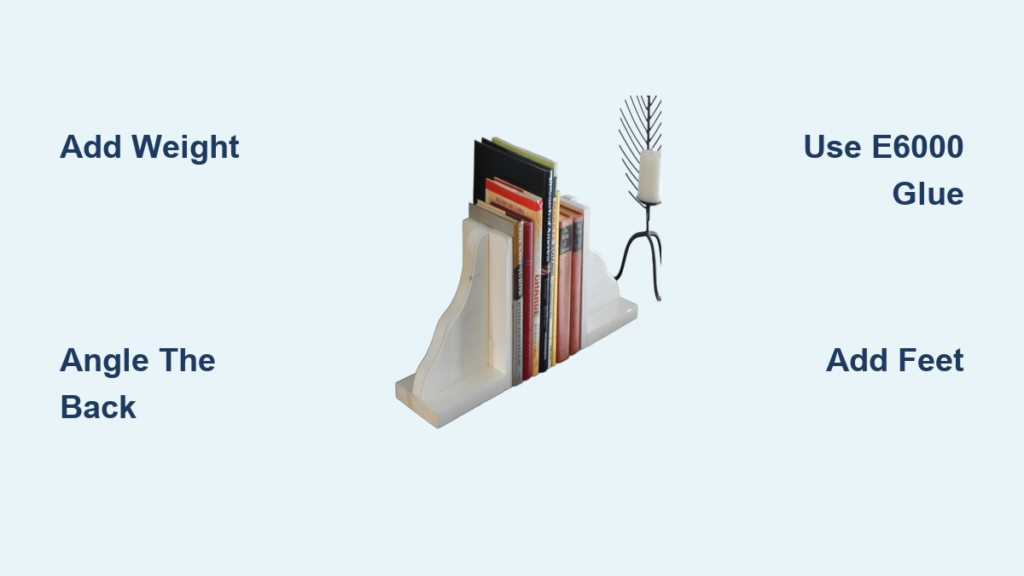
You don’t need to spend $30 on a pair of bookends when you can build your own for under $5, often for free. Whether you’re organizing a home library, sprucing up a shelf, or crafting a personalized gift, learning how to make bookends is a simple, rewarding project that blends function with creativity. From sleek hardwood angles to whimsical upcycled toys, the key to success lies in weight, stability, and smart adhesion. This guide walks you through proven techniques, material choices, and pro tips so you can build bookends that actually hold books without sliding or tipping.
No more generic “getting started” fluff. Just actionable steps, tested methods, and the exact tools and tricks used by makers to create professional-looking results on a budget.
Choose Your Bookend Base Material
Pick a Heavy or Weightable Core
The foundation of any functional bookend is mass. Without sufficient weight, even the most beautiful design will fail when books press against it. Select materials that are naturally dense or can be weighted:
- Wood: Hardwood blanks (oak, walnut), bamboo boards, or repurposed wood blocks.
- Concrete: Cast half-spheres or cubes for industrial-strength support.
- Metal: Scrap steel, washers, or vintage items like telephones with internal metal.
- Books: Old or damaged books, painted and glued into a solid stack.
- Lightweight? Add weight: Fill plastic containers with rice, glue down metal washers, or mount to a wood or metal base.
Pro Tip: A 4″ x 6″ wooden block weighing 1 to 1.5 lbs is ideal for most bookshelves. Lighter objects must be anchored.
Match Material to Your Skill Level
| Material | Best For | Tools Needed |
|---|---|---|
| Bamboo board | Beginners | Scissors, glue, paintbrush |
| Wooden block | All levels | Sandpaper, E6000 glue |
| Concrete | Advanced | Mold, mixing tools, safety gear |
| Cardboard | Budget crafters | Scissors, spray paint |
| Vintage book | Upcyclers | Hot glue, paint |
Avoid flimsy plastics or hollow decor unless you plan to fill or mount them.
Build a Stable Bookend Base
Create Friction with a Footed Design
Even heavy bookends can slide. Prevent this by increasing surface grip.
Add Craft Stick Feet
- Cut five jumbo craft sticks in half.
- Glue them side-by-side across the bottom edge using E6000 (for permanence) and hot glue (for instant hold).
- Paint to match the bookend.
Why it works: The extended base lowers the center of gravity and increases friction.
Use Felt Pads (Optional)
- Stick self-adhesive felt pads on the bottom to protect shelves and reduce slippage.
Angle the Back for Better Support
Books push forward. A sloped back counters that force.
Cut a 15–20 Degree Angle
- Use a miter saw or hand saw to cut hardwood blanks at a slight backward tilt.
- Sand edges smooth with 120-grit, then 220-grit paper.
- Finish with oil, wax, or polyurethane.
Expert Note: A 15° angle is optimal, steep enough to resist tipping and low enough to fit on most shelves.
Assemble with the Right Adhesives

Use E6000 for Heavy or Mixed Materials
When bonding wood to metal, plastic to wood, or figurines to bases, E6000 glue is the gold standard.
Steps:
- Apply a pea-sized dab to both surfaces.
- Press together firmly.
- Wait 24 hours for full cure. Don’t rush it.
Warning: Sanding or stress-testing before 24 hours can break the bond.
Combine Hot Glue + E6000 for Instant Hold
Hot glue sets fast but isn’t always strong long-term.
Dual-Glue Method:
- Apply hot glue to position the piece.
- Add E6000 underneath or along the seam.
- Hold until hot glue sets (30 seconds).
- Let E6000 cure overnight.
Perfect for: Attaching pumpkins, toys, or hardware to wood blocks.
Seal Paper with Mod Podge
For decoupage using napkins, quotes, or fabric, Mod Podge is essential.
How to Apply:
- Paint base color (e.g., white chalk paint).
- Apply thick layer of Mod Podge.
- Lay separated napkin top layer on wet glue.
- Cover with parchment paper and heat seal with a low-iron.
- Sand edges smooth after drying.
Pro Move: Sanding excess napkin after gluing prevents ragged cuts.
Decorate with Style and Cohesion
Paint for a Unified, High-End Look
Mismatched items like toys or gourds can look designer with one trick: monochromatic paint.
Faux Ceramic Finish:
- Spray or brush white chalk paint (e.g., Rustoleum “Plaster”) over plastic animals, telephones, or pumpkins.
- Let dry, then lightly distress edges with sandpaper.
- Result: Looks like expensive ceramic.
Metallic Accents:
- Use rose gold, copper, or silver paint on book spines, hardware, or pumpkin stems.
- Vary tones slightly for depth.
Try Themed Designs
Match your bookends to a room’s vibe:
| Theme | Materials | Design Ideas |
|---|---|---|
| Rustic Farmhouse | Wood blocks, pumpkins | Chalk-painted, distressed edges |
| Modern Minimalist | Hardwood, concrete | Clean lines, oil finish |
| Literary | Old books | Paint spines metallic, stack three high |
| Kids’ Room | Dinosaur toys | Paint white, glue to wood base |
| Kitchen | Rolling pin, honey bear | Spray paint gold, add rice weight |
Try 5 Proven DIY Bookend Projects
Bamboo Decoupage Bookends
What You Need:
- 2 bamboo cutting boards ($1 each)
- White chalk paint
- Decorative napkin
- Mod Podge
- Craft sticks
- E6000 + hot glue
Steps:
- Paint boards white; let dry.
- Separate napkin layer with tape.
- Apply Mod Podge, lay napkin, heat seal.
- Sand edges smooth.
- Glue craft sticks to bottom.
- Paint back French blue.
Time: 1 hour active, 24 hours drying
Difficulty: Intermediate
Wooden Block + Pumpkin Bookends
What You Need:
- 2 wood blocks (Dollar Tree)
- Metallic pumpkin decor
- Chalk paint (“Plaster”)
- E6000 glue
Steps:
- Glue two blocks together at right angle.
- Let dry overnight.
- Paint all sides white.
- Lightly sand edges for distressing.
- Glue pumpkin to center.
- Cure 24 hours.
Time: 30 minutes active
Difficulty: Beginner
Angled Hardwood Bookends
What You Need:
- Oak or walnut blank (6″x4″)
- Miter saw
- Sandpaper (120, 220 grit)
- Tung oil or poly
Steps:
- Cut two pieces at 15–20° angle.
- Sand smooth.
- Apply finish.
- Optional: Add inlay or carving.
Time: 1 hour
Difficulty: Intermediate
Pro Tip: Wipe wood with mineral spirits first to check grain.
Vintage Book Stack Bookends
What You Need:
- 3 old books
- Hot glue gun
- Metallic paint
- Metal bookend (from dollar store)
Steps:
- Paint spines and page edges grey or white.
- Accent spines with rose gold paint.
- Glue two books back-to-back.
- Open top book, insert metal bookend, glue in place.
- Glue third book behind to hide hardware.
Why it works: The internal metal spine does the heavy lifting.
Faux Ceramic Animal Bookends
What You Need:
- Plastic animal figurines (dinosaurs, bears)
- White spray paint
- Wood block or scrap metal base
- E6000 glue
Steps:
- Spray paint animals white.
- Let dry completely.
- Glue to wood base.
- Cure 24 hours.
Bonus: Fill hollow animals with rice before sealing for extra weight.
Troubleshoot Common Problems
Why Is My Bookend Sliding?
- Cause: Low friction or insufficient weight.
- Fix: Add craft stick feet, felt pads, or increase mass with rice or metal.
Why Did the Glue Fail?
- Cause: E6000 not fully cured or too little glue.
- Fix: Wait 24 hours before handling. Use pea-sized dabs on both surfaces.
Why Is the Napkin Bubbling?
- Cause: Glue not sealed properly.
- Fix: Use heat press or iron over parchment paper. Don’t skip this step.
Why Did the Bamboo Split?
- Cause: Drilling too fast or without pilot hole.
- Fix: Start with pin-sized bit, drill slowly, increase size gradually.
Customize for Gifting and Style
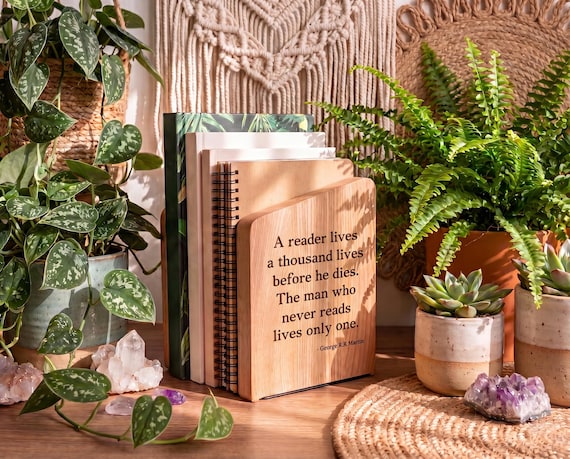
Personalize with Details
- Add initials with stencils or vinyl stickers.
- Paint quotes like “Read More” or “Stay Curious.”
- Use themed napkins: Books, stars, florals.
Make a Matching Set
Even mismatched items look intentional when:
- Painted the same color.
- Given the same finish (e.g., all distressed).
- Paired with matching bases (same wood, same feet).
Great for Gifts
- Budget: Most projects under $10.
- Personal: Tailor to recipient’s taste (book lover, chef, kid).
- Packaging: Wrap in tissue, tie with twine.
Frequently Asked Questions About Making Bookends
What Is the Best Material for DIY Bookends?
Hardwood, concrete, and dense wood blocks provide the most natural weight and stability. For budget projects, bamboo cutting boards and Dollar Tree wood blocks work beautifully when paired with craft stick feet or weighted bases.
How Heavy Should Homemade Bookends Be?
A 4″ x 6″ wooden block weighing 1 to 1.5 lbs handles most bookshelves. Lighter materials like plastic figurines or cardboard must be filled with rice, glued to metal bases, or weighted with washers to function properly.
Can I Make Bookends Without Power Tools?
Yes. Beginners can use bamboo cutting boards, wooden blocks, cardboard pyramids, or vintage books. Hand saws work for simple angled cuts, though miter saws offer more precision for hardwood projects.
How Long Does E6000 Glue Take to Dry?
E6000 requires a full 24 hours to cure completely. Handling or sanding before this period can weaken the bond. For instant hold during assembly, combine E6000 with hot glue.
Are DIY Bookends Strong Enough for Heavy Books?
Absolutely, when built correctly. The key is weight distribution and proper adhesion. Angled hardwood designs, concrete casts, and weighted faux ceramic animals all support large book collections reliably.
How Do I Prevent My Bookend From Scratching Shelves?
Add self-adhesive felt pads to the bottom or attach craft stick feet. Both options increase friction while protecting wood and glass shelving surfaces from damage.
Final Takeaways for Making Your Own Bookends
Now you know how to make bookends that are functional, stylish, and totally unique. The three most important principles to remember: weight is king (add rice, sand, or metal when needed), angle matters (15–20° tilt prevents tipping), and glue patience pays off (E6000 needs 24 hours to cure fully).
Start with a simple wooden block or bamboo board, follow the steps outlined above, and in under an hour you’ll have bookends that look like they came from a boutique, without the price tag. Pick your favorite project, gather your materials, and build a set today.