
Building a wooden desk yourself costs far less than buying one retail, and the finished product fits your exact space and style needs. Whether you need a simple home office workstation or a custom craft table, learning how to build a desk with wood gives you a durable piece that mass-produced furniture simply cannot match. This guide covers everything from selecting materials and cutting precision to assembling, finishing, and customizing your build.
By the end of this article, you will know exactly which wood to choose for your budget, which tools are essential versus optional, and how to avoid the most common mistakes that cause wobbly or warped desks. Every step includes specific dimensions, time estimates, and pro tips collected from real builders.
Design Your Ideal Desk
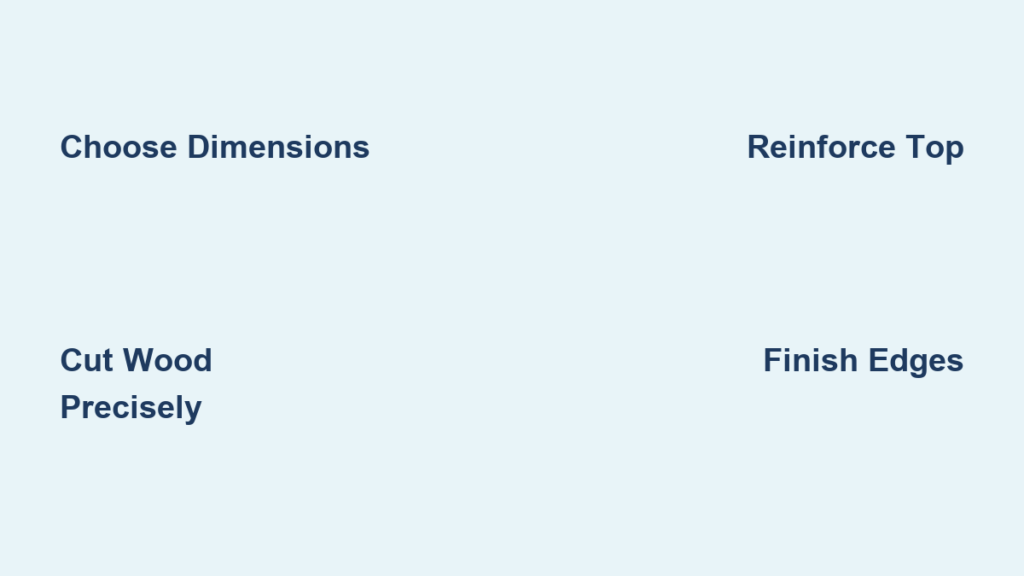
Choose the Right Dimensions
Before buying lumber, measure your space and decide on the desk purpose. Standard desk height runs 29 to 30 inches, which works well for most seated users. Taller individuals may prefer 31 inches, while shorter users can drop to 28 inches.
Most desks need 24 to 30 inches of depth to allow comfortable arm clearance. Width typically ranges from 48 to 72 inches depending on how many monitors or equipment you plan to use. Leave at least 24 inches of legroom beneath the desktop and plan for 1.5 inches of overhang on the front edge to support your forearms while typing.
| Use Case | Recommended Dimensions |
|---|---|
| Home Office | 60″ × 24″ × 30″ |
| Dorm Room | 48″ × 24″ × 30″ |
| Craft Station | 72″ × 30″ × 28″ |
| L-Shaped Desk | Two 48″ sections joined |
Pick a Style That Matches Your Space
Modern desks do not have to look like workbenches. Clean lines, hidden supports, and stylish legs help your desk blend into living spaces rather than dominating them.
Popular leg styles include:
• Floating desks mounted to wall brackets for a sleek, space-saving look
• Industrial pipe legs using black iron fittings for urban flair
• Hairpin or bolt-on legs that require no frame assembly
• Solid wood legs built from 2x4s or 2x3s for a custom, sturdy base
Free plans with cut lists and assembly diagrams are available from HouseOnLongwoodLane.com and CraftyAmigo.com to simplify your project.
Choose the Right Wood for Your Budget
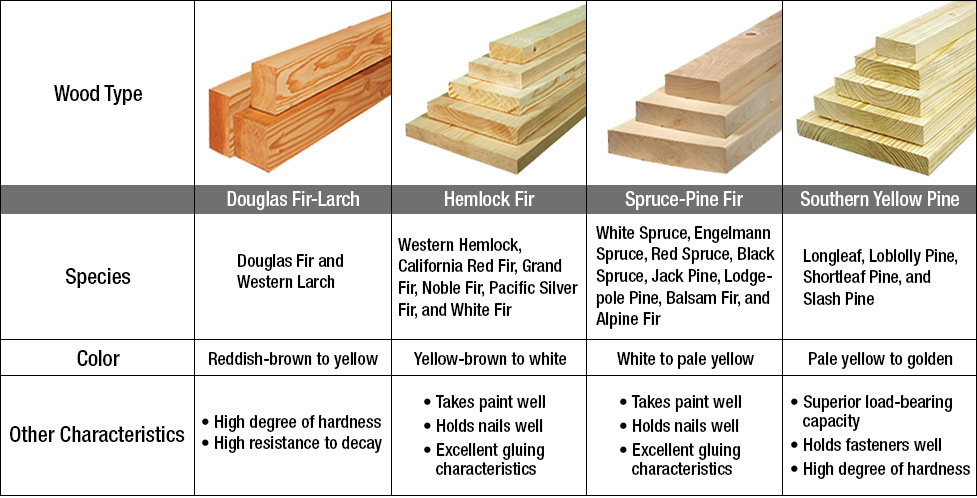
Budget-Friendly Options
For builds under $100, combine SPF (spruce-pine-fir) 2x4s with 3/4-inch birch plywood. This pairing is widely available, easy to cut, and accepts both paint and stain beautifully. Cut a 4-foot by 8-foot plywood sheet to 24 by 60 inches or 24 by 72 inches for the desktop. Use 2x4s or 2x3s for legs and frame supports.
Hardware stores like Home Depot offer up to five free cuts. Take advantage of this service to size your plywood before leaving the store, which saves significant cutting time at home.
Premium Hardwood Options
For heirloom-quality desks, use white oak, walnut, or maple. Reclaimed slabs from sawmills or tree services can be surprisingly affordable. Plane and joint rough boards to 3/4-inch thickness, then glue them edge-to-edge for a wide, continuous top.
Pre-made butcher block countertops from home improvement stores measure 2 feet by 6 feet or 2 feet by 8 feet at 1.5 inches thick. These run $150 to $250 and require minimal finishing. Live edge slabs create one-of-a-kind statement pieces for more adventurous builders.
One Reddit user noted that a raw wood top sanded and oiled costs three to four times less than a premade desk top while looking significantly better.
Gather Essential Tools

Must-Have Tools for Beginners
You do not need a full workshop to build a quality desk. These tools handle the essential work:
• Circular saw with straight edge guide for precise plywood cuts
• Power drill or impact driver for driving screws quickly
• Orbital sander for smoothing surfaces through 80 to 220 grit
• Tape measure, pencil, and square for accurate layout
• Clamps (4 to 6 bar or pipe clamps) for glue-ups
• Safety gear including glasses, mask, and ear protection
Tools That Upgrade Your Build
A Kreg pocket-hole jig ($30) creates strong, hidden joints perfect for frames and shelves. This single tool represents one of the best investments for beginner woodworkers according to experienced builders. A brad nailer (18-gauge) secures trim without visible screws, and a router with a 1/4-inch roundover bit softens sharp edges for comfort and style.
For hardwood projects, a jointer and planer become essential for flattening rough-sawn lumber.
Build the Frame and Legs
Cut and Assemble Wood Legs
Cut four legs to 30.25 inches from 2x3s or 2x4s. Combined with a 3/4-inch desktop, this produces a total height of 31 inches. Adjust down to 29.25 inches if you prefer a 30-inch desk.
Lay legs flat and mark support positions at 3 inches and 15 inches from the bottom. Cut aprons to length: front and back pieces at 50.75 inches for a 60-inch desk, side pieces at 12.75 inches to account for the 2×4 width. Attach aprons using pocket screws and wood glue, then reinforce corners with Simpson GA2 angle brackets.
Always pre-drill when fastening into softwood. Never toenail 2x2s without pre-drilling because the wood splits easily.
Alternative: Pipe or Hairpin Legs
Skip the frame entirely by using metal legs. Black iron pipe legs cost $40 to $60 and require screwing flanges into the underside. Hairpin legs bolt on with included hardware and take minutes to install. IKEA-compatible legs work with standard desktops for a modern, affordable solution.
One builder spent $40 on pipe fittings and constructed a sleek industrial desk in a single day.
Construct the Tabletop
Use Plywood for a Flat, Stable Surface
A 3/4-inch birch or oak plywood sheet resists warping and finishes easily. Cut to your desired size using a circular saw and straight edge. Sand all surfaces starting with 80-grit paper and finishing with 220-grit. Round the front edge slightly with a sander or router for a finished look.
Create a Solid Wood Top
Glue multiple boards edge-to-edge for a custom appearance. Joint edges flat using a hand plane or jointer, apply wood glue generously, and clamp tightly. Allow 24 hours to cure before flattening and sanding.
Glue the top upside down so clamps press the joint tighter for a stronger bond.
Reinforce Against Sagging
Even strong wood bows over time without support. Install 2×2 stabilizers underneath running front to back. Add cross braces in the center for added rigidity. Glue and screw a 1/4-inch plywood backer beneath the top for maximum stiffness.
One first-time builder experienced wobble until adding cross supports, after which the desk became rock solid.
Finish the Edges Like a Pro

Option 1: Iron-On Edge Banding
This quick method hides plywood edges economically. Cut veneer tape to length, iron it on with a household iron set to medium heat, trim excess with a sharp utility knife, and sand smooth with 120-grit paper. Banding comes in oak, birch, and walnut to match various tops.
Option 2: Solid Wood Edge Strips
More durable and professional-looking, solid wood strips require cutting 1x2s to fit the perimeter, mitering corners for clean joints, attaching with brad nails and wood glue, then sanding and staining to match the top.
For a modern accent, use contrasting wood such as walnut strips on a birch top.
Attach the Top Securely
Allow for Wood Movement
Never screw directly through the top because wood expands and contracts with humidity changes. Place the desktop face-down on a flat surface, position the frame or legs underneath, and use figure-8 fasteners or L-brackets to allow movement while securing the connection. Alternatively, screw up through the frame into the top with 1 1/4-inch screws while leaving space for expansion.
Always assemble on a flat floor because uneven surfaces cause wobble that becomes permanent once the desk is complete.
Sand and Finish for Long Life
Step-by-Step Sanding
Fill screw holes and gaps with wood filler before sanding. Progress through grits systematically: 80 to 120 to 180 to 220 grit. Wipe the entire surface clean with a tack cloth between grits.
Choose the Right Finish
| Finish | Best For | Drying Time | Maintenance |
|---|---|---|---|
| Polyurethane (oil-based) | Durability, rich color | 24 hours | Re-coat every 3-5 years |
| Water-Based Polycrylic | No yellowing, fast dry | 6 hours | Light scuffs over time |
| Tung Oil | Natural look, food-safe | 24 hours | Reapply every 1-2 years |
| Hard Wax Oil | High traffic, modern | 24 hours | Low maintenance |
| Paint | Hiding flaws, modern look | 4 hours | Touch up as needed |
Wear gloves and a mask when applying stain or oil, especially in poorly ventilated areas.
One pro used Tricorn Black paint on pine legs to mimic metal at a fraction of the cost.
Customize Your Desk
Add Cable Management
Drill 1 to 2 inch holes near the back edge and insert metal grommets. Route cords through to a power strip mounted underneath for a clean, organized appearance.
Build in Storage
Add shelves using 2×2 supports and 1/4-inch plywood. Construct simple drawers from 1/2-inch plywood using box joints. Attach a raised monitor stand at the back for ergonomic positioning.
Go Modular
Join two desktop sections at a corner with reinforced brackets to create an L-shaped desk. Add a rolling cart or keyboard tray for flexibility as your needs change.
Fix Common Problems
Wobbly Legs
Check that all legs are exactly the same length. Add diagonal braces or cross supports beneath the frame. Tighten all screws and brackets, checking periodically as wood settles.
Warped Top
Sand flat and reapply finish. Install a central support beam underneath. Avoid placing the desk near heat sources or areas with high humidity.
Split Wood
Always pre-drill holes for screws. Use shorter nails when attaching thin strips to plywood. Avoid over-tightening clamps during glue-up, which crushes wood fibers and weakens the joint.
Final Checklist Before You Start
Before beginning your build, confirm each of these items:
• Measured space and chosen dimensions
• Selected wood type (plywood, pine, oak, or hardwood)
• Picked leg style (wood, pipe, or hairpin)
• Gathered tools (saw, drill, sander, clamps)
• Downloaded or drawn plans with cut list
• Purchased materials with extra stock for mistakes
• Prepared workspace (flat, safe, well-ventilated)
• Packed safety gear (glasses, mask, gloves)
Frequently Asked Questions About Building a Desk with Wood
How much does it cost to build a wooden desk?
Budget builds using plywood and 2x4s cost $90 to $140 for materials. Premium hardwood desks run $150 to $300 depending on wood choice. This compares favorably to retail desks that often cost $200 to $500 for comparable quality.
What is the standard desk height?
Standard desk height ranges from 29 to 30 inches for seated work. This measurement includes the tabletop thickness. Adjust leg length to achieve your preferred final height.
Do I need special tools to build a desk?
No. A circular saw, power drill, orbital sander, and clamps handle most builds. A $30 pocket-hole jig greatly strengthens joints and simplifies assembly for beginners.
How long does it take to build a desk?
Plan for 1 to 2 hours measuring and cutting, 1 to 2 hours assembling the frame, 2 to 4 hours preparing the tabletop, and 3 to 6 hours sanding and finishing. Total build time runs 1 to 2 days including finish cure time.
Can I use pine wood for a desk?
Yes. Pine is inexpensive, widely available, and accepts paint or stain well. Softwood requires careful joinery and may dent under heavy use, but it works perfectly for budget builds and beginner projects.
Key Takeaways for Building Your Wooden Desk
Building a wooden desk costs significantly less than buying retail while giving you complete control over dimensions, materials, and style. Choose plywood and SPF lumber for budget builds under $150, or invest in hardwood for heirloom-quality pieces that last generations. Always assemble on a flat surface, pre-drill all screw holes, and add cross braces beneath the top to prevent sagging and wobble over time.
Your next step is simple: measure your space, sketch your design, and gather your materials. The desk you build yourself will outperform anything store-bought at a fraction of the cost.


