
You’ve got a desk, but it is cluttered. Books, chargers, notebooks, and decor are fighting for space. The solution is to build a desk hutch, a smart, space-saving upgrade that adds vertical storage without taking up floor space. Whether you are a college student optimizing a dorm room or a remote worker building a custom home office, a DIY desk hutch offers maximum functionality, personalization, and cost savings. This guide walks you through every step, from choosing materials to final mounting, using only the most reliable, field-tested methods. You will learn how to build a sturdy, attractive hutch in under $30, using basic tools and beginner-friendly techniques.
In this article, you will discover the best hutch design for your space, which materials provide the right balance of strength and affordability, and exactly how to assemble, finish, and mount your creation. Every section includes practical tips, common mistakes to avoid, and time estimates to keep your project on track.
Choose the Right Hutch Type for Your Space
Match Design to Your Needs
Not all hutches are the same. Your choice depends on desk size, ceiling height, storage needs, and skill level. Here are the most effective styles:
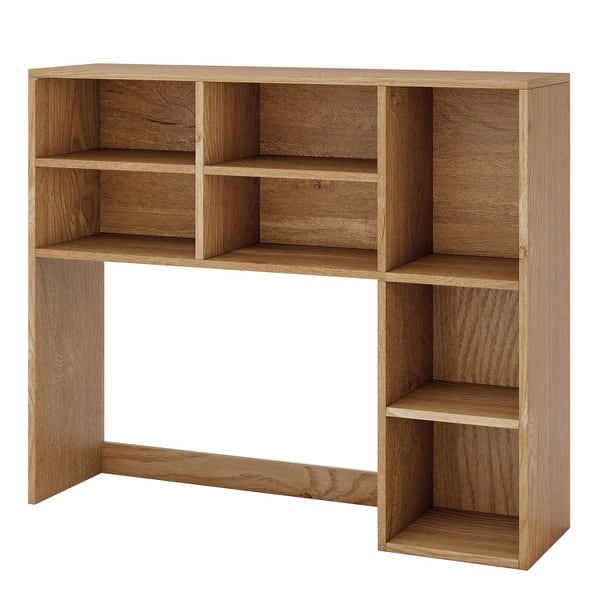
- Tall Wooden Hutch: Best for home offices needing book and file storage. Uses 3/4 inch plywood and includes a back panel for rigidity.
- Short Wood Hutch: Ideal for desks under shelves or low ceilings. Keeps essentials within reach without blocking light.
- Wall-Mounted Hutch: Saves floor space and reduces tipping risk. Must be secured into wall studs.
- Crate-Based Hutch: Perfect for dorm rooms or renters. Built from Dollar Tree or Walmart crates, lightweight, modular, and ultra-budget-friendly.
- Integrated Cabinet Hutch: For advanced builders. Combines enclosed cabinets and open shelving for a built-in look.
Pro Tip: If you are new to woodworking, start with a short wood hutch using MDF or plywood. It is simple, strong, and easy to paint.
Select Materials for Strength and Style
Use 3/4 Inch Plywood or MDF for the Frame
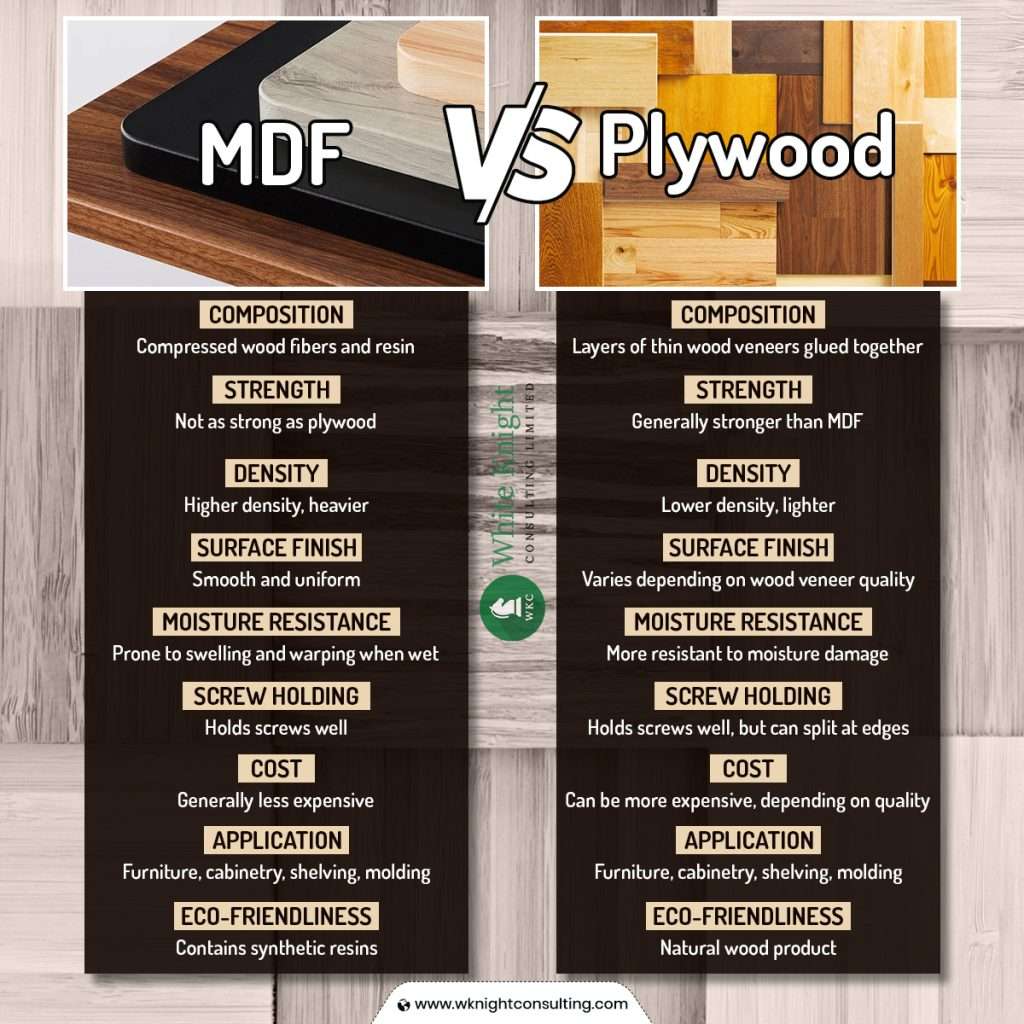
The two best materials for a desk hutch are plywood and MDF (Medium-Density Fiberboard).
| Material | Best For | Pros | Cons |
|---|---|---|---|
| 3/4″ Plywood | Permanent, heavy-use builds | Strong, resists warping, great for staining | Edges need banding or paint |
| 3/4″ MDF | Painted, budget-friendly builds | Smooth finish, easy to cut | Heavy, swells in moisture |
Use 3/4 inch material for side panels, shelves, and the top cap. Use 1/4 inch to 1/2 inch plywood or MDF for the back panel, which adds structural support and prevents wobbling. Use 1×3 boards or 3/8 inch half-round molding for trim.
Avoid particleboard. It is weak and prone to swelling when screwed into.
Gather Essential Tools and Safety Gear
Basic Toolkit for Beginners
You do not need a full workshop. These tools are all you need to build a solid hutch:
- Miter saw or circular saw: For straight, accurate cuts
- Drill/driver: For screws and pocket holes
- Pocket hole jig (Kreg Jig): Creates strong, hidden joints, ideal for beginners
- Tape measure and carpenter’s square: Ensures precise, square assembly
- Clamps: Holds pieces together during glue-ups
- Sander (80 to 220 grit): Prepares surface for paint or stain
- Brad nailer (optional): Speeds up trim and panel attachment
Safety First
Wear safety glasses and hearing protection. Use a respirator when cutting or sanding MDF because it releases formaldehyde dust. Secure workpieces with clamps to prevent kickback. Keep cords clear of cutting paths.
Measure and Plan Before Cutting
Size It to Fit Your Desk
A hutch should sit securely on your desk without overhanging or blocking movement.
- Width: Make it 0.5 inch narrower than your desk. Example, a 56 inch desk needs a 55.5 inch hutch.
- Depth: Match or slightly exceed desk depth. For MDF hutches, 5.5 inch to 9.25 inch is common.
- Height: Maximum 24 to 25 inches for freestanding models. Taller units must be wall-mounted.
- Clearance: Leave 8 to 10 inches between desk surface and first shelf for lamps or monitors.
Check ceiling height and chair clearance, especially in dorms or small offices.
Cut and Assemble the Frame
Step 1: Cut All Pieces to Size
Using your saw, cut the following pieces. Label each piece to avoid confusion.
- Side panels: 2 pieces at 25 inches tall by depth (for example, 9.5 inches)
- Top piece: 55.5 inches long by depth
- Main shelf: 55.5 inches long by depth
- Back support rail (optional): 55.5 inches long by 2 inches
Step 2: Join with Pocket Holes and Wood Glue
- Set your Kreg Jig for 3/4 inch material.
- Drill pocket holes on the inside edges of the side panels.
- Apply Titebond III wood glue to the joints.
- Align the top and shelf with the sides.
- Secure with 1.25 inch pocket screws.
Always pre-drill and countersink, especially in MDF, to prevent splitting.
Step 3: Reinforce with a Back Panel
- Cut 1/4 inch plywood to match the outside dimensions (for example, 55.5 inches by 25 inches).
- Position it over the back of the frame.
- Attach with 1.25 inch screws every 8 inches along the edges.
This turns your hutch into a rigid box, critical for long-term stability.
Add Shelves and Dividers
Install Fixed or Adjustable Shelving
For a tall hutch, add internal organization. Cut a second shelf to fit inside the frame. Mount it 16 to 20 inches from the bottom to allow lamp clearance. Use screws or dado joints for support.
Build a Divider Unit (Optional)
Create a central storage zone by cutting two 8-inch tall dividers and a 17-inch shelf. Assemble into an H shape with glue and screws. Center on the main shelf and secure from above and below. This is perfect for textbooks, binders, or office supplies.
Drill a Cord Access Hole
Keep Cables Tidy and Hidden
- On the back panel, mark a spot 4 to 6 inches up from the bottom, near the center.
- Clamp a scrap wood piece behind the MDF to prevent blowout.
- Use a 3-inch hole saw to drill a half-circle opening.
- Sand edges smooth.
- Optional: Insert a rubber grommet or attach cable clips.
This hole lets you run power strips, laptop chargers, and lamp cords neatly through the back.
Finish with Trim and Edging
Create a Polished, Professional Look
Raw edges ruin even the best build. Here is how to finish them.
Option 1: Half-Round Molding
Cut 3/8 inch by 3/4 inch half-round molding to fit shelf and top edges. Attach with wood glue and 18-gauge brad nails. Countersink nails, fill holes, and sand smooth.
Option 2: 1×3 Trim Front
Cut 1×3 boards to fit the front of the hutch and shelves. Nail or screw from underneath. This adds architectural depth and hides raw edges.
Paint or stain after assembly for a seamless finish.
Customize for Function and Style
Add Lighting and Organization
Make your hutch more than just storage.
LED Lighting
Install battery-powered LED strip lights under the top shelf. Use push-to-turn puck lights for instant task lighting. This is great for night study or creating ambiance.
Corkboard or Dry-Erase Panel
Cut a piece to fit the back interior. Attach with adhesive or screws. Use it for notes, reminders, or inspiration.
Drawer Inserts (if adding drawers)
Use small plastic bins, fabric boxes, or foam dividers. These keep pens, USB drives, and sticky notes organized.
Build a Crate-Based Hutch (Ultra-Budget Option)
For Dorms, Renters, or Fast Builds
If you want a no-power-tools, under $20 hutch, use plastic crates.
Step 1: Stack and Glue Crates
Use Dollar Tree or Walmart crates (approximately 12 inches by 12 inches by 6 inches). Apply Gorilla Glue into the top holes of one crate. Stack a second crate on top, aligning holes for stability. Build two four-crate towers.
Step 2: Create a Base
Tape two foam boards together for strength. Trace the crate footprint and cut with a razor. Cover with fabric using Krylon spray adhesive.
Step 3: Attach Crates
Glue the crate towers to the fabric-covered base with E6000. Let dry 24 hours.
Step 4: Insert Panels
Cut trifle display boards to fit crate openings. Cover with fabric or wallpaper using spray adhesive. Slide panels into crates from the front.
Step 5: Add Features
Mount an 8 inch by 10 inch mirror to the back with hot glue. Install LED push lights on top edges. Add acrylic organizers inside for pens and makeup.
This design is modular, portable, and easy to disassemble, perfect for dorm moves.
Apply the Final Finish
Paint or Stain for Durability
For MDF:
1. Prime first using water-based primer to seal the surface.
2. Apply 2 coats of satin latex paint with a foam roller.
3. Sand lightly between coats with 220-grit paper.
4. Wipe with a tack cloth before final coat.
For Plywood or Solid Wood:
1. Sand with 120 then 220 grit.
2. Apply pre-stain conditioner, especially on pine.
3. Wipe on oil-based or water-based stain.
4. Seal with 2 to 3 coats of polycrylic.
Pro Tip: Use painter’s tape to protect edges and create clean lines.
Mount the Hutch Safely
Choose the Right Attachment Method
How you secure the hutch depends on its size and weight.
To the Desk (Freestanding)
Use pocket screws through the base into the desk top. Or drive angled wood screws through the back of the hutch into the desk. This ensures it will not tip forward.
To the Wall (Tall or Heavy Units)
Must be anchored into wall studs. Use L-brackets at the top back corners. Attach one side to the hutch, the other to the stud. This prevents dangerous tip-over, especially in homes with children.
Never skip this step for hutches over 24 inches tall.
Maintain and Upgrade Over Time
Keep It Looking Great
Dust weekly with a microfiber cloth. Wipe spills immediately, especially on MDF. Tighten screws every few months. Touch up paint or finish if chipped.
Easy Upgrades
- Swap fabric panels in crate hutches
- Add new LED lighting or smart switches
- Install adjustable shelf pins for flexible storage
- Convert into a vanity with a mirror and makeup organizers
Frequently Asked Questions About Building a Desk Hutch
What is the best material for a beginner desk hutch build?
MDF is the best choice for beginners. It is affordable, cuts cleanly, and provides a smooth surface for painting. Use 3/4 inch MDF for the frame and 1/4 inch for the back panel. Plywood offers greater durability but requires more finishing work on the edges.
How much does it cost to build a DIY desk hutch?
Most DIY desk hutch projects cost between $20 and $30. Using scrap wood or leftover materials can reduce costs to near zero. This represents a 70 to 90 percent savings compared to retail hutches that cost $100 or more.
How long does it take to build a desk hutch?
Actual build time is 1 to 2 hours, not counting drying time for glue and paint. A beginner can complete the project in one weekend. The crate-based version can be assembled in under an hour.
Do I need to anchor my desk hutch to the wall?
Yes, for any hutch over 24 inches tall or if the unit will be accessed by children. Use L-brackets secured into wall studs. This prevents dangerous tip-over accidents. Freestanding hutches on stable desks do not require wall anchoring if they are short and lightweight.
Can I build a desk hutch in a dorm room?
Yes, the crate-based hutch design is specifically designed for dorm rooms. It requires no power tools, costs under $20, and can be disassembled for moving. The modular design makes it easy to transport between dorms or apartments.
What tools are absolutely required to build a desk hutch?
The minimum toolkit includes a miter saw or circular saw, a drill/driver, a pocket hole jig, a tape measure, and a carpenter’s square. A sander and clamps are also helpful. These basic tools handle most of the work for beginner-friendly builds.
Why Build Your Own Desk Hutch
Save Money, Add Value, Express Style
Building your own desk hutch delivers several key advantages. The cost is under $30 compared to $100 or more for retail options. You gain complete customization to match your room’s color, layout, and specific needs. The skill level required is beginner-friendly with pocket holes and basic tools. When built correctly using proper joinery, the result is stronger than most store-bought models.
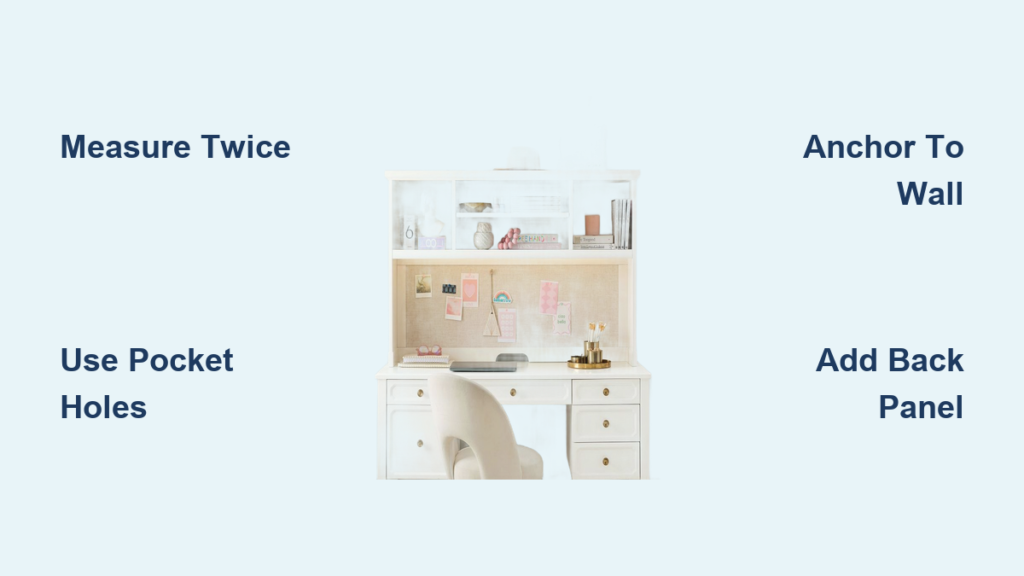
Key Takeaways for Building Your Desk Hutch
The most important factors for success are planning, precision, and personalization. Measure twice and cut once to ensure accuracy and prevent wobble. Use wood glue on every joint because it creates stronger bonds than screws alone. Sand thoroughly before finishing since MDF and plywood need smooth preparation. Anchor tall units to wall studs without exception, as safety is non-negotiable. Start with a basic open hutch design if you are new to building, as it is faster and just as functional.
You now have everything you need to build a desk hutch that is strong, stylish, and perfectly suited to your space. Whether you choose solid wood, MDF, or plastic crates, the key is taking accurate measurements, assembling with secure joinery, and customizing for your specific needs. With under $30 and a weekend, you can transform your workspace and enjoy the pride of building it yourself.


