
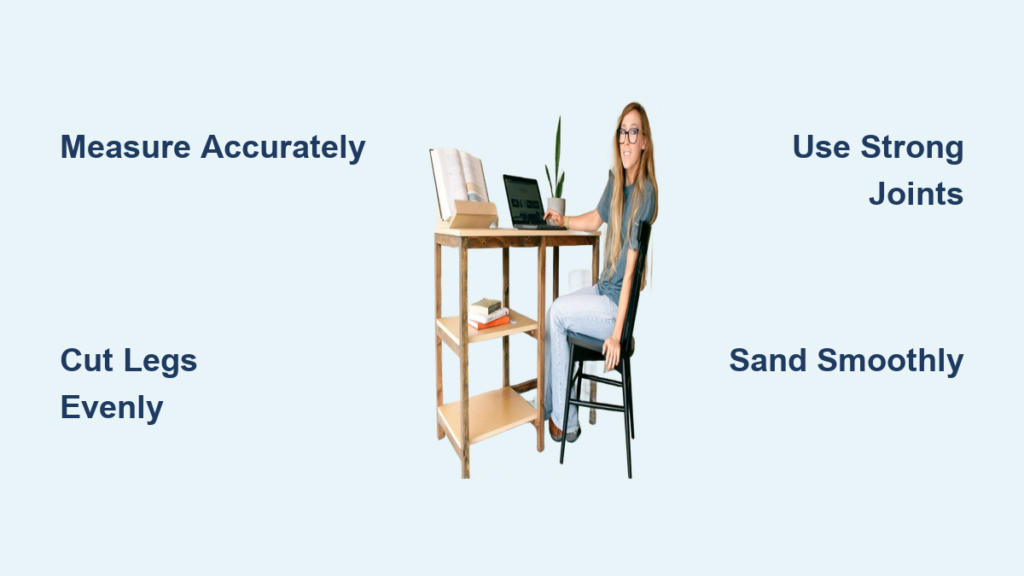
Building a desk from scratch gives you full control over size, style, and functionality. Whether you need a compact workstation for a small apartment or a spacious creative studio desk, learning how to build a desk transforms your workspace into something uniquely yours. This guide covers everything from planning dimensions and selecting materials to assembling sturdy frames and applying professional finishes.
With the right approach, you can build a durable desk that fits your space perfectly and matches your aesthetic preferences. The following sections walk you through each phase of construction, helping you avoid common mistakes and achieve results that rival store-bought furniture.
Plan Your Desk Dimensions and Layout
Before purchasing materials, determine the ideal size based on your room constraints and ergonomic needs. A poorly sized desk leads to discomfort and inefficiency during daily use.
Standard dimensions guide your planning process. Desktop height should fall between 29 and 30 inches from the floor. Leg clearance requires at least 24 inches of vertical space beneath the surface. Depth should range from 20 to 30 inches, with 24 inches serving most users comfortably.
Length depends on your monitor setup and work requirements. A single monitor works well at 48 inches, while dual monitors or creative work benefits from 60 to 90 inches. Measure your chair first. When seated, your elbows should form a 90-degree angle with forearms parallel to the floor at desk height.
Tested design archetypes help guide your build. The minimalist configuration suits small spaces with a slim top and simple legs. Professionals benefit from workstation designs featuring drawers and cable management. Artists may prefer angled surfaces with wider tops. Mobile desks with caster wheels work best for studio apartments.
Choose the Right Materials for Your Build
Material selection impacts cost, appearance, durability, and construction complexity. Each option serves different needs and budgets.
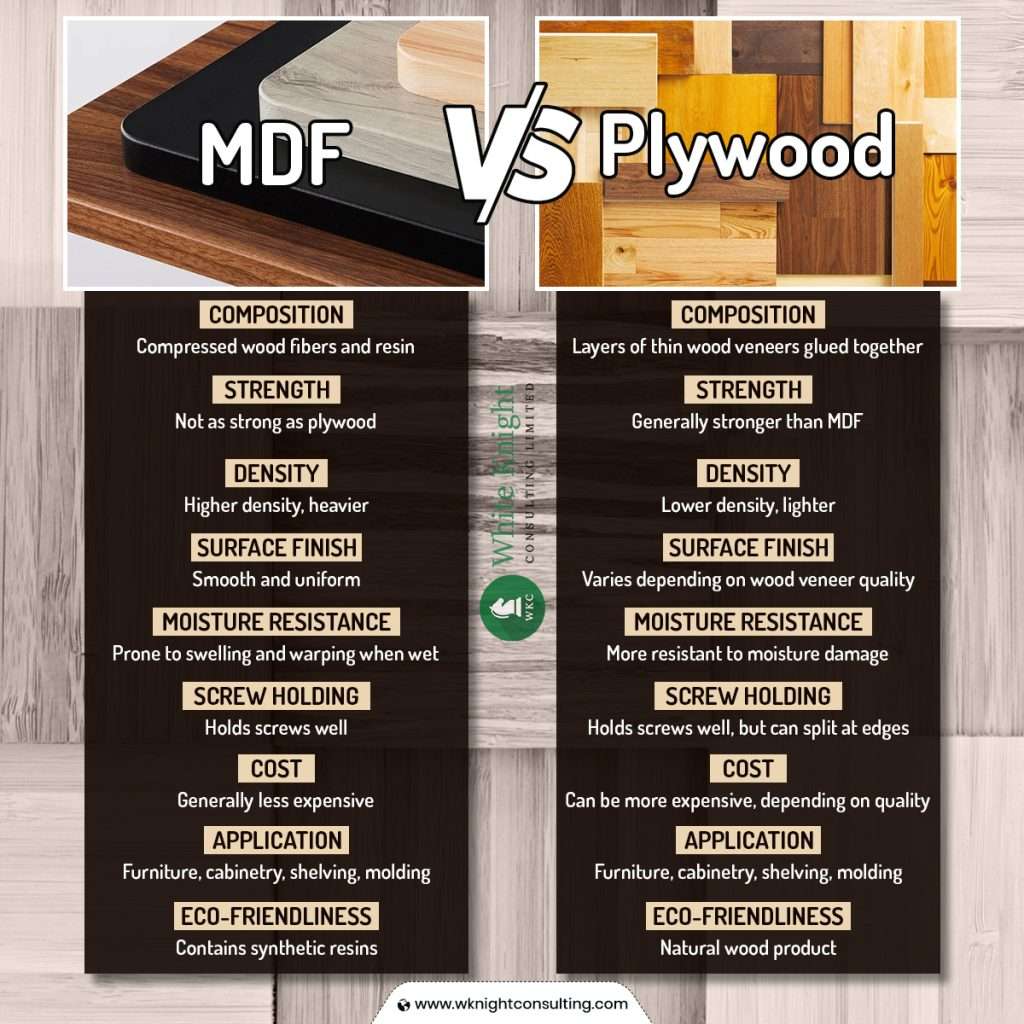
Plywood offers the best balance of affordability and stability. Three-quarter-inch birch or hardwood plywood resists warping and cuts easily. The main drawback involves exposed edges appearing unfinished. Fix this with iron-on veneer tape, solid wood edge banding, or a quarter-inch roundover using a router.
MDF provides a perfectly flat surface ideal for painted finishes. Seal all sides with oil-based primer to prevent moisture swelling. Avoid staining, as MDF absorbs unevenly. Create a faux wood finish by priming, applying a dark brown base coat, dry-brushing diluted black glaze in long strokes, and sealing with matte polyurethane.
Solid wood delivers premium appearance and longevity. Edge-glue three or more boards for wide tops. Plane edges flat before gluing, then clamp with pipe clamps and cauls. Allow two to four hours of cure time before trimming ends square.
Budget-conscious builders can use alternative options. Butcher block countertops come pre-finished at home improvement stores. IKEA tabletops like LINNMON or ANFALLARE bamboo speed up assembly. Black iron pipe legs create an industrial look for approximately $40.
Gather Essential Tools for DIY Desk Building

You do not need a full workshop to build a quality desk. Basic tools handle most builds efficiently.
Your essential toolkit should include a circular saw with a straight edge guide for accurate cuts. A power drill with driver bits drives screws and drills pilot holes. Use Torx T25 bits to prevent cam-out. A spade bit or holesaw drills large holes for pipe legs. Clamps including pipe clamps for glue-ups and bar clamps for assembly hold pieces steady during building. An orbital sander with 80 to 220 grit paper smooths surfaces. A speed square checks 90-degree angles and guides cuts. Don’t forget measuring tape, a level, and a pencil.
A pocket hole jig dramatically simplifies joinery. Options like the Kreg Jig R3 or Craig 720 Pro create strong, hidden joints ideal for attaching aprons and frames. A Workmate-style stand stabilizes pieces during assembly. Hand planes flatten board edges before gluing. Cauls distribute clamp pressure evenly across joints.
Advanced tools improve precision but aren’t required. A table saw rips boards to width. A miter saw makes clean crosscuts. A router rounds over edges or adds chamfers. A planer thicknesses rough lumber. Most projects succeed with just basic tools.
Build a Sturdy Frame and Legs
Leg construction determines whether your desk feels solid or wobbles during use. Precision matters here.
Cut all legs to exact length using the formula: leg length equals desired desk height minus tabletop thickness. For example, a 30-inch desk with a 1.5-inch top requires 28.5-inch legs. Even one-eighth-inch difference causes noticeable wobble. Use the same material for all legs to ensure consistency.
Join legs and aprons using proven methods. Pocket hole screws offer the easiest approach. Drill angled holes into apron ends, then attach to legs with 2.5-inch pocket screws. Hide screws inside if the desk is freestanding. Dowel joinery provides traditional strength. Drill holes two inches from ends, spaced 10 inches apart, using half-inch dowels with a dowel jig for alignment. Apply wood glue, insert dowels, and clamp until set. Add a second row on the opposite side for heavy-duty builds.
For desks longer than six feet, add center supports or extra legs to prevent sagging. Always assemble the frame upside down on a flat surface before attaching the top.
Assemble and Finish the Desktop
:max_bytes(150000):strip_icc()/100980633-2fcbdd48b8ff41e5bb962dcb7b77951d.jpg)
Joining solid wood boards requires careful preparation. Flatten edges using a hand plane or jointer. Align boards with grain running the same direction. Use dowels or biscuits for alignment if desired. Apply wood glue to all mating edges, then clamp with pipe clamps using cauls for even pressure. Let cure for two to four hours before trimming ends square.
Sand progressively from 120 to 150 to 220 grit. Never skip grits, as jumps cause visible scratches. Wipe with tack cloth before finishing.
Plywood and MDF tops follow a different process. Cut to your desired dimensions. Treat edges by gluing solid wood banding, using iron-on veneer tape, or rounding over with a quarter-inch roundover bit. Fill holes and gaps with a sawdust-glue mix, then sand smooth.
Add Storage and Drawers
Drawer construction adds functionality without excessive complexity. Use MDF or plywood for drawer boxes. Make sides three inches wide and fronts four inches tall to create an overhang for grip. Install a quarter-inch plywood bottom in a dado groove.
Use 16-inch ball-bearing, full-extension slides for smooth operation. Mount side-mount or undermount slides, then test movement before final screwing. Cut-out handles eliminate additional hardware. Simply route a grip slot in the drawer front.
Integrate cabinet storage for larger items. Build door cabinets using three-quarter-inch plywood boxes. Sandwich the bottom between 2x4s with pocket screws. Mount pivot hinges on the outer edge for thick doors, positioning them five-eighths inch from the left and three-eighths inch from the front.
Under-desk shelves attach via 2×2 cleats notched to fit around legs. Place shelves 12 to 18 inches below the desktop for monitors or books.
Sand and Finish Like a Pro
Proper finishing protects your desk and enhances its appearance. Start sanding with 80 to 120 grit to remove tool marks. Progress through 150 to 220 grit for a smooth finish. Always sand with the grain. Wipe with tack cloth before applying any finish.
Stain solid wood or plywood using gel stain to prevent blotching, especially on pine. Apply one section at a time and wipe off excess immediately. Let dry fully before sealing, typically 24 hours.
Paint MDF for a smooth, modern look. Prime with oil-based or bonding primer. Apply your base coat, then dry-brush diluted black glaze for a wood-grain effect. Seal with matte polyurethane applied with a brush, not a roller, to preserve texture.
Apply two to three coats of water-based polyurethane, sanding lightly between coats with 220-plus grit.
Upgrade with Smart Features
Enhance functionality with thoughtful additions. Install LED strip lights along the apron or back edge. Use rubber clips for easy removal. Power strips with USB ports keep devices charged and cords tidy.
Add cable management by drilling grommet holes near the back edge. Use adhesive cable trays under the desktop. Route cords through back-panel plywood strips.
Profile edges for comfort using a router. Apply a quarter-inch roundover for softer feel or create a 22-degree chamfer for a modern edge. Rounded edges reduce wrist strain during extended use.
Paint the frame for visual contrast. White legs with a dark top create Scandinavian style. Black pipe legs with a walnut top achieve industrial elegance.
Ensure Ergonomics and Longevity
Set correct heights for comfortable daily use. The desktop should sit 28 to 30 inches high. Keyboard trays work best 4 to 8 inches below the desktop. Your chair should support your lumbar region with feet flat on the floor.
Prevent damage over time by sealing MDF fully to avoid moisture swelling. Clean with a damp cloth, not a wet one. Reapply finish every two to three years on high-use areas. Tighten screws annually. Use felt pads under monitors and laptops. Avoid direct sunlight to prevent fading.
Troubleshoot Common Build Issues
Address problems promptly to ensure your desk remains stable and functional.
Desk wobble usually stems from uneven legs or loose joints. Re-cut legs to identical length. Add corner braces or cross-bracing. Shim feet on uneven floors.
Top sagging in the middle occurs on long spans without support. Install a center leg or beam. Use thicker material such as three-quarter-inch plywood minimum. Double-layer the top with glue and screws.
Screws strip out when used in softwood or after repeated removal. Fill the hole with toothpicks plus wood glue. Use longer or thicker screws. Switch to lag bolts for heavy joints.
Frequently Asked Questions About Building a Desk
What is the cheapest way to build a desk?
Use 2×12 pine boards from a home improvement store. Two 2x12x8 boards, two 2x6x8 boards, one 2x4x8 board, and dowels plus screws cost approximately $46. This approach delivers a solid desk well under $50.
How long does it take to build a desk?
Simple builds using pre-cut materials take four to six hours. Custom builds with solid wood and drawers require 15 to 20 hours over several days. Factor in drying time for glue and finish.
Do I need a table saw to build a desk?
No. A circular saw with a straight edge guide makes accurate cuts without a table saw. Most DIY builders complete projects using only basic tools.
What is the standard desk height?
Standard desk height ranges from 29 to 30 inches from floor to desktop. This works for most adults with proper chair height adjustment.
Can I use MDF for a desk top?
Yes, but you must seal all surfaces with oil-based primer to prevent moisture damage. MDF works best for painted desks. Avoid staining, as it absorbs unevenly.
How do I prevent my desk from wobbling?
Cut all legs to identical lengths. Assemble the frame on a flat surface. Add cross-bracing between legs. Use corner braces for extra rigidity.
Key Takeaways for Building Your Own Desk
Building a desk is achievable for beginners with careful planning and attention to detail. Focus on precise measurements, square assembly, and strong joints. The rest follows naturally.
Choose materials based on your budget and aesthetic goals. MDF and plywood offer affordability and stability. Solid wood provides premium appearance and durability. Pocket hole jigs simplify joinery for all skill levels. Three-quarter-inch material prevents flex in tabletops and frames. Always sand progressively through 80, 120, 150, and 220 grit for smooth results. Reinforce long desks with center supports to prevent sagging.
With this guide, you now know exactly how to build a desk that fits your space, matches your style, and serves your needs for years to come. Start with a simple design, learn as you go, and enjoy the satisfaction of working at a desk you built with your own hands.


